

There’s something absolutely magical about pulling a perfectly tender, juicy brisket out of the oven. This isn’t your typical backyard barbecue situation – this is a foolproof method that delivers restaurant-quality results right in your own kitchen, no smoker required!
I absolutely love making brisket in the oven because it’s so much more forgiving than traditional smoking methods. The low, gentle heat combined with the moisture-trapping environment of a covered Dutch oven creates the most incredible bark and tender meat that falls apart at the slightest touch. Whether you’re hosting a dinner party or meal prepping for the week ahead, this oven-baked brisket is going to become your new favorite go-to recipe.
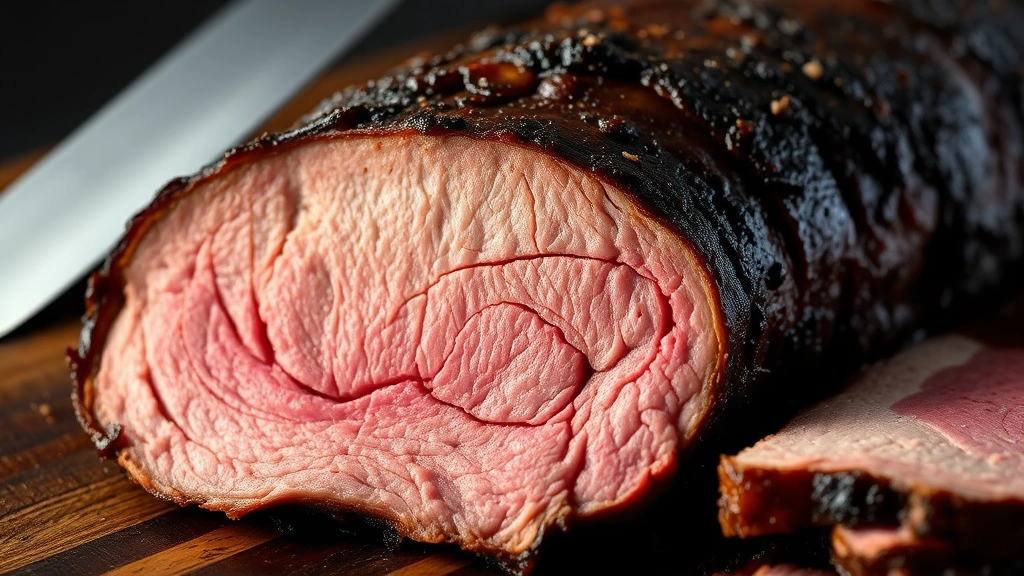
The secret to this best brisket oven recipe is all about the timing, temperature, and patience. We’re talking about a beautiful crust on the outside, that gorgeous mahogany color, and meat so tender it practically melts in your mouth. I always make sure to select a quality cut of beef, apply a generous dry rub, and let it sit overnight if possible. This allows all those wonderful spices to really penetrate the meat.
What I love most about this method is that it’s completely hands-off once everything gets going. You can prep other sides like Easy Pickled Red Onion Recipe or even a Best Chickpea Salad Recipe while your brisket works its magic. The result is a show-stopping centerpiece that will have your guests asking for the recipe.
I’ve tested this brisket oven recipe countless times, and I’m so excited to share my foolproof method with you. From selecting the right cut to achieving that perfect slice, I’m walking you through every single step. Trust me, once you master this technique, you’ll be making brisket constantly. It’s that good, that easy, and that absolutely delicious. Let’s get started!
Ingredients
- 1 beef brisket (12-14 pounds, preferably prime grade)
- 3 tablespoons kosher salt
- 2 tablespoons freshly ground black pepper
- 1 tablespoon smoked paprika
- 1 tablespoon garlic powder
- 1 tablespoon onion powder
- 1 tablespoon brown sugar
- 1 teaspoon cayenne pepper
- 1 teaspoon dry mustard powder
- 2 tablespoons vegetable oil
- 2 large yellow onions, quartered
- 8 cloves garlic, smashed
- 2 cups beef broth
- 1 cup apple cider vinegar
- 3 tablespoons Worcestershire sauce
- 2 tablespoons tomato paste
- 3 bay leaves
- 4 sprigs fresh thyme
- 1 large Dutch oven with lid

Instructions
- Remove your brisket from the refrigerator 2 hours before cooking. This allows the meat to come to room temperature, ensuring even cooking throughout. Pat the brisket completely dry with paper towels – this is crucial for achieving that beautiful crust.
- While the brisket is coming to temperature, preheat your oven to 275°F. Make sure your oven rack is positioned low enough to accommodate your Dutch oven comfortably.
- Combine the kosher salt, black pepper, smoked paprika, garlic powder, onion powder, brown sugar, cayenne pepper, and dry mustard powder in a small bowl. Mix thoroughly until all spices are evenly distributed.
- Generously apply the dry rub all over the brisket, making sure to coat both the fat cap and the meat side. Really press the seasonings into the meat so they adhere properly. If you have time, wrap the brisket in plastic wrap and refrigerate for 4-8 hours or overnight – this allows the flavors to penetrate deeper.
- Heat the vegetable oil in your Dutch oven over medium-high heat until it shimmers. Carefully place the brisket fat-side up in the hot oil and sear for 3-4 minutes on each side until a deep mahogany crust forms. Work in batches if needed, but don’t overcrowd the pan.
- Remove the brisket from the Dutch oven and set aside on a cutting board. Add the quartered onions and smashed garlic to the pot, stirring occasionally for 2-3 minutes until they begin to soften and release their aromas.
- Pour in the beef broth, apple cider vinegar, and Worcestershire sauce, using a wooden spoon to deglaze the bottom of the pot and scrape up all those flavorful browned bits. Stir in the tomato paste until well combined.
- Add the bay leaves and fresh thyme sprigs to the braising liquid. Return the brisket to the Dutch oven, fat-side up, nestling it among the aromatics. The liquid should come about halfway up the sides of the brisket.
- Cover the Dutch oven with its lid and transfer to the preheated 275°F oven. Bake for 3.5 to 4 hours, checking the tenderness after 3 hours by inserting a fork – the meat should bend easily but not yet fall apart.
- After 4 hours, remove the Dutch oven from the oven and carefully lift the brisket onto a cutting board. Tent it loosely with foil to keep it warm while you prepare the sauce.
- Strain the braising liquid through a fine-mesh strainer into a large saucepan, discarding the solids. Skim off excess fat from the surface using a fat separator or by carefully tilting the pan and spooning off the fat.
- Simmer the strained braising liquid over medium heat for 8-10 minutes until it reduces slightly and concentrates in flavor. Taste and adjust seasonings as needed with additional salt and pepper.
- Slice the brisket against the grain into quarter-inch thick slices. The meat should be incredibly tender and practically fall apart as you slice. If it’s still too tough, return it to the Dutch oven, cover, and braise for an additional 30 minutes.
- Arrange the sliced brisket on a serving platter and pour some of the reduced braising liquid over the top. Serve immediately with the remaining sauce on the side.
- Store any leftovers in an airtight container in the refrigerator for up to 5 days, or freeze for up to 3 months. Reheat gently in a low oven to avoid drying out the meat.
Pro Tips
Temperature control is everything when it comes to oven-braised brisket. At 275°F, you’re cooking low and slow, which breaks down the collagen and connective tissue without drying out the meat. Never go above 300°F or you risk toughening the exterior.
The dry rub can be customized to your preferences. If you prefer a spicier brisket, add more cayenne pepper. For a sweeter profile, increase the brown sugar. Some people love adding coffee powder or chili powder to their rub for extra depth.
Don’t skip the searing step. While it takes extra time, browning the brisket on both sides creates a flavorful crust through the Maillard reaction. This adds incredible depth to your final dish that you simply cannot achieve by skipping this step.
The braising liquid is precious – never discard it! This is liquid gold for serving alongside your brisket or using in soups and gravies. You can reduce it further if you prefer a thicker, more concentrated sauce. Some people like to make a glaze by reducing it until it coats the back of a spoon.
Slicing technique matters more than you might think. Always slice against the grain, which means perpendicular to the muscle fibers. This shortens the fibers and makes each bite more tender. If you slice with the grain, even perfectly cooked brisket can seem tough.
For meal prep, this brisket actually improves the next day as flavors continue to develop. Slice it when completely cooled, layer it with some braising liquid in an airtight container, and refrigerate. Reheat gently in a 325°F oven, covered, until warmed through.
Complementary side dishes include Best Heavy Cream Alfredo Sauce Recipe for pasta, mashed potatoes, or roasted vegetables. The richness of the brisket pairs beautifully with creamy sides.
If your brisket still seems tough after the initial cooking time, don’t panic. Simply return it to the Dutch oven, cover, and continue cooking in the oven in 30-minute increments until it reaches the desired tenderness. Every brisket is slightly different based on age and quality.
For extra flavor depth, consider using half beef broth and half red wine in your braising liquid. This adds complexity and a beautiful color to both the meat and the sauce.