

There’s something absolutely magical about a perfectly executed turkey cutlet – it’s elegant, versatile, and honestly? It’s easier to master than you might think. I’ve been making these for years, and I’m thrilled to share my foolproof method that delivers restaurant-quality results every single time.
Turkey cutlets are the unsung hero of weeknight dinners. They cook in minutes, absorb flavors beautifully, and are naturally lean and healthy. Whether you’re looking for a quick weeknight protein or something impressive enough for entertaining, this recipe has you covered. The key to the BEST turkey cutlets lies in three things: properly pounding your meat to even thickness, using the right breading technique, and nailing that golden-brown sear.
I love serving these with fresh lemon, crispy sides that complement light proteins, or even over pasta. The beauty of turkey cutlets is their adaptability – you can dress them up or down depending on your mood. Some nights I go Italian with marinara and fresh mozzarella, other nights I keep it simple with a bright lemon butter sauce and roasted vegetables.
What I absolutely love about this recipe is how it teaches you fundamental cooking techniques that apply to so many other dishes. Once you master the art of breading and searing turkey cutlets, you’ll feel confident tackling chicken, veal, and pork cutlets too. Plus, turkey is an affordable option that makes elegant entertaining budget-friendly.
The technique I’m sharing today is based on traditional Italian preparation methods, but with a few modern touches I’ve developed over time. I use a combination of panko and regular breadcrumbs for the perfect texture – crispy on the outside, tender on the inside. The addition of fresh herbs and a touch of Parmesan takes these from good to absolutely unforgettable.
I recommend investing in a good meat mallet if you don’t already own one – it’s truly a game-changer and makes the whole process quicker and more consistent. You’ll also want to use a heavy-bottomed skillet or cast iron pan for the best searing action. Temperature control is crucial here; too low and your coating won’t crisp properly, too high and you’ll burn the outside before the inside cooks through.
One of my favorite things about sharing this recipe is seeing how adaptable it is. Some of my readers have told me they’ve made it with creative flavor variations, others have paired it with unexpected sides. The foundation is solid, so feel free to play with seasonings, breading additions, or sauce pairings. That’s the beauty of mastering a classic technique.
Let me walk you through exactly how to create turkey cutlets that are crispy, juicy, and absolutely delicious. I promise this will become a regular in your dinner rotation. It’s the kind of recipe that looks impressive but is surprisingly simple to execute, making it perfect for both everyday meals and special occasions. Your family will be asking for these again and again!
For the external resources, I’d recommend checking out Bon Appétit’s technique guides for additional breading inspiration and Serious Eats’ meat science articles to understand the chemistry behind perfect searing. The New York Times Cooking section also has wonderful variations on cutlet recipes worth exploring.
Ingredients
- 1.5 pounds turkey breast cutlets (or 3 turkey breasts, pounded thin)
- 1 cup all-purpose flour
- ½ cup panko breadcrumbs
- ½ cup regular breadcrumbs
- ½ cup freshly grated Parmesan cheese
- 2 large eggs
- ¼ cup whole milk
- 2 teaspoons dried Italian seasoning
- 1 teaspoon garlic powder
- 1 teaspoon onion powder
- Salt and freshly ground black pepper to taste
- ¼ teaspoon cayenne pepper (optional)
- 3 tablespoons olive oil
- 2 tablespoons butter
- Fresh lemon wedges for serving
- Fresh parsley for garnish (optional)
- Fleur de sel or flaky sea salt for finishing
Instructions
- Pat turkey cutlets dry with paper towels – this is essential for proper browning. If your turkey breasts are thick (over ¾ inch), place them between two pieces of plastic wrap and gently pound with a meat mallet until they’re an even ¼ to ½ inch thickness throughout. This ensures even cooking.
- Set up your breading station with three shallow bowls or dishes. In the first bowl, combine flour, 1 teaspoon salt, ½ teaspoon black pepper, and ¼ teaspoon cayenne pepper if using.
- In the second bowl, whisk together eggs and milk until well combined and smooth.
- In the third bowl, combine panko breadcrumbs, regular breadcrumbs, Parmesan cheese, Italian seasoning, garlic powder, onion powder, ½ teaspoon salt, and ¼ teaspoon black pepper. Mix thoroughly with a fork to evenly distribute all seasonings.
- Working with one cutlet at a time, dredge it thoroughly in the flour mixture, shaking off any excess. This flour coating helps the egg adhere properly.
- Dip the floured cutlet into the egg mixture, making sure both sides are completely coated but not dripping with excess liquid.
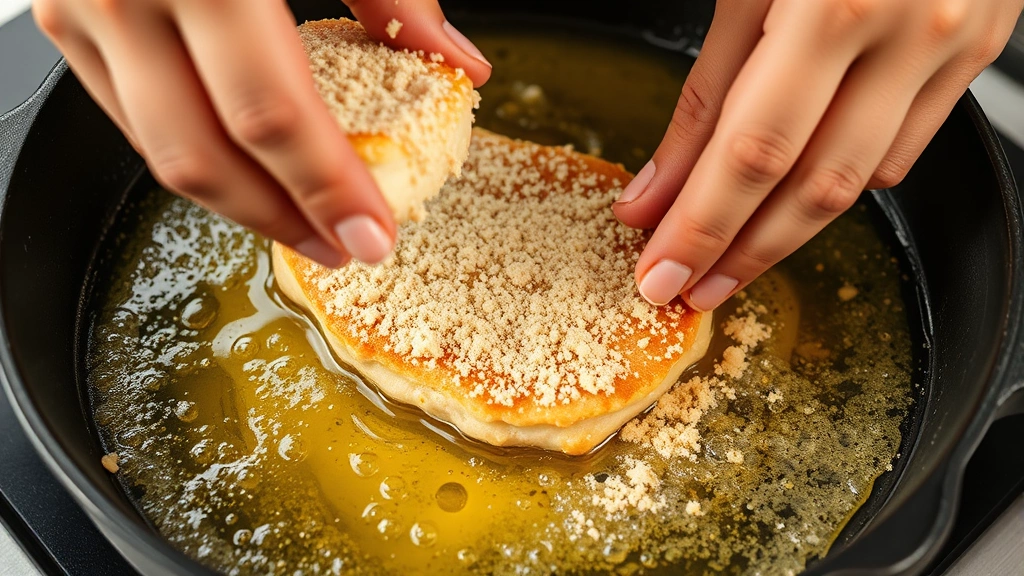
- Place the cutlet into the breadcrumb mixture and press gently so the coating adheres well. Flip and coat the other side, pressing gently again. Set the breaded cutlet on a clean plate.
- Repeat with remaining turkey cutlets. Once all are breaded, let them rest on the plate for 5 minutes – this helps the coating set and adhere better during cooking.
- Heat olive oil and butter together in a large heavy-bottomed skillet (cast iron is ideal) over medium-high heat. You want the heat to be hot enough that a breadcrumb sizzles immediately when dropped in, but not so hot that the butter burns.
- Once the oil-butter mixture is shimmering and just beginning to smoke slightly, carefully place the breaded turkey cutlets in the pan. Don’t overcrowd – work in batches if necessary.
- Cook for 5-6 minutes without moving them, until the bottom is deeply golden brown and crispy. Resist the urge to flip early; this golden crust is what you’re after.
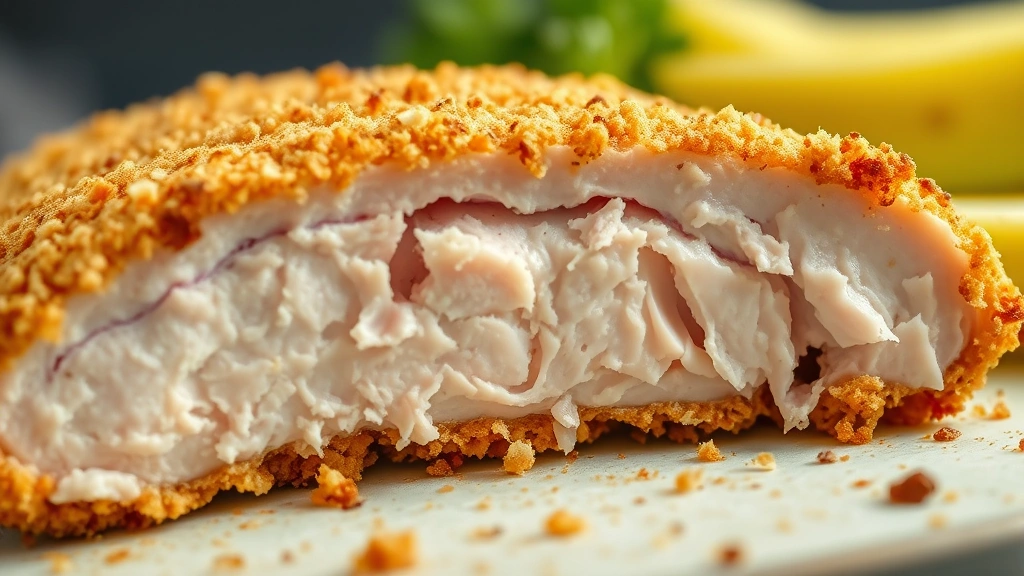
- Flip the cutlets carefully and cook the other side for another 5-6 minutes until equally golden brown and the internal temperature reaches 165°F (74°C) when measured with a meat thermometer at the thickest point.
- Transfer cooked cutlets to a plate lined with paper towels to drain any excess oil.
- Serve immediately while still hot, garnished with fresh parsley if desired and fleur de sel. Squeeze fresh lemon juice over the top just before eating.
- Optional: For a pan sauce, after removing the cutlets, pour off most of the oil, add ½ cup chicken broth and 2 tablespoons fresh lemon juice to the same pan, scraping up any browned bits. Simmer for 2-3 minutes until slightly reduced, then drizzle over the cutlets.
Pro Tips
Don’t pound too thin: While you want even thickness, pounding turkey too thin can make it tough and dry. Aim for ¼ to ½ inch thickness – thick enough to stay juicy and tender inside while the coating gets crispy.
The resting period matters: After breading, letting the cutlets rest for 5 minutes allows the coating to set and adhere better. This prevents the breading from sliding off during cooking and creates a better crust.
Breadcrumb combination: Using both panko and regular breadcrumbs creates the ideal texture – panko gives you crunch while regular breadcrumbs provide better adhesion and finer texture. This combination is truly the secret weapon.
Don’t skip the Parmesan: It adds umami flavor and helps the coating brown beautifully. Make sure it’s freshly grated for the best results – pre-grated versions have anti-caking agents that affect texture.
Egg-milk mixture: The milk dilutes the egg slightly, allowing for better, more even coverage without excess dripping. This creates a thinner adhesive layer that helps the breadcrumbs stick without creating a thick crust.
Butter and oil together: Using both butter and oil is key. Butter adds flavor but has a lower smoke point, so combining it with olive oil raises the overall smoke point while maintaining the delicious butter flavor.
Flour layer is essential: This step is often skipped but shouldn’t be. The flour creates a surface for the egg to grip onto, which helps everything adhere properly. It prevents the breadcrumbs from sliding around.
Serving suggestions: These are wonderful with lemon and fresh greens, over pasta with marinara, alongside roasted asparagus or green beans, or in a sandwich with fresh mozzarella and arugula. You can also serve with a caper-lemon sauce or a simple marinara for dipping.
Make ahead tip: You can bread the cutlets several hours ahead and refrigerate them on a plate covered with plastic wrap. Cook them just before serving for the crispiest results. Don’t freeze breaded cutlets as the coating becomes soggy when thawed.
Leftovers: While best fresh, leftover turkey cutlets can be refrigerated for up to 3 days. Reheat gently in a 350°F oven for about 10 minutes to restore crispiness, or enjoy cold in salads and sandwiches the next day.