

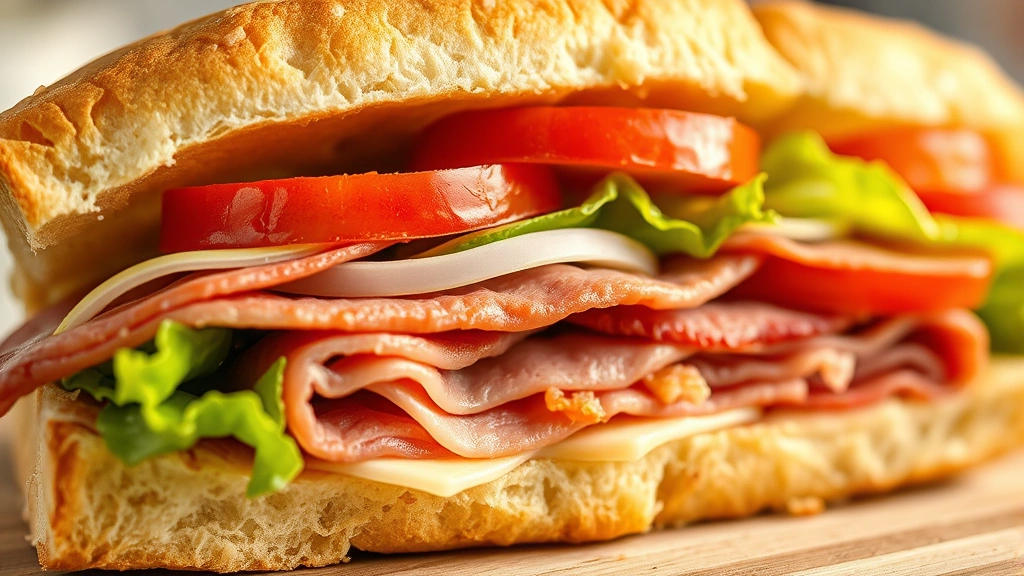
A classic grinder sandwich is the ultimate handheld meal—layers of quality deli meats, crisp vegetables, and creamy spreads all nestled in a crusty sub roll. This iconic sandwich, also known as a submarine or hoagie depending on where you’re from, is perfect for lunch, picnics, or casual entertaining. The beauty of a great grinder lies in the balance of flavors and textures: tender, flavorful meats paired with crisp vegetables, tangy peppers, and a perfectly seasoned dressing that brings everything together. What makes this recipe special is the attention to detail—choosing quality ingredients, layering them thoughtfully, and letting the sandwich sit for a few minutes so all the flavors meld beautifully.
While the traditional grinder typically features Italian cold cuts, you can absolutely customize this recipe based on your preferences and what you have on hand. Some people prefer a meat-heavy version with multiple types of deli meats, while others enjoy adding fresh vegetables like tomatoes, cucumbers, or fresh herbs. The key is to build your sandwich with intention, making sure each layer contributes something delicious to the final bite.
This recipe serves as your foundation for creating the perfect grinder sandwich at home. Whether you’re preparing lunch for yourself, feeding a crowd, or looking for an easy dinner solution, a well-made grinder is always a crowd-pleaser. The ingredients are simple and readily available at most grocery stores, making this an accessible recipe for home cooks of all skill levels. Once you master the basic technique, you’ll find yourself making grinders regularly—they’re that good.
I love serving grinders with simple sides like a crisp coleslaw or homemade coleslaw dressing. For gatherings, you might also enjoy making bread dressing as a complementary dish. The sandwich itself is hearty enough to be a complete meal, but these sides add nice variety to your table.
If you’re interested in other sandwich recipes or bread-based dishes, check out some of our other favorites. The techniques you’ll learn here—about building flavor, layering ingredients, and creating textural interest—apply to many different types of sandwiches and composed dishes.
For more inspiration on sandwich making, I recommend checking out Serious Eats’ sandwich guide and Bon Appétit’s sandwich collection. You’ll find endless ideas for variations and techniques that can elevate your grinder game. The New York Times also has excellent sandwich recipes and techniques worth exploring.
Ingredients
- 1 sub roll or grinder roll (about 8-10 inches long), preferably crusty Italian bread
- 2 ounces sliced salami or Italian cold cuts
- 2 ounces sliced ham or capicola
- 2 ounces sliced provolone or mozzarella cheese
- 1/4 cup roasted red peppers, sliced or from a jar
- 1/4 cup sliced red onion
- 2-3 slices fresh tomato (optional but recommended)
- Handful of fresh lettuce or arugula
- 2 tablespoons mayonnaise or Italian dressing
- 1 tablespoon red wine vinegar
- 1 teaspoon dried oregano
- 1/2 teaspoon salt
- 1/4 teaspoon black pepper
- Pinch of red pepper flakes (optional)
- 1 tablespoon olive oil (optional, for drizzling)
- Fresh basil leaves (optional garnish)
Instructions
- Prepare your workspace by gathering all ingredients and arranging them within easy reach. Having everything ready before you start assembling will make the process smooth and help ensure your sandwich stays fresh.
- Slice your sub roll in half horizontally, being careful not to cut all the way through. You want the two halves connected so the sandwich holds together well. If your roll is particularly thick, you can gently scoop out some of the interior crumb to make room for fillings.
- In a small bowl, combine the mayonnaise, red wine vinegar, dried oregano, salt, black pepper, and red pepper flakes if using. Stir until well combined and smooth. This creates your signature dressing that brings all the flavors together.
- Spread half of the dressing mixture on the bottom half of the roll, using the back of a spoon to distribute it evenly. Don’t be shy—this dressing is what makes the sandwich special.
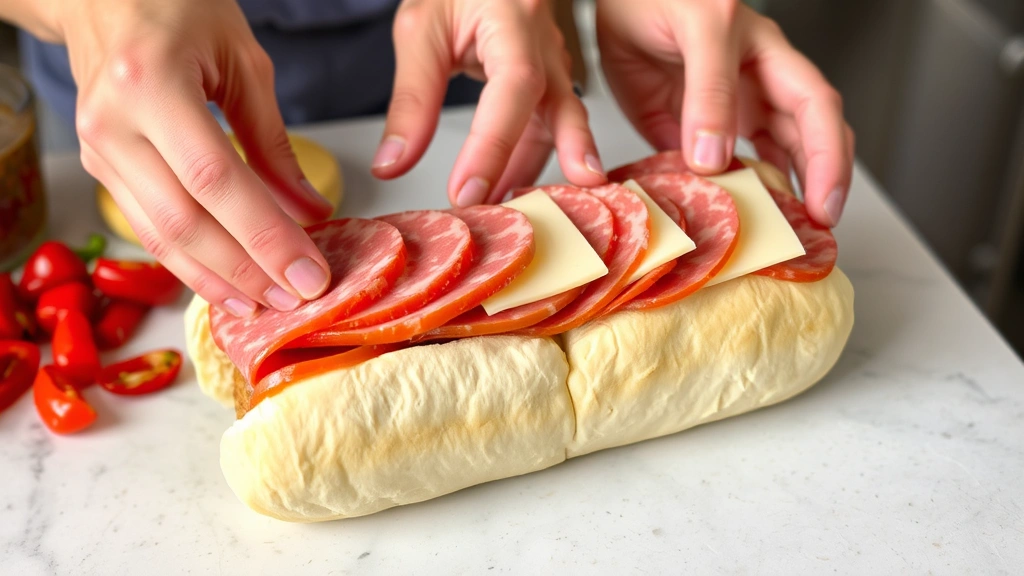
- Layer the salami and ham on top of the dressing, slightly overlapping the slices to ensure coverage and create visual appeal. The deli meats should cover most of the bread surface.
- Add the provolone or mozzarella cheese slices on top of the meats. The cheese will help bind everything together and add creaminess to each bite.
- Layer the roasted red peppers next, spreading them out across the cheese. If using jarred peppers, pat them dry with a paper towel first to remove excess liquid that could make the sandwich soggy.
- Add the sliced red onion in an even layer. The red onion provides a sharp, fresh bite that contrasts beautifully with the rich meats and cheese.
- If using tomato slices, arrange them next, sprinkling lightly with a pinch of salt and pepper. Fresh tomato adds juiciness and brightness, but ensure your tomatoes are ripe and flavorful for the best results.
- Top the vegetables with a bed of fresh lettuce or arugula. This adds crunch and helps prevent the bottom bread from becoming soggy by creating a barrier between the wet ingredients and the roll.
- Spread the remaining dressing on the inside of the top half of the roll, distributing it evenly across the surface.
- If using fresh basil, layer a few leaves on top of the lettuce for an extra touch of freshness and Italian flair.
- Carefully close the sandwich by pressing the top half gently onto the bottom half. Don’t squeeze too hard—you want to keep the layers intact and the sandwich from falling apart.
- Let the sandwich sit at room temperature for 2-3 minutes before serving. This resting period allows the flavors to meld and the dressing to be absorbed slightly by the bread, creating a more cohesive sandwich.
- If you prefer your sandwich warm, you can wrap it in foil and heat it in a 350°F oven for about 5 minutes, or place it in a panini press for 2-3 minutes until warmed through and the cheese melts slightly.
- Slice the sandwich in half diagonally if desired, or wrap it partially in parchment paper for easy eating. Serve immediately with your favorite sides.
Pro Tips
Meat Quality: Purchase your meats from the deli counter rather than pre-packaged if possible. Freshly sliced meats have better texture and flavor. Ask for thin slices so they’re easier to layer and more pleasant to bite through.
Cheese Options: While provolone is traditional, you can substitute with fresh mozzarella, asiago, or even smoked gouda depending on your preference. Some people enjoy a blend of two cheeses for added complexity.
Vegetable Variations: Don’t feel limited to the ingredients listed. Add sliced cucumbers, bell peppers, or mushrooms if you prefer. Just remember to keep vegetables relatively dry to prevent sogginess.
Dressing Customization: If you don’t have red wine vinegar, substitute with white wine vinegar or balsamic vinegar. For a creamier sandwich, use Italian dressing instead of the homemade mixture. Some people prefer oil and vinegar with a sprinkle of Italian seasoning instead of mayo-based dressing.
Making Ahead: Grinders are best served fresh, but you can assemble them up to 2 hours ahead if needed. Wrap them tightly in parchment paper or foil and refrigerate. Remove from the refrigerator about 15 minutes before serving to bring to room temperature.
Warm Versus Cold: While traditional grinders are served cold, some regions prefer them toasted. If you want a warm grinder, assemble it as directed, then wrap in foil and bake at 350°F for 5-7 minutes until warmed through and the cheese begins to melt.
Layering Importance: The order in which you layer ingredients matters more than you might think. Putting dressing and cheese on the bread first creates a barrier that helps prevent sogginess. Vegetables in the middle and lettuce on top provide structure and keep everything in place.
Serving Suggestions: Pair your grinder with crispy potato chips, a side salad, pickles, or coleslaw. A cold beverage like iced tea, lemonade, or a light soda complements the richness of the sandwich perfectly.
Storage: Leftover assembled grinders should be wrapped tightly and refrigerated, though they’re best eaten fresh. If storing components separately, keep meats and cheeses in airtight containers for up to one week, and fresh vegetables in the crisper drawer.
Scaling Up: This recipe easily scales for multiple servings. Simply repeat the process for each sandwich, or create a party-size grinder by using a longer roll and doubling all ingredients, then slicing into individual portions.