

There’s nothing quite like the aroma of freshly baked bread rising in your kitchen, and mastering the art of a perfect rising bread recipe is a game-changer for any home baker. Whether you’re a seasoned baker or just starting your bread-baking journey, this comprehensive guide will walk you through every step to create the most incredible, fluffy, and flavorful loaf you’ve ever tasted.
The key to exceptional bread isn’t just about following a recipe—it’s about understanding the science behind the rise, the importance of proper fermentation, and how to achieve that perfect golden crust with a tender crumb. I’ve spent years perfecting this technique, and I’m thrilled to share my tried-and-true method with you.
This rising bread recipe uses a combination of active dry yeast and a long, slow fermentation process that develops deep flavor and creates an incredibly light, airy texture. The beauty of this method is that it’s forgiving, flexible, and produces consistently stunning results. You can make this bread with just a few simple ingredients—flour, water, salt, and yeast—yet the results taste like they came straight from an artisan bakery.
One of the secrets to my success is using a combination of warm water and cold water, which helps regulate fermentation and gives you better control over your dough’s development. I also recommend investing in a good kitchen scale, as measuring by weight rather than volume ensures accuracy and consistency every single time you bake.
The process involves several rises: a bulk fermentation, a shaping period, and a final proof. Each stage is crucial for developing flavor and achieving that perfect rise. Don’t rush this process—patience is truly the secret ingredient in exceptional bread baking. I always tell people that bread is a living thing, and you need to respect its timeline.
This recipe makes two beautiful loaves, perfect for sharing with family and friends or for enjoying one fresh while freezing the other for later. The crust will be beautifully golden and crispy, while the interior is soft, pillowy, and absolutely perfect for everything from morning toast to sandwich-making.
If you’re looking for more baking inspiration, check out our no-knead bread recipe for a more hands-off approach, or explore our sourdough starter guide for a tangy alternative. You might also enjoy our focaccia bread recipe for a delicious flatbread variation. For detailed baking techniques, Serious Eats’ yeast bread guide is incredibly helpful, and Bon Appétit’s basic bread recipe offers another excellent perspective. The New York Times no-knead bread is also worth exploring for comparison.
Trust the process, follow these steps carefully, and you’ll have the most incredible, bakery-quality bread right from your own oven. Your kitchen will smell absolutely divine, and your family will be begging you to make this bread again and again.
Ingredients
- 3½ cups (420g) all-purpose flour, plus more for dusting
- 1½ teaspoons (9g) fine sea salt
- ½ teaspoon (2.5g) instant yeast or active dry yeast
- 1¼ cups (295ml) warm water (about 110°F/43°C)
- ¼ cup (60ml) cool water (about 65°F/18°C)
- 1 tablespoon honey or sugar (optional, helps activate yeast)
- 2 tablespoons olive oil (optional, for enriched dough)
- Cornmeal or additional flour for dusting the banneton baskets
- Ice cubes for creating steam in the oven
Instructions
- In a large mixing bowl, combine the all-purpose flour and fine sea salt, whisking them together to distribute the salt evenly throughout the flour. This ensures the salt is incorporated evenly and won’t create dead spots in your dough.
- In a separate small bowl, dissolve the instant yeast in the warm water, stirring gently. If using honey, add it to the yeast mixture and stir until combined—the honey helps activate the yeast and provides a touch of sweetness to your final loaf.
- Create a well in the center of your flour mixture and pour the yeast and warm water mixture into the well, then add the cool water. Using your hands or a wooden spoon, begin mixing the ingredients together, incorporating the flour from the sides into the wet ingredients.
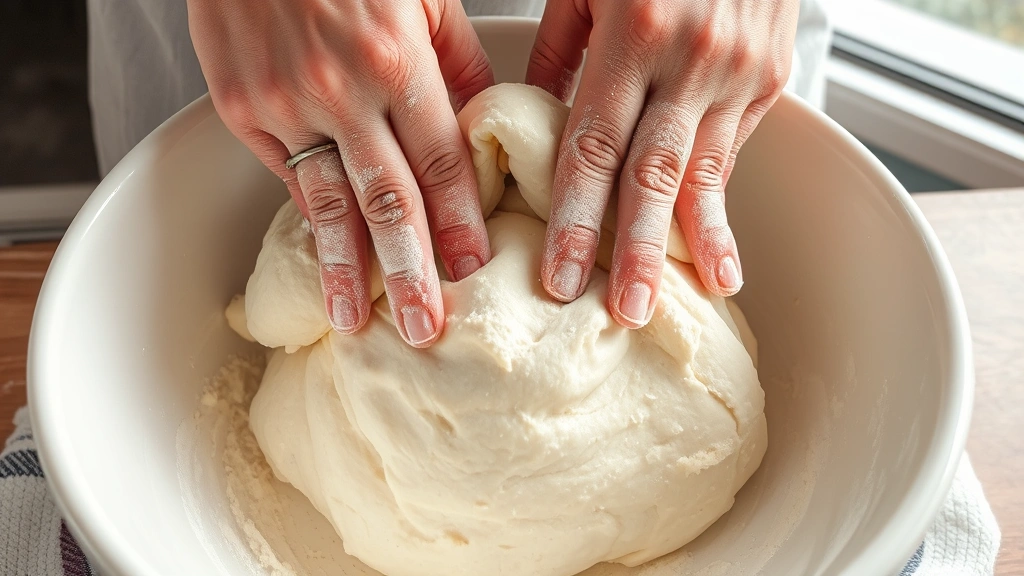
- Continue mixing until all the flour is incorporated and you have a shaggy, slightly sticky dough. You should not see any dry flour remaining. If the dough seems too dry, add an additional tablespoon of water. If it’s too sticky, let it rest for 5 minutes and it will absorb the moisture.
- Cover the bowl with plastic wrap or a damp towel and let the dough rest at room temperature for 30 minutes. This rest period, called autolyse, allows the flour to fully hydrate and makes the dough easier to work with.
- After the 30-minute rest, perform the first set of stretch and folds: wet your hand slightly, grab one side of the dough, and stretch it up and over the center, pressing gently. Rotate the bowl 90 degrees and repeat 4 times. This builds strength without traditional kneading.
- Cover the bowl again and let it rest for 30 minutes. Repeat the stretch and fold process two more times over the next hour, allowing 30 minutes between each set. This three-part process develops gluten structure and creates a stronger dough.
- After completing all three sets of stretch and folds, cover the dough and allow it to undergo bulk fermentation for 8-12 hours at room temperature. The dough should increase in volume by about 50-75% and should feel light and airy with visible bubbles on the surface.
- While the dough is fermenting, prepare two banneton proofing baskets by dusting them generously with flour or cornmeal. If you don’t have bannetons, you can line two bowls with flour-dusted kitchen towels.
- Once the bulk fermentation is complete, turn the dough out onto a lightly floured work surface. Divide it into two equal pieces using a bench scraper or knife, being gentle to preserve the gas bubbles you’ve developed.
- Shape the first piece of dough into a round by folding the edges toward the center and gently rolling it toward you to create surface tension. Place it seam-side up in the first prepared banneton basket.
- Repeat the shaping process with the second piece of dough, placing it seam-side up in the second banneton basket. Cover both baskets with plastic wrap or place them inside a plastic bag.
- Place the shaped dough in the refrigerator for at least 8 hours, preferably overnight. This cold retard dramatically improves the flavor through slow fermentation and makes scoring much easier. You can keep the dough refrigerated for up to 24 hours.
- When you’re ready to bake, preheat your oven to 500°F (260°C) with a Dutch oven or covered baking vessel inside for at least 45 minutes. The vessel needs to be extremely hot to create the proper steam for oven spring.
- Remove one basket of dough from the refrigerator and carefully turn it out onto a sheet of parchment paper. Using a sharp bread lame or knife, score the top of the loaf with a diagonal slash about ¼-inch deep. This controls where the bread expands.
- Carefully transfer the parchment paper with the dough into the preheated Dutch oven. Pour about ¼ cup of ice or hot water into the bottom corner of the Dutch oven to create steam, then quickly cover with the lid.
- Reduce the oven temperature to 450°F (232°C) and bake for 20 minutes covered to trap steam and encourage oven spring. The steam keeps the crust flexible while the crumb sets, allowing for maximum expansion.
- Remove the Dutch oven lid and continue baking for 15-20 minutes until the loaf is deeply golden brown on all sides. The internal temperature should reach 205-210°F (96-99°C) when measured with an instant-read thermometer inserted into the center.
- Carefully remove the loaf from the Dutch oven using oven mitts and transfer it to a wire cooling rack. Repeat the baking process with the second loaf, preheating the Dutch oven again for at least 15 minutes between loaves.
- Allow both loaves to cool completely on the wire racks for at least 1 hour before slicing. The crumb will continue to set as it cools, and cutting too early will result in a gummy interior. Resist the temptation to slice into warm bread!
- Once completely cooled, store the bread in a paper bag at room temperature for up to 3 days. For longer storage, slice the cooled bread, wrap it well in plastic wrap and foil, and freeze for up to 2 months. Thaw at room temperature and refresh in a 350°F oven for 10 minutes.

Pro Tips
- **Understanding Yeast**: The amount of yeast in this recipe is intentionally low (½ teaspoon for 3½ cups flour). This encourages a long, slow fermentation that develops deep, complex flavors rather than a quick rise. Low-yeast, cold-fermented bread tastes infinitely better than bread made with lots of yeast and minimal rise time.
- **Temperature Control**: Room temperature fermentation works best between 68-75°F (20-24°C). If your kitchen is warmer, your dough will ferment faster, so reduce the bulk fermentation time accordingly. If it’s cooler, allow additional time. You want the dough to increase by about 50-75%, not double or triple.
- **Hydration Level**: This recipe uses 75% hydration (the ratio of water to flour by weight), which creates an open, airy crumb with beautiful irregular holes. If this feels too sticky for your comfort level, reduce the warm water to 1 cup and the cool water to 2 tablespoons for a slightly firmer dough.
- **Stretch and Fold Technique**: This method replaces traditional kneading and is gentler on the developing gluten structure. Your hand should be slightly wet but not dripping, and you should feel the dough resist slightly as you stretch it. This resistance indicates gluten development.
- **Banneton Baskets**: These oval or round woven baskets are invaluable for bread baking, but if you don’t have them, line bowls with clean kitchen towels and dust generously with flour. The flour prevents sticking and helps create structure as the dough proofs.
- **The Cold Retard**: Refrigerating shaped dough overnight is one of the best things you can do for bread flavor and workability. The cold slows yeast activity while bacteria continue producing acids, resulting in more complex flavor. It also makes the dough firmer and easier to score without deflating.
- **Scoring Your Bread**: A sharp blade is essential for proper scoring. Dull blades drag rather than cut, which deflates your dough. Make confident, quick motions at a 45-degree angle, about ¼-inch deep. Good scoring controls expansion and creates that beautiful ear.
- **Dutch Oven Alternative**: If you don’t have a Dutch oven, you can create steam using a baking stone on the middle oven rack with a cast-iron skillet on the lower rack. Place the skillet in the oven as it preheats, then carefully add ice cubes to it when you load the bread.
- **Troubleshooting Flat Bread**: If your bread isn’t rising much in the oven, your dough may be overproofed. It should feel slightly jiggly and spring back slowly when poked, leaving a slight impression. If it doesn’t spring back at all, it’s overproofed and needs a shorter final rise.
- **Troubleshooting Dense Crumb**: Dense, gummy crumbs usually indicate the bread was cut before fully cooling or there wasn’t enough steam during baking. Always wait at least 1 hour before slicing, and ensure you’re creating adequate steam in your Dutch oven.
- **Flour Selection**: All-purpose flour works beautifully for this recipe, but you can experiment with bread flour (higher protein) for a chewier crumb or cake flour for a softer texture. Different flours absorb water differently, so you may need to adjust hydration slightly.
- **Maintaining Moisture**: If your crust becomes too hard before you’re ready to eat it, place the loaf in a paper bag overnight. The crust will soften slightly as it absorbs ambient moisture. You can also refresh a day-old loaf by spritzing it lightly with water and warming it in a 350°F oven for 10 minutes.