

This cashew cheese recipe is hands down the easiest vegan spread you’ll ever make—and I mean that literally. In just five minutes, you’ll have a creamy, dreamy cheese alternative that tastes so good, even your non-vegan friends will be asking for seconds. No weird ingredients, no complicated equipment, just pure cashew magic that transforms from a humble nut into something absolutely luxurious.
I discovered this recipe during a phase when I was experimenting with dairy-free living, and honestly? It completely changed the game for me. The beauty of this cashew cheese is that it’s incredibly versatile—spread it on toast, dollop it on pasta, use it as a dip for vegetables, or swirl it into soups. It’s the kind of recipe that feels like a culinary hack because it’s so simple, yet so impressive.
Jump To Section
Why This Recipe Works
The magic here comes from the natural creaminess of raw cashews combined with just a few strategic ingredients. Raw cashews contain oils and proteins that, when blended properly, create an incredibly smooth, spreadable texture that mimics dairy cheese beautifully. Unlike some vegan cheese recipes that rely on starches or gums, this one keeps things pure and simple.
What makes this approach so effective is the balance between tanginess and richness. A touch of lemon juice and nutritional yeast adds that sharp, savory cheese flavor you’re craving, while the cashew base provides luxurious creaminess. The result? Something that tastes genuinely delicious, not like a compromise or substitute. Additionally, because there’s no cooking involved, all the nutritional benefits of raw cashews stay intact.
The five-minute timeline is genuinely achievable because you’re only soaking the cashews briefly and then blending. This makes it perfect for weeknight cooking or when you need an impressive appetizer fast. I love recipes that work with real-world timing, and this one absolutely does.
Ingredient Tips & Substitutions
Let’s talk cashews first—you’ll want raw, unsalted cashews for this recipe. They should be ivory-colored and have that slightly sweet, buttery flavor. If you can only find roasted cashews, they’ll still work, though the flavor profile will be slightly different and less delicate. For the best results, look for high-quality cashews from a trusted source, as they make a noticeable difference in the final taste.
Nutritional yeast is the secret ingredient that gives this cashew cheese its savory, umami depth. It’s not the same as regular yeast, so don’t swap them out. You can find it in most health food stores or online. However, if you’re in a pinch, you could use a small amount of Parmesan powder, though the flavor will be slightly different and less vegan-friendly.
The lemon juice is essential for brightness and tang. Fresh is always better than bottled if you have it available. Meanwhile, garlic powder adds another layer of savory complexity—adjust the amount based on your preference and how much garlic flavor you enjoy. For a milder version, use half the amount; for garlic lovers, feel free to increase it slightly.
Water quality matters more than you’d think here. If your tap water is heavily chlorinated, filtered water will give you a cleaner taste. The amount of water needed can vary slightly depending on your blender’s power and the moisture content of your cashews, so start with less and add gradually until you reach your desired consistency.
Serving Suggestions
This cashew cheese shines brightest when spread generously on warm crusty bread or crackers. Pair it with fresh herbs like dill or chives for an elegant appetizer. For something more substantial, try it as a sauce base for perfect pesto pasta—the creaminess complements herbaceous flavors beautifully.
I’m also obsessed with dolloping this onto roasted vegetables or using it as a dip for fresh crudités. It works wonderfully as a spread in sandwiches alongside fresh lettuce and tomato. For a more gourmet application, swirl it into creamy pasta dishes or use it as a base for ricotta-style pasta recipes.
If you want to get fancy, layer this cashew cheese with roasted red peppers and herbs for an impressive appetizer board. It also works wonderfully as a creamy component in grain bowls or Buddha bowls. For a simple yet elegant presentation, serve it in a small bowl with a drizzle of good quality olive oil and fresh cracked pepper on top.
Storage & Make-Ahead Tips
This cashew cheese keeps beautifully in an airtight container in the refrigerator for up to five days. The consistency may firm up slightly when chilled, which is actually perfect for spreading. Simply let it come to room temperature for a few minutes if you prefer it softer, or stir in a tiny splash of water to loosen it up again.
You can absolutely make this ahead for entertaining. In fact, I often prepare a batch the day before, which gives the flavors time to meld and develop even more complexity. The overnight rest makes it taste even better, if you can believe that. For longer storage, you can freeze it in ice cube trays and thaw portions as needed—it keeps for up to two weeks in the freezer.
One of my favorite make-ahead strategies is to prepare a plain batch and then divide it into portions, adding different mix-ins to each one. Keep the plain version as your base, then create variations with fresh herbs, sun-dried tomatoes, or roasted garlic. This way, you have multiple flavors ready to go without extra work.
Why Go Dairy-Free?
Whether you’re fully vegan, lactose intolerant, or simply exploring plant-based options, this vegan cheese spread delivers serious satisfaction without any compromise on flavor. The dairy-free movement has come such a long way, and recipes like this prove you’re not missing out on anything. Instead, you’re gaining something special—a recipe that works for virtually any dietary preference.
Beyond dietary reasons, cashew-based cheeses have become incredibly popular because they’re genuinely delicious. According to Bon Appétit, plant-based cheese innovations have completely transformed how we think about vegan cooking. This recipe taps into that same philosophy—making food that happens to be vegan, rather than making “vegan food” that feels like a category unto itself.
For pasta lovers, this cashew cheese pairs beautifully with pesto chicken pasta or works as a standalone pasta sauce. Combine it with fresh vegetables, spring salad ingredients, or waldorf salad components for complete meals that feel indulgent and satisfying.
The ingredient list is refreshingly short and recognizable. There’s something deeply satisfying about knowing exactly what’s in your food and being able to pronounce every ingredient. Most people already have these items in their pantry, which means you can make this cashew cheese recipe whenever inspiration strikes.
According to Serious Eats, the best vegan recipes focus on flavor first and foremost. This one absolutely does that. The nutritional yeast provides B vitamins that are especially important in plant-based diets, while cashews offer healthy fats and protein. You’re not just making something delicious—you’re making something genuinely nourishing.
I’ve served this to skeptical cheese lovers, and the common reaction is genuine surprise at how good it tastes. It doesn’t try to be exactly like dairy cheese—instead, it’s its own delicious thing. That confidence in what it is, rather than what it’s pretending to be, is what makes it work so well. The five-minute preparation time means you can whip up a batch whenever you need an impressive, crave-able spread that checks every box.
Ingredients
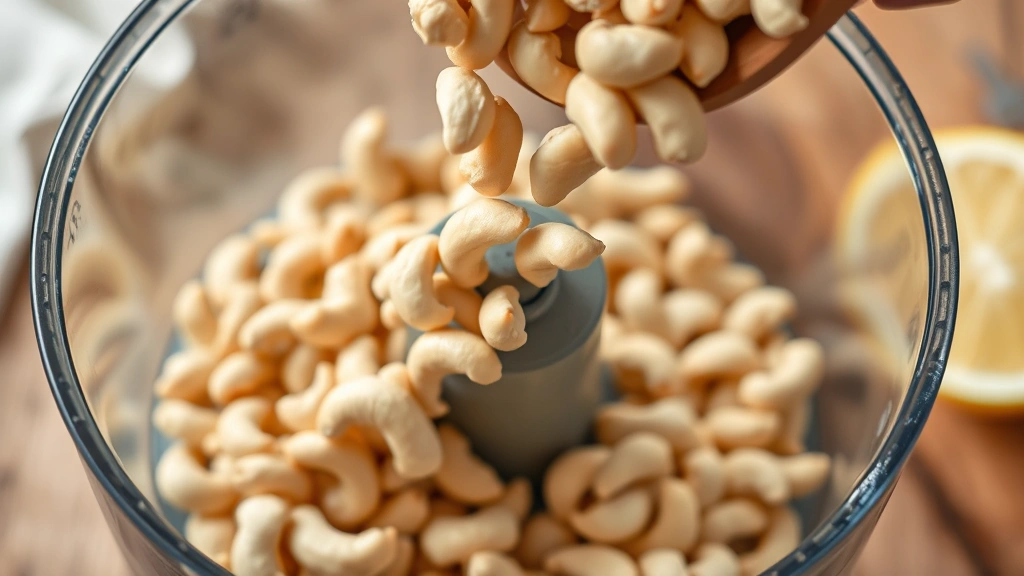
- 1½ cups raw cashews, soaked in hot water for 10 minutes
- 3 tablespoons water (or more as needed for consistency)
- 2 tablespoons nutritional yeast
- 2 tablespoons fresh lemon juice
- 1 teaspoon garlic powder
- ½ teaspoon sea salt
- ¼ teaspoon ground black pepper
- ¼ teaspoon white miso paste (optional, adds depth)
Instructions
- Soak your raw cashews in hot water for about 10 minutes while you gather the rest of your ingredients. Hot water softens them quickly without requiring advance planning.
- Drain the cashews thoroughly and add them to your food processor or high-powered blender.
- Pour in the water, nutritional yeast, fresh lemon juice, garlic powder, salt, and pepper.
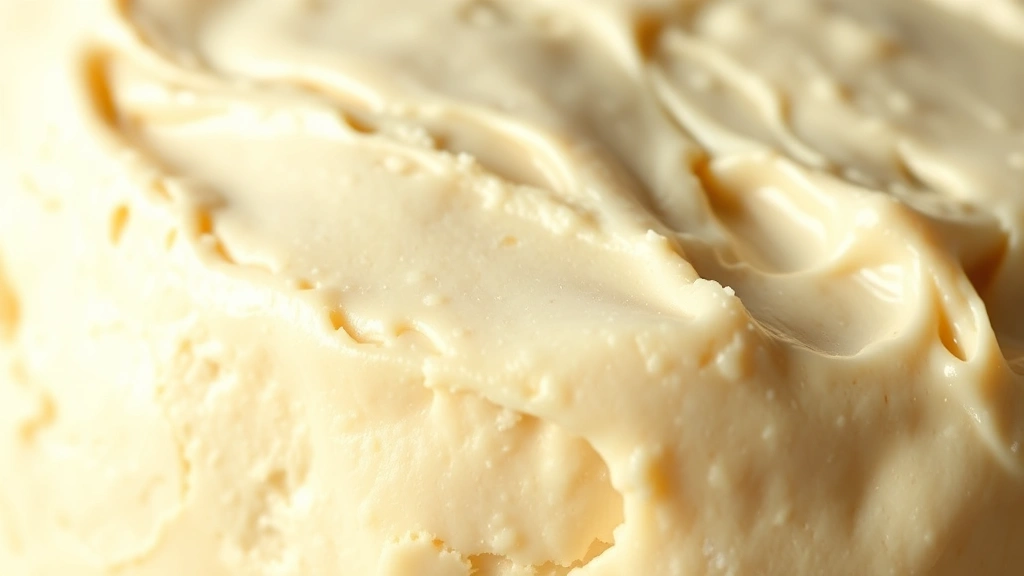
- Blend until completely smooth and creamy, about 2-3 minutes. Stop and scrape down the sides as needed.
- Taste and adjust seasonings—add more garlic powder for intensity, lemon juice for brightness, or salt for savory depth.
- If the mixture is too thick, add water one tablespoon at a time until you reach your desired spreadable consistency.
- Transfer to an airtight container and refrigerate until ready to serve.
- Serve with crackers, vegetables, or spread generously on warm bread. The cashew cheese will firm up slightly when chilled but softens quickly at room temperature.
Pro Tips
The soaking time is crucial for creating that ultra-smooth texture. Hot water works faster than cold water, so don’t skip this step or try to blend dry cashews. Additionally, the quality of your cashews directly impacts the final flavor—splurge on good ones if you can.
If you don’t have nutritional yeast, you can substitute it with finely grated Parmesan (though it won’t be vegan), or use a combination of garlic powder and onion powder for a different flavor profile. However, nutritional yeast really is the MVP ingredient here, so I recommend sourcing it if possible.
For a tangier cashew cheese, increase the lemon juice to 3 tablespoons or add a tablespoon of white miso paste. Meanwhile, if you prefer something milder, reduce the garlic powder to half a teaspoon. The beauty of this recipe is how easily it customizes to your taste preferences.
This recipe doubles beautifully if you’re serving a crowd or want to store extra portions. Frozen in ice cube trays, it provides convenient portions for future meals. For a festive presentation, transfer to a serving bowl and top with fresh herbs like dill, chives, or microgreens before serving.
One helpful tip: if your cashew cheese separates slightly when refrigerated, simply stir in a tablespoon of water and blend again briefly. This brings everything back to its creamy consistency. Also, make sure your food processor or blender is completely clean and dry before starting—any residual moisture can affect the final texture.