

This chex mix oven recipe is the ultimate crowd-pleaser that transforms simple pantry staples into an irresistibly crunchy party snack. I’ve made this countless times for gatherings, game days, and holiday parties, and it never fails to disappear within minutes. The beauty of this recipe lies in its simplicity—just toss everything together, roast it in the oven, and you’ve got homemade goodness that tastes infinitely better than anything store-bought.
What makes homemade chex mix so special? For starters, you control every single ingredient. No mysterious additives, no artificial flavors, just real butter, real spices, and the exact ratio of cereals and nuts you love. The aroma that fills your kitchen while it’s baking is absolutely intoxicating—your guests will follow their noses straight to the snack bowl.
Jump To Section
Why This Recipe Works
The secret to perfect chex mix is all about even coating and proper oven temperature. When you use melted butter mixed with Worcestershire sauce and seasonings, every piece gets evenly saturated. The oven does the heavy lifting, toasting everything to golden perfection while you relax. Meanwhile, the low-to-medium heat ensures nothing burns while the flavors develop beautifully.
Timing is everything here. Those frequent stirrings aren’t just busywork—they’re what guarantee each cereal piece, nut, and pretzel gets its moment in the hot oven. This method beats the stovetop approach because the oven’s dry heat creates that signature crispy texture without any greasiness. Additionally, you’ll get more even browning when you spread everything in a single layer on a large baking sheet.
I love how adaptable this recipe is to your personal preferences. Some folks go savory and spicy, while others prefer sweet and buttery versions. The foundation stays the same, but the fun is in making it your own. This is perfect for anyone who enjoys easy comfort food recipes that deliver big flavor with minimal effort.
Ingredient Tips & Substitutions
Chex cereal is the star player here, and you can absolutely mix and match varieties. Rice Chex, Wheat Chex, and Corn Chex all work beautifully together, or stick with one type if that’s what you prefer. The combination gives you different textures and flavors that complement each other perfectly.
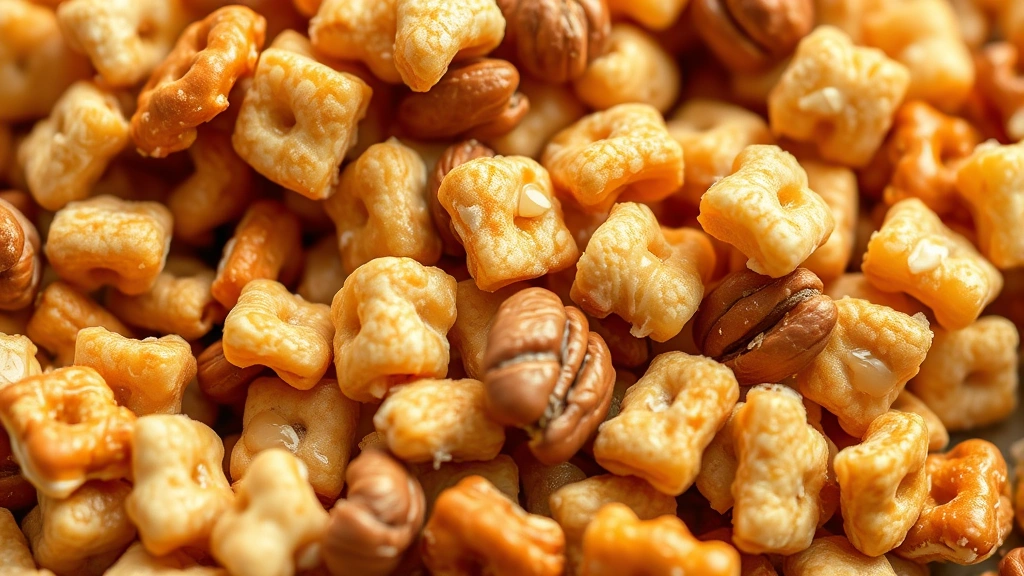
For the nuts, I typically use a mix of cashews and peanuts, but almonds, pecans, or walnuts work wonderfully too. Just avoid nuts that are already heavily salted, since you’ll be adding seasoning. Pretzels add that salty crunch that makes people keep coming back for more—use the thin stick variety rather than thick pretzel pieces so they toast evenly.
Worcestershire sauce is non-negotiable for that umami depth, but if you need a substitute, soy sauce works in a pinch. However, I really encourage you to grab the Worcestershire—it’s what elevates this from basic to unforgettable. The butter should be real butter, not margarine, because that’s where genuine flavor comes from. For a dairy-free version, use a high-quality butter alternative that can handle oven heat.
The seasoning blend is where your personality shines through. I love the classic garlic powder and onion powder combination, but you could add cayenne pepper for heat, smoked paprika for depth, or ranch seasoning powder for something completely different. Start with less seasoning than you think you need—you can always taste and add more after the first stir.
The Baking Process Explained
Start by preheating your oven to 250 degrees Fahrenheit. This might seem low, but it’s intentional. A lower temperature means slower, more even toasting without scorching. While the oven heats, melt your butter in a small saucepan and whisk in the Worcestershire sauce and seasonings. This warm mixture is what creates the perfect coating.
Combine all your dry ingredients—the cereals, nuts, and pretzels—in a large bowl. Pour the butter mixture over everything and stir thoroughly. I use a sturdy wooden spoon or rubber spatula, making sure every piece gets some of that buttery coating. This is the crucial moment where patience pays off; don’t rush this step.
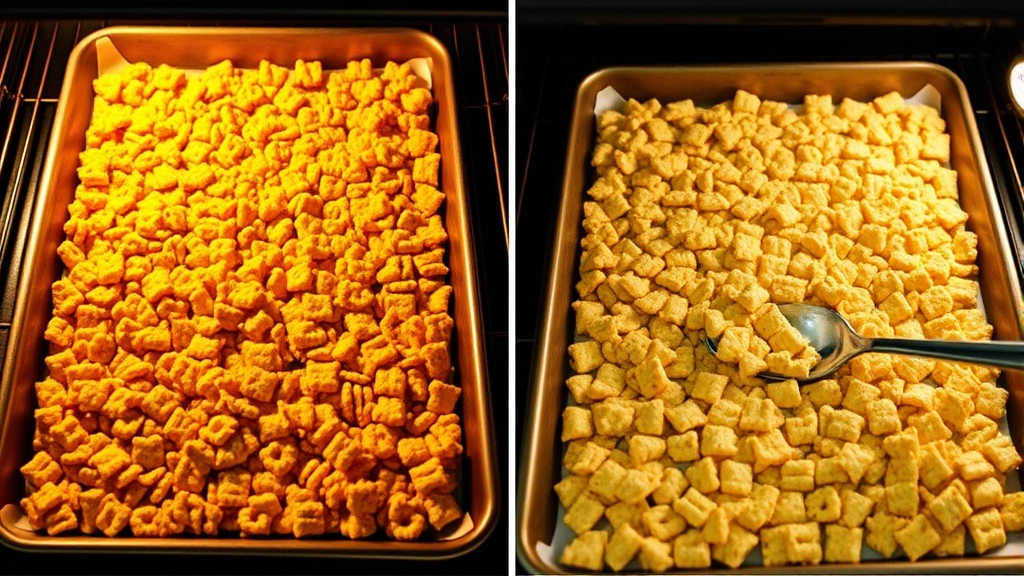
Spread the mixture in a single layer on a large baking sheet. I usually need two sheets because I never skimp on ingredients. Place in the preheated oven and set a timer for 15 minutes. When it goes off, pull out the sheet and stir everything from the edges toward the center. Return to the oven and repeat this process every 15 minutes for a total baking time of about 45-60 minutes.
You’ll know it’s done when everything looks golden brown and smells absolutely incredible. The timing can vary depending on your oven and how much mixture you’re making, so use your senses. It should look dry and crispy, not wet or shiny. Once you pull it from the oven, spread it on clean kitchen towels or parchment paper to cool completely. This is essential—it continues to crisp up as it cools.
Serving Suggestions
There’s truly no wrong way to serve homemade chex mix. Pile it high in bowls for game night, package it in cute jars as gifts, or set it out during holiday parties. For instance, you could serve it alongside creamy mac and cheese bites for a complete snack spread.
I love pairing it with both sweet and savory beverages. It works beautifully with cold sodas, sparkling water, beer, or wine. The salty, umami-forward flavors complement almost any drink. Additionally, it’s fantastic for lunchboxes, road trips, or just mindless snacking while you’re watching your favorite show.
If you’re hosting and want to get fancy, portion some into small paper cones or individual bags for guests to take home. It’s a thoughtful touch that shows you put care into your entertaining. You could even tie them with ribbon and add a label. Everyone loves homemade gifts, especially something this delicious.
Storage & Shelf Life
Once your chex mix is completely cooled, store it in airtight containers or resealable bags. Properly stored, it stays crispy and fresh for up to two weeks, though honestly, it rarely lasts that long in my house. The key is keeping moisture out, so make sure those containers seal tightly.
For longer storage, you can freeze chex mix for up to three months. Just portion it into freezer bags, removing as much air as possible before sealing. When you want to enjoy it, let it come to room temperature in the sealed bag—this prevents condensation from making it soggy. I often make several batches in advance during the holiday season and pull them out as needed.
If your chex mix does get a little soft over time, don’t toss it. Pop it back in a 250-degree oven for about 10 minutes to re-crisp it. Spread it in a thin layer and keep a close eye on it. This revival method works wonderfully and brings back that fresh-from-the-oven texture. However, only do this once or twice, as repeated heating can affect the flavor.
For a homemade snack gift, make it a week or two before giving it away. This timing allows the flavors to meld beautifully. Package it in decorative bags or jars with a simple label noting the ingredients—people appreciate knowing what they’re eating, especially if there are allergies to consider.
This homemade version really showcases why making your own snacks beats grabbing something pre-packaged. You can customize the salty and savory element exactly how you want it, control the sodium level, and skip any ingredients you’d rather avoid. For more party snack inspiration, check out these best snack recipes from Bon Appétit.
Whether you’re making this for a casual gathering or a special occasion, this chex mix oven recipe delivers impressive results every single time. The combination of textures—crispy cereal, crunchy nuts, salty pretzels—keeps your palate entertained. Meanwhile, the savory seasoning makes it impossible to eat just a handful. I genuinely believe this belongs in every home baker’s regular rotation.
For more inspiration on snacking and party foods, you might enjoy exploring Serious Eats snack collection or this New York Times snack mix guide. Once you master this basic chex mix oven recipe, you’ll want to experiment with variations. Try a sweet and salty version with brown sugar and cinnamon, or go bold with sriracha and lime. The foundation is solid, and the possibilities are endless.
Make a batch this weekend and taste the difference homemade makes. Your friends and family will be asking for the recipe, I promise.
Ingredients
- 3 cups Rice Chex cereal
- 3 cups Wheat Chex cereal
- 2 cups roasted cashews
- 1½ cups roasted peanuts
- 2 cups pretzel sticks
- 6 tablespoons unsalted butter
- 2 tablespoons Worcestershire sauce
- 1½ teaspoons garlic powder
- 1 teaspoon onion powder
- ½ teaspoon cayenne pepper (optional)
- 1 teaspoon salt
- ½ teaspoon black pepper
Instructions
- Preheat your oven to 250 degrees Fahrenheit and line two large baking sheets with aluminum foil for easy cleanup.
- In a small saucepan over low heat, melt the butter and whisk in the Worcestershire sauce until fully combined and fragrant.
- Remove from heat and stir in the garlic powder, onion powder, cayenne pepper, salt, and black pepper until you have a smooth seasoning mixture.
- Combine the Rice Chex, Wheat Chex, cashews, peanuts, and pretzel sticks in a very large bowl and toss gently to mix.
- Pour the warm butter mixture over the cereal and nut combination, then stir vigorously with a sturdy wooden spoon until every piece is evenly coated with the butter and seasonings.
- Divide the mixture between the two prepared baking sheets and spread in a single layer, being careful not to crowd the pans.
- Place both sheets in the preheated oven and set a timer for 15 minutes.
- When the timer goes off, remove both sheets from the oven and stir the mixture thoroughly, pushing the pieces from the edges toward the center to ensure even toasting.
- Return to the oven and repeat the stirring process every 15 minutes for a total baking time of 45-60 minutes, until the mixture is golden brown and fragrant.
- Spread the finished chex mix on clean kitchen towels or parchment paper to cool completely, stirring occasionally to prevent clumping.
- Once completely cooled, transfer to airtight containers or resealable bags for storage.
- Serve in bowls at room temperature and enjoy the homemade crunch and flavor that surpasses anything store-bought.
Pro Tips
The key to perfect homemade chex mix is patience and frequent stirring. Don’t skip those 15-minute intervals—they’re essential for even toasting and prevent burning. The lower oven temperature works slowly and steadily, creating that signature crispy texture without any greasiness.
Feel free to customize the nuts and cereals based on what you have on hand or your personal preferences. Almonds work beautifully instead of cashews, and pecans add a richer flavor profile. You could use all one type of Chex cereal if you prefer, or mix in some Corn Chex for variety. The beauty of this recipe is its flexibility.
For a spicier version, increase the cayenne pepper to 1 teaspoon or add ½ teaspoon of smoked paprika for depth. If you prefer a ranch-flavored chex mix, substitute 2 tablespoons of dry ranch seasoning powder for the individual spices. For a sweet and salty variation, reduce the Worcestershire sauce to 1 tablespoon and add 2 tablespoons of brown sugar to the butter mixture.
Make sure all your ingredients are at room temperature before mixing, as cold nuts and cereal won’t coat as evenly with the warm butter. Additionally, don’t skip spreading the mixture in a single layer—crowding the pan prevents proper air circulation and even toasting. If necessary, use three baking sheets rather than trying to fit everything on two.
Cooling completely is absolutely crucial for achieving maximum crispiness. While it might be tempting to dig in while it’s still warm, the chex mix continues to firm up significantly as it cools. Patience here pays off with the perfect texture. Store in airtight containers away from heat and humidity, and it will stay fresh for up to two weeks.
If you’re doubling this recipe, simply multiply all ingredients by two and use three or four baking sheets instead of two. The baking time remains the same, but you may need to add an extra stir or two to ensure everything browns evenly. For gift-giving, package the cooled chex mix in decorative jars with a simple label listing the ingredients.