

A cold foam recipe is the secret weapon that transforms your everyday beverages into café-quality drinks you’ll actually want to sip on. Whether you’re topping your morning coffee, afternoon iced tea, or even a refreshing cocktail, this silky, luxurious foam adds that extra touch of elegance and sophistication without requiring any special equipment.
I discovered cold foam about five years ago at a trendy coffee shop downtown, and honestly? I was hooked immediately. The barista whisked milk with a touch of vanilla and honey, and it created this cloud-like topping that made me feel fancy before 8 AM. Now I make it at home regularly, and I want to share all my favorite variations with you.
Jump To Section
Why This Cold Foam Recipe Works
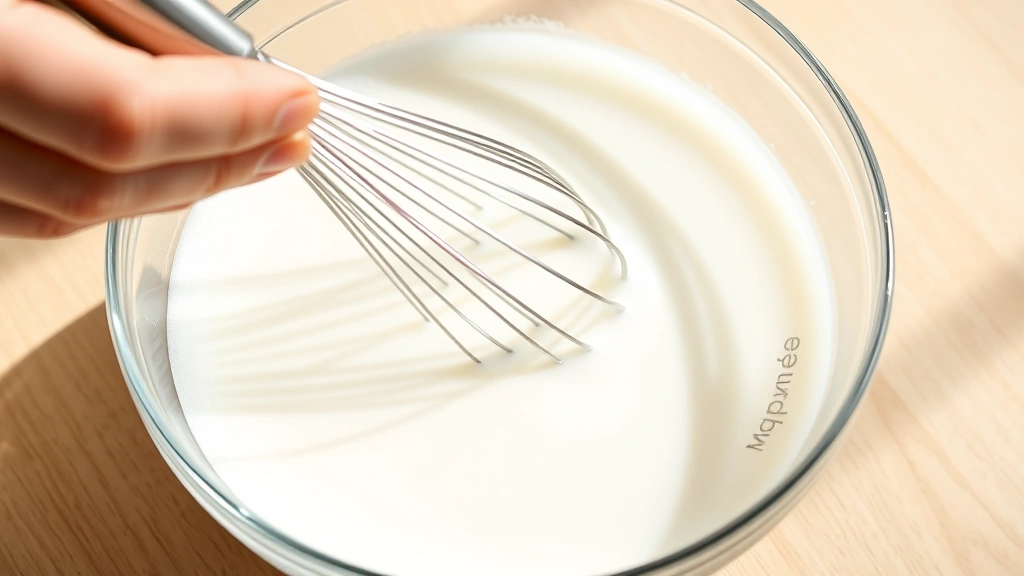
The beauty of cold foam is its simplicity. You don’t need an espresso machine or fancy frother—just a few pantry staples and a little elbow grease (or a handheld mixer). The technique works because you’re incorporating air into cold liquid, which creates those tiny bubbles that give foam its signature light, airy texture.
What makes this approach different from hot milk foam is that cold foam stays stable longer and doesn’t require steam. This means you can make it ahead of time, which is perfect for busy mornings when you’re still half-asleep. Additionally, the cold temperature makes it ideal for iced drinks that would otherwise melt traditional hot foam.
The magic happens when you whisk vigorously for just the right amount of time. Too little whisking and you’ll have flat milk; too much and you’ll end up with separated cream. I’ll walk you through the sweet spot so you nail it every single time.
Ingredient Tips & Substitutions
The foundation of any cold foam recipe starts with milk, but here’s where things get interesting. I prefer using whole milk or 2% because the fat content creates the best, longest-lasting foam. However, if you’re avoiding dairy, oat milk froths beautifully and has this naturally sweet flavor that works wonderfully with coffee.
The sweetener is completely customizable based on your preferences. Honey adds warmth and complexity, while vanilla creates that classic café vibe. For a fun twist, try almond extract, cinnamon, or even a splash of maple syrup. Meanwhile, if you’re keeping things simple, you can absolutely skip the sweetener and let the milk shine on its own.
For the best results, make sure your milk is cold straight from the refrigerator. Room temperature milk won’t create the same texture, and you’ll find yourself whisking forever without achieving that beautiful foam. I keep my mixing bowl in the fridge for five minutes before starting, which sounds extra but genuinely makes a difference.
Consider pairing your foam creations with complementary recipes like the Best Tea Sandwich Recipe for the perfect morning combination, or serve alongside your Best Fresh Tomato Soup Recipe for a cozy lunch setup.
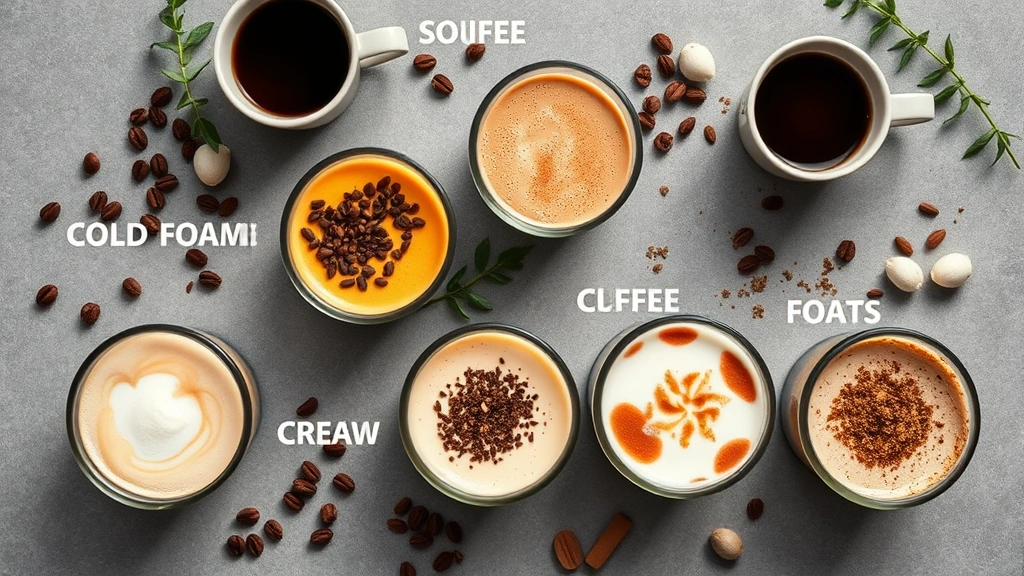
Five Amazing Cold Foam Variations
The classic vanilla honey foam is my go-to, but once you master the basic technique, the possibilities become endless. Each variation takes about two minutes to prepare and completely transforms your drink experience. Here are my five favorite versions that I rotate through depending on my mood and the season.
The first variation is the simple classic: whole milk, honey, and vanilla extract. This is what started my cold foam obsession, and it remains my most-requested flavor. The honey adds subtle sweetness while the vanilla keeps everything refined and sophisticated.
Next up is the brown sugar cinnamon foam, which tastes like autumn in a cup. I whisk cold milk with brown sugar and a generous pinch of cinnamon, then top cold brew coffee with this spiced beauty. It’s warming and comforting, even though everything stays perfectly chilled.
The maple bourbon version (without the alcohol for morning versions) brings a cozy, slightly smoky flavor that pairs beautifully with dark roast coffee. I use pure maple syrup and just a hint of vanilla, and it creates this incredibly rich-tasting topping that makes you feel like you’re at a premium coffee shop.
For something lighter and more refreshing, the coconut lime foam deserves a spot in your rotation. Coconut milk combined with fresh lime juice and a touch of honey creates something tropical and unexpected. It’s perfect over iced chamomile tea or even sparkling water for a non-coffee option.
Finally, there’s the salted caramel foam, which is basically indulgence in a bowl. I whisk cold milk with caramel sauce (store-bought is totally fine) and finish with just a whisper of sea salt. It’s decadent without being overwhelming, and it makes regular coffee feel like a dessert.
How to Achieve Perfect Texture Every Time
The technique is straightforward, but timing matters. Pour your cold milk into a bowl or container, add your flavorings, and then whisk vigorously for about 90 seconds. You’ll notice the milk becoming frothier and lighter in color as you continue whisking.
Stop when you see a foamy layer about half an inch thick on top—that’s your sweet spot. If you keep going, the foam will start to separate and become watery. However, if you stop too early, your foam won’t have enough body to top your drink properly.
For a hands-free version, use an electric handheld mixer on medium-high speed for about 45 seconds. This is genuinely a game-changer if you’re making cold foam daily. The mixer does the work while you’re getting your coffee cup ready, which makes mornings infinitely less chaotic.
You can also use a French press as a frothing vessel if you don’t have other equipment. Pour your milk mixture into the press, pump the plunger up and down vigorously for about 30 seconds, and boom—you’ve got perfect foam without any special gadgets.
Serving Suggestions & Pairing Ideas
Cold foam works beautifully over iced coffee, but that’s just the beginning. Try it over cold brew, iced lattes, or even iced tea for something completely different. The vanilla honey version is exceptional over Earl Grey or English breakfast tea—it elevates your afternoon break into something genuinely special.
For iced chocolate milk (yes, really), cold foam takes it from nostalgic childhood drink to sophisticated treat. I also love topping homemade cold brew concentrate with foam—it creates these gorgeous layers that look absolutely Instagram-worthy.
Beyond beverages, consider using cold foam as a topping for smoothie bowls or acai bowls. The texture adds an unexpected element that your guests will absolutely love. For something savory, a light herb-infused foam (using vegetable broth instead of milk) can elevate soups in surprising ways.
If you’re hosting brunch, make a batch of several foam variations and set them out with cold brew and iced tea so guests can customize their drinks. It’s a simple touch that makes people feel pampered, and it requires minimal effort from you. Additionally, pair your beverage spread with the Tasty Salad in a Jar Recipe and Best Tuna Salad Sandwich Recipe for a complete spread.
Don’t overlook iced cocktails either. A cold foam recipe with whiskey notes (using whiskey-flavored syrup or extract) is spectacular over bourbon cocktails. The foam adds texture and visual interest that makes your home happy hour feel genuinely special.
Storage & Troubleshooting Tips
Cold foam is best used immediately after whisking, but it will hold its structure in the refrigerator for up to 4 hours. If you’re making it ahead for a gathering, whisk it right before serving for the best appearance and texture. If your foam starts to separate slightly, a quick whisk brings it right back together.
If your foam isn’t forming properly, check that your milk is genuinely cold and that you’re whisking vigorously enough. Room temperature milk just won’t cooperate, and lazy whisking never creates enough air bubbles. Meanwhile, if you’re over-whisking and getting separated foam, you’ve gone just a bit too far—pull back about 15 seconds next time.
For skim milk, you may need to whisk slightly longer since there’s less fat to stabilize the foam. Conversely, cream-based cold foam recipes whisk much faster because of the high fat content. The key is watching your foam’s progress rather than relying solely on time.
Store your liquid components in airtight containers for up to one week. This means you can prep vanilla-infused milk or honey-sweetened mixtures ahead and simply whisk when ready. It’s perfect for those mornings when you want something special but don’t have time for extra steps.
According to Serious Eats, understanding milk science helps you master cold foam techniques. For more creative beverage inspiration, check out Bon Appétit’s beverage section. The New York Times cooking section also offers excellent insights into modern drink preparation methods.
This cold foam recipe has genuinely changed how I experience my morning coffee. What started as a curiosity at a café has become my daily ritual, and now I’m excited to share this simple luxury with you. Make a batch this morning, and I promise you’ll wonder why you didn’t discover this sooner.
Ingredients
- 1 cup cold whole milk or 2% milk
- 1 tablespoon honey or maple syrup
- ½ teaspoon vanilla extract
- Pinch of sea salt (optional)
Instructions
- Pour cold milk into a medium bowl or container, making sure it’s fresh from the refrigerator.
- Add honey and vanilla extract to the cold milk.
- Whisk vigorously for 90-120 seconds using a hand whisk, or use an electric handheld mixer on medium-high speed for 45-60 seconds.
- Stop whisking when you see a foamy layer about ½ inch thick forming on top of the milk.
- Carefully spoon the foam onto your cold coffee, iced tea, or other cold beverage, leaving the liquid milk behind in the bowl.
- Sprinkle with sea salt if desired, and serve immediately for best texture and appearance.
Pro Tips
Cold foam is best used immediately after whisking, though it holds for up to 4 hours in the refrigerator. If the foam begins to separate, simply whisk again briefly to bring it back together. For a thicker, more substantial foam, whisk for an additional 30 seconds—just be careful not to over-whisk past the point where it becomes grainy.
Milk selection matters significantly for cold foam success. Whole milk and 2% create the best, longest-lasting foam because of their fat content. However, oat milk is an excellent dairy-free alternative that froths beautifully and has a naturally sweet flavor. Almond milk and soy milk can work but may require slightly longer whisking times. Meanwhile, skim milk will eventually foam but takes noticeably more effort and produces less stable results.
You don’t need fancy equipment for this cold foam recipe. A hand whisk works perfectly fine, though it requires more arm strength. An electric handheld mixer cuts the time in half and requires minimal effort. For those with a milk frother, cold foam settings on modern frothers work wonderfully. A French press can also double as a frothing vessel—simply pour your milk mixture in and pump the plunger vigorously.
Flavor variations are endless and completely customizable. Brown sugar and cinnamon create a cozy autumn vibe, while maple syrup brings warmth perfect for dark roast coffee. Coconut milk with lime juice offers tropical freshness, and caramel sauce (store-bought is fine) creates indulgent richness. For something unexpected, try a pinch of cardamom, a touch of almond extract, or even cocoa powder for chocolate-tinged foam.
Sweetener can be adjusted to your preference or omitted entirely. Some people prefer unsweetened foam that lets their beverage’s natural flavors shine. Others love doubling the honey for extra richness. Keep in mind that honey adds complexity beyond just sweetness, so it’s worth trying at least once even if you typically prefer less sweet drinks.
Storage of prepared components makes mornings easier. Mix honey with vanilla extract and store in a small jar for up to two weeks. Pre-measure your milk into containers if making multiple servings. Then whisking takes just two minutes when you’re ready to enjoy your beverage. This approach is perfect for those who want café-quality drinks without the café wake-up time.