
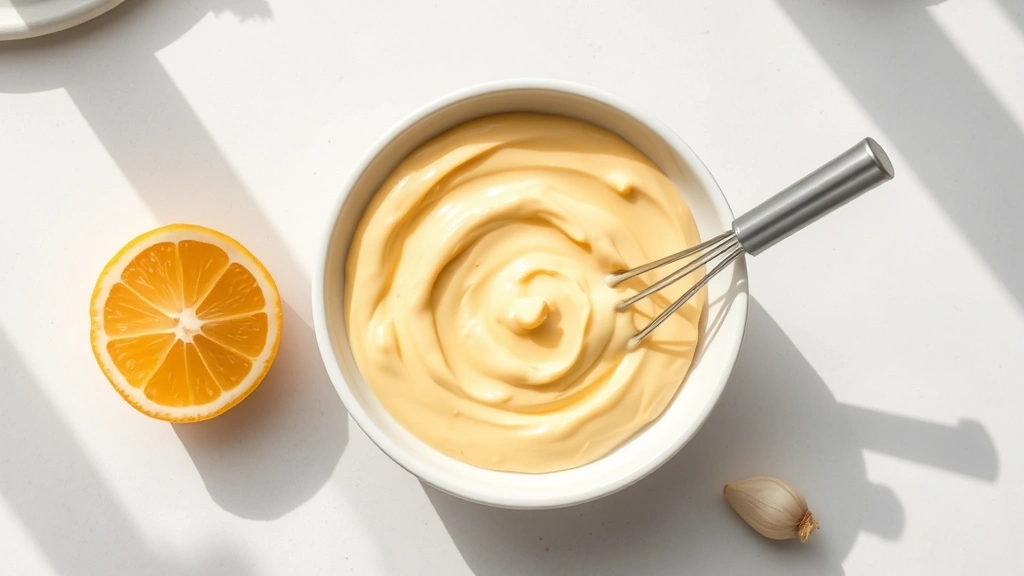
Aioli is one of those magical kitchen staples that transforms ordinary meals into restaurant-quality dishes. This easy aioli recipe is the foundation for so many incredible dishes, and once you master this simple technique, you’ll find yourself making it constantly. The beauty of aioli lies in its simplicity—just a few quality ingredients emulsified together to create silky, luxurious perfection.
Most people think aioli is complicated, but I’m here to tell you it’s actually easier than you might think. Whether you’re making homemade mayonnaise for the first time or you’re a seasoned kitchen pro, this recipe will guide you through each step with confidence. The key is understanding the emulsion process and keeping your ingredients at the right temperature.
Traditionally, aioli hails from the Mediterranean, particularly from regions of Spain and France where garlic and olive oil are kitchen essentials. The classic version is made by hand with a mortar and pestle, but modern kitchen tools make this process incredibly accessible. I love using a food processor or blender for the best results, though you can absolutely make it by hand if you prefer.
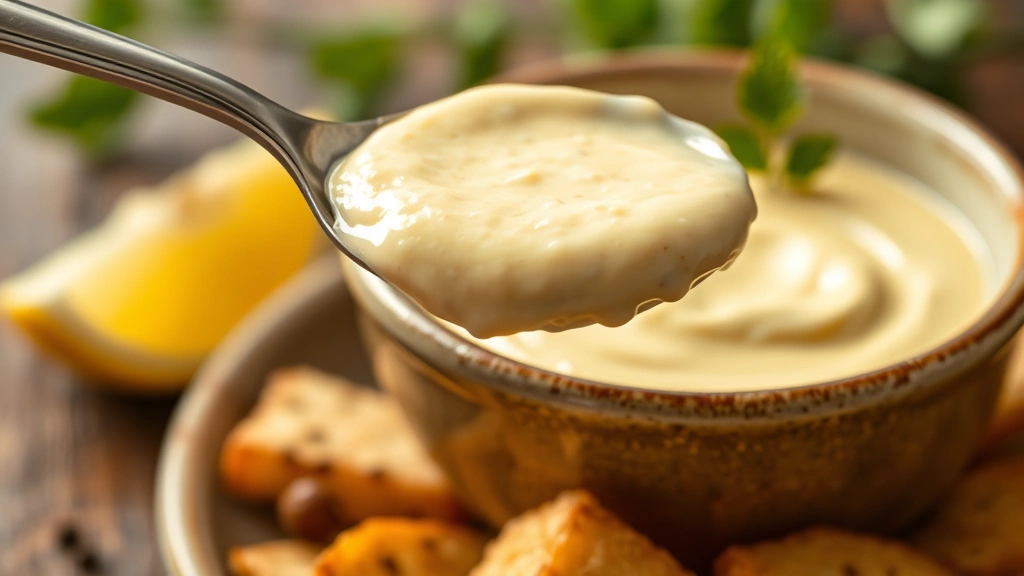
What makes this aioli recipe so special is its versatility. Serve it with crispy homemade fries, spread it on sandwiches, dollop it onto grilled vegetables, or use it as a dipping sauce for seafood. You can also customize it with different herbs, spices, or flavored oils to create variations that match your meal perfectly. Some of my favorite additions include roasted red peppers, saffron, or fresh herbs like basil and tarragon.
I always recommend starting with room temperature ingredients—this is absolutely crucial for successful emulsification. Cold eggs and oil don’t want to come together, so take your time and let everything sit out for about 30 minutes before you begin. This simple step dramatically increases your chances of success.
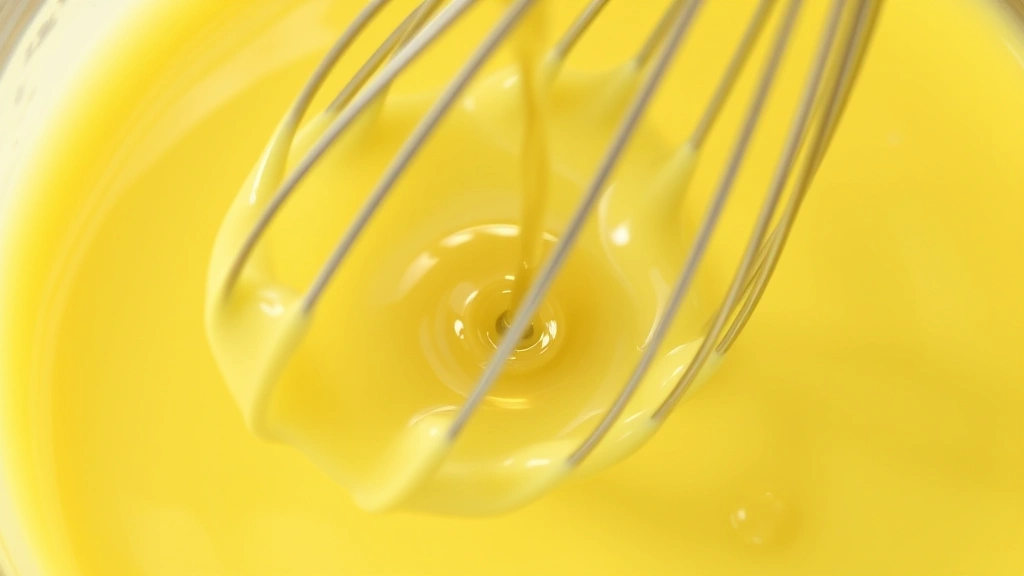
One more important tip: add your oil slowly at first. This is where patience becomes your best friend. The first quarter cup of oil should go in literally drop by drop while you’re whisking or processing. Once the mixture begins to thicken and emulsify, you can increase the oil flow to a thin stream. This gradual process ensures your aioli stays creamy and doesn’t break.
If your aioli does break—don’t worry, it happens to everyone! You can rescue it by starting with a fresh egg yolk in a clean bowl and slowly whisking in the broken aioli. It’s like magic how it comes back together. I’ve saved countless batches this way.
This recipe makes about one cup of aioli, which is perfect for most meals. Store it in an airtight container in the refrigerator for up to one week. I often make a double batch and keep it on hand for quick meals throughout the week. It’s the secret weapon in my kitchen for elevating simple ingredients into something spectacular.
For more inspiration on how to use this aioli, check out these incredible seafood dipping sauces or explore creative sandwich spread ideas. You can also visit Serious Eats’ comprehensive aioli guide for even more variations and techniques.
Ingredients
- 1 large egg yolk, room temperature
- 1 clove garlic, minced very finely (or 1/2 teaspoon garlic paste)
- 1/2 teaspoon Dijon mustard
- 1/4 teaspoon kosher salt
- Pinch of white pepper
- 1 tablespoon fresh lemon juice, room temperature
- 3/4 to 1 cup neutral oil (light olive oil, avocado oil, or vegetable oil), room temperature
- 1/2 teaspoon cold water (if needed for consistency)
Instructions
- Place your egg yolk, minced garlic, Dijon mustard, kosher salt, and white pepper in a medium bowl. If using a food processor or blender, add these ingredients to the work bowl instead.
- Whisk the ingredients together vigorously for about 30 seconds until well combined and slightly pale. If using a food processor, pulse for about 5 seconds until combined.
- Add half of the lemon juice to the mixture and whisk well to incorporate. This helps stabilize the emulsion and adds flavor.
- Begin adding your oil one drop at a time while whisking constantly (or processing on medium speed if using a food processor). This step takes patience—do not rush it. The mixture should begin to thicken and become pale after about 1 minute of adding oil drop by drop.
- Once the mixture has noticeably thickened and emulsified (after about 1/4 cup of oil has been incorporated), you can increase the flow of oil to a thin, steady stream while continuing to whisk or process.
- Continue adding oil in a thin stream while whisking constantly for another 2-3 minutes, until all the oil is incorporated and the aioli is thick, creamy, and pale yellow.
- Taste the aioli and add the remaining lemon juice, adjusting the salt and pepper to your preference. Whisk in the additional lemon juice until fully combined.
- If the aioli is too thick, whisk in the cold water a few drops at a time until you reach your desired consistency. It should be spreadable but still hold its shape.
- Transfer the aioli to a clean jar or container with a tight-fitting lid. Store in the refrigerator for up to one week.
- Before serving, give the aioli a quick stir or whisk to ensure it’s smooth and well combined, as it may separate slightly during storage.
Pro Tips
- **Room Temperature is Key**: This cannot be overstated. All ingredients, especially the egg yolk and oil, should be at room temperature (around 70°F). Cold ingredients won’t emulsify properly and your aioli will likely break.
- **Oil Selection Matters**: Use a neutral oil with a mild flavor for classic aioli. Light olive oil works well, but avoid extra virgin olive oil for the base recipe as its strong flavor can overpower. Save your best extra virgin olive oil for drizzling on top or for flavored variations.
- **The Broken Aioli Fix**: If your aioli breaks and becomes thin and oily, don’t throw it away! Start with a fresh room-temperature egg yolk in a clean bowl. Slowly whisk in the broken aioli drop by drop, just as if you were starting from scratch. It will come back together.
- **Garlic Preparation**: For the smoothest aioli, use a garlic press or mince your garlic extremely finely. You can also use garlic paste or 1/4 teaspoon of garlic powder as alternatives. Fresh garlic gives the best flavor.
- **Flavor Variations**: Add roasted red peppers, saffron threads, fresh herbs (basil, tarragon, dill), smoked paprika, cayenne pepper, or sun-dried tomatoes. Add these after the emulsion is complete to avoid interfering with the process.
- **Storage Tips**: Keep your aioli in an airtight container in the coldest part of your refrigerator. It will keep for up to one week. Some people add a small amount of water on top to create a seal and extend shelf life.
- **Egg Safety**: Use pasteurized eggs if you’re concerned about food safety, or look for pasteurized eggs specifically labeled for raw consumption at your grocery store.
- **Whisking vs. Food Processor**: While a food processor makes this incredibly fast, whisking by hand gives you better control and helps you feel when the emulsion is forming. Try both methods to see which you prefer.
- **Consistency Control**: Your aioli’s thickness depends on how much oil you add. For a thicker consistency (like for piping), use the full cup of oil. For a thinner consistency (like for drizzling), add water or lemon juice to loosen it.
- **Serving Suggestions**: Serve with crispy fries, grilled fish, roasted vegetables, on sandwiches, with shrimp, as a dip for artichokes, or alongside roasted chicken. The possibilities are truly endless.
Pingback: How to Make the Best Pan Fried Salmon Recipe! – Simple Recipe Finder