
Anaheim peppers are a culinary treasure that deserves a place in your kitchen! These mild, versatile chiles are perfect for anyone looking to add a subtle heat and wonderful depth of flavor to their dishes. With their long, slender shape and beautiful green color, Anaheim peppers are both beautiful and delicious. Whether you’re roasting them until their skin is charred and blistered, stuffing them with cheese and meat, or incorporating them into sauces and salsas, these peppers deliver consistent, approachable heat that won’t overpower your palate.
The beauty of Anaheim peppers lies in their versatility. Unlike their spicier cousins, they rank between 500-2,500 on the Scoville scale, making them accessible to those who prefer milder heat. They’re perfect for roasting and peeling, which brings out their natural sweetness and creates a silky texture ideal for countless preparations. I’ve been cooking with these peppers for years, and I always find myself reaching for them when I want authentic flavor without excessive heat.
In this comprehensive guide, I’ll walk you through everything you need to know about preparing and cooking with Anaheim peppers. From selecting the best peppers at your market to mastering the roasting technique, you’ll discover why these chiles are a staple in Southwestern and Mexican cuisine. We’ll explore classic preparations like chile rellenos, as well as modern interpretations that showcase their unique flavor profile. Whether you’re a seasoned cook or just beginning your pepper journey, this recipe will elevate your cooking game.
I love teaching people how to work with fresh peppers because the transformation is truly magical. When you roast an Anaheim pepper, the heat causes the skin to separate from the flesh, making it easy to peel away and revealing the tender, slightly sweet pepper underneath. This technique is the foundation for so many delicious dishes, and once you master it, you’ll find yourself using it again and again. The proper storage and handling of fresh peppers also ensures you get the maximum flavor from your ingredients.
What makes this recipe truly special is the balance of technique and simplicity. You don’t need fancy equipment or complicated steps—just fresh Anaheim peppers, your oven or stovetop, and a little patience. The result is restaurant-quality peppers that you can use in countless ways. Choosing the right cheese and fillings is equally important, as it complements the natural flavor of the peppers beautifully.
For those interested in expanding their pepper repertoire, poblano peppers offer a similar cooking method with slightly different flavor notes. The techniques you learn here will transfer beautifully to other mild chiles. Many home cooks find that once they understand how to roast and prepare one type of pepper, they become confident experimenting with others.
I’ve included detailed instructions for roasting, peeling, and preparing these peppers, along with serving suggestions and storage tips. According to Serious Eats’ pepper guide, Anaheim peppers are among the most approachable options for home cooks. Whether you’re making traditional chile rellenos or using them in your own creative dishes, you’ll find that these peppers are wonderfully forgiving and consistently delicious.
The wonderful thing about working with Anaheim peppers is that they’re available year-round in most markets, making them perfect for planning menus. Bon Appétit’s roasted chile recipe offers additional inspiration for creative applications. I encourage you to experiment with different fillings and preparations—there’s truly no wrong way to enjoy these magnificent peppers. Let’s dive into the technique and discover why Anaheim peppers might just become your new favorite ingredient!
Ingredients
- 8 fresh Anaheim peppers, medium-sized
- 3 tablespoons olive oil
- 2 cups shredded Oaxaca cheese or mozzarella
- 1 medium white onion, thinly sliced
- 4 garlic cloves, minced
- 1 cup Mexican crema or sour cream
- 1 cup whole milk
- 2 tablespoons fresh cilantro, chopped
- 1 jalapeño, seeded and minced (optional)
- 1 teaspoon salt
- ½ teaspoon black pepper
- ¼ teaspoon ground cumin
- Pinch of paprika
- 2 tablespoons flour
- Vegetable oil for roasting
Instructions
- Preheat your oven to 425°F (220°C). Line a baking sheet with aluminum foil for easy cleanup and to help distribute heat evenly around the peppers.
- Rinse the Anaheim peppers under cool running water and pat them completely dry with paper towels. Moisture on the skin can cause steaming instead of proper charring.
- Lightly brush each pepper with vegetable oil on all sides, using about 1 tablespoon total. This helps the skin char evenly and improves browning.
- Arrange the oiled peppers directly on the prepared baking sheet in a single layer, leaving space between each one for air circulation.
- Place the baking sheet in the preheated oven on the middle rack. Roast for 15-20 minutes, turning the peppers every 5 minutes with tongs to ensure even charring on all sides.
- The peppers are done when the skin is completely blackened and blistered all over. This is essential for easy peeling and developing the deep roasted flavor.
- Carefully remove the baking sheet from the oven and transfer the hot peppers to a large bowl. Cover the bowl tightly with plastic wrap or a lid.
- Let the peppers steam in their own heat for 10 minutes. This step is crucial—the steam causes the charred skin to separate from the flesh, making peeling much easier.
- Remove the plastic wrap and let the peppers cool until you can handle them with your bare hands, about 5 more minutes.
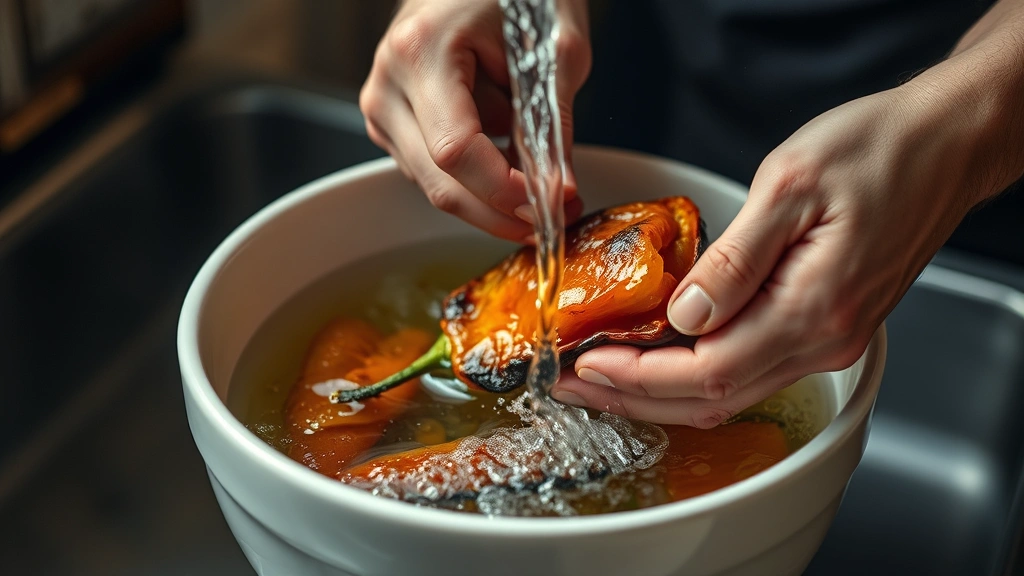
- Working over a colander to catch the juices, gently rub the charred skin off each pepper under cool running water. Use your thumbs to gently peel away the blackened exterior.
- Make a small slit along the length of each pepper and carefully remove the seeds and white membrane inside. Rinse gently to remove any remaining seeds.
- Pat the peeled peppers dry with paper towels and set aside on a clean plate.
For the filling and sauce:
Heat 2 tablespoons of olive oil in a large skillet over medium heat. Add the sliced onion and cook for 3-4 minutes until softened and fragrant.
- Add the minced garlic to the skillet and cook for 1 more minute, stirring constantly to prevent burning. The mixture should smell incredibly aromatic.
- In a separate bowl, whisk together the Mexican crema, milk, and flour until smooth and completely free of lumps. This creates a silky sauce base.
- Pour the crema mixture into the skillet with the onions and garlic, stirring constantly. Add salt, black pepper, cumin, and paprika.
- Continue stirring over medium heat for 5-7 minutes until the sauce thickens slightly and coats the back of a spoon. It should reach a gentle simmer.
- Stir in the fresh cilantro and minced jalapeño if using. Taste the sauce and adjust seasonings as needed.
- In a small bowl, mix the shredded cheese with a pinch of salt and pepper.
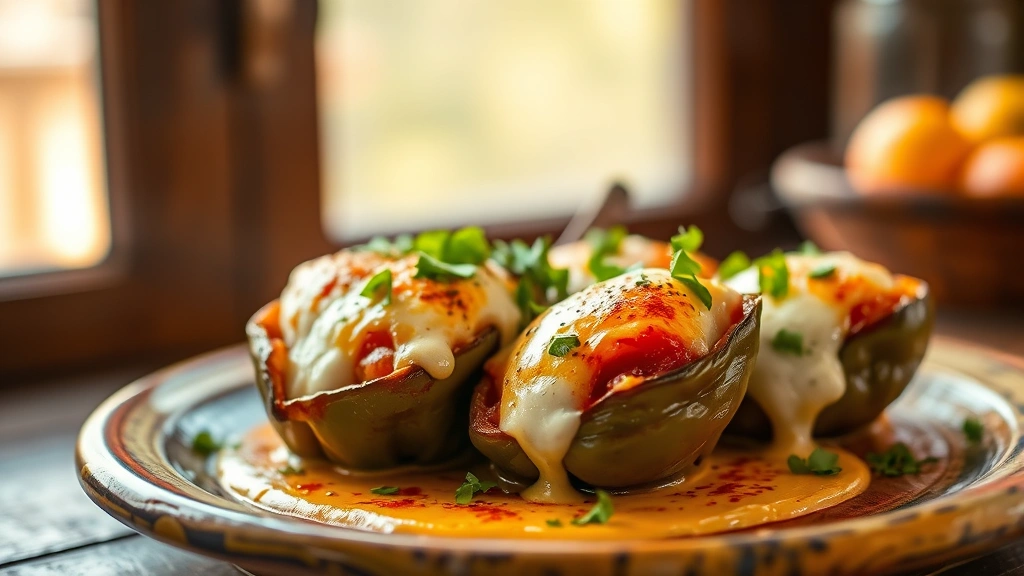
Assembly:
Spoon a thin layer of the cream sauce onto the bottom of a 9×13 inch baking dish.
- Carefully stuff each roasted pepper with approximately 2-3 tablespoons of the shredded cheese, distributing it evenly inside the pepper.
- Arrange the stuffed peppers seam-side down in the baking dish, nestling them close together in a single layer.
- Pour the remaining cream sauce evenly over the stuffed peppers, making sure to coat them well. Sprinkle any remaining cheese over the top.
- Bake in the preheated 425°F oven for 12-15 minutes until the sauce is bubbling at the edges and the cheese on top is melted and slightly golden.
- Remove from the oven and let rest for 3-5 minutes before serving. Garnish with additional fresh cilantro and serve hot.

Pro Tips
- **Selecting Anaheim Peppers**: Choose peppers that are firm, smooth-skinned, and free of blemishes. They should feel heavy for their size, indicating good moisture content. Avoid any that are soft or have dark spots, as these are past their prime.
- **Roasting Alternatives**: If you don’t have an oven, you can roast peppers directly over a gas flame using tongs, or place them under your broiler for 12-15 minutes, turning frequently. The key is achieving an even char on the entire surface.
- **Peeling Tips**: The steam bath is absolutely essential—don’t skip this step! If your peppers aren’t peeling easily, return them to the bowl and cover for another 2-3 minutes. Some peppers take longer than others depending on thickness.
- **Make-Ahead Instructions**: Roast and peel the peppers up to 2 days in advance. Store them in an airtight container in the refrigerator. You can also freeze roasted, peeled peppers for up to 3 months when stored properly in freezer bags.
- **Cheese Variations**: Oaxaca cheese is traditional and has a beautiful melting quality, but you can substitute with fresh mozzarella, Chihuahua cheese, or a combination of Mexican cheeses. Avoid pre-shredded cheese if possible, as it contains anti-caking agents that affect melting.
- **Sauce Consistency**: If your sauce seems too thick, whisk in additional milk a tablespoon at a time. If it’s too thin, mix 1 tablespoon flour with 2 tablespoons cold milk to create a slurry, then whisk it in.
- **Serving Suggestions**: Serve hot with warm flour tortillas, Mexican rice, and refried beans. A simple green salad with lime vinaigrette complements the richness of the dish beautifully.
- **Spice Level**: Anaheim peppers are naturally mild. If you prefer more heat, add diced jalapeños to the filling or increase the amount in the sauce. You can also add a pinch of cayenne pepper to the cream sauce.
- **Leftover Storage**: Store cooled chile rellenos in an airtight container in the refrigerator for up to 3 days. Reheat gently in a 350°F oven for 15-20 minutes, covered with foil, to prevent drying out.
- **Vegetarian Option**: This recipe is naturally vegetarian. For a vegan version, substitute the cream with cashew cream, use dairy-free cheese, and replace milk with unsweetened plant milk.