
There’s something absolutely magical about homemade pickled banana peppers that store-bought versions simply cannot capture. These vibrant, tangy peppers are the perfect addition to charcuterie boards, tacos, nachos, or enjoyed straight from the jar as a zesty snack. What I love most about this recipe is how simple it truly is – you likely have most of these ingredients in your pantry already!
Pickled banana peppers have been a staple in kitchens for generations, and for good reason. They’re versatile, delicious, and incredibly easy to make. The beauty of making them at home is that you control the heat level, the vinegar strength, and exactly how crisp you want them to be. Plus, your kitchen will smell absolutely divine while they’re simmering away.
I’ve been making these for years, and I’m so excited to share my foolproof method with you today. This recipe yields perfectly crisp, tangy peppers that will last for months in your refrigerator – though I promise they won’t stick around that long! The key to success is using fresh, firm peppers and not overcooking them during the initial blanching process. Check out our other pickled vegetable recipes for more preservation ideas.
Whether you’re a pickling novice or a seasoned pro, this recipe will guide you through every step to create restaurant-quality pickled banana peppers at home. The combination of vinegar, spices, and fresh garlic creates a brine that’s absolutely irresistible. I recommend making a double batch because once people taste these, they’ll be asking for jars as gifts!
One of my favorite things about this recipe is how customizable it is. Want them spicier? Add more red pepper flakes. Prefer them milder? Reduce the heat. Like a sweeter pickle? Add an extra tablespoon of sugar. Learn our essential canning tips before you get started. The foundation of this recipe is solid, but your personal preferences should always shine through. I’ve included detailed notes below with all my pro tips and storage suggestions to ensure your pickled banana peppers turn out perfectly every single time.
Ingredients
- 2 pounds fresh banana peppers, washed and trimmed
- 4 cups white vinegar (5% acidity)
- 2 cups water
- 3 tablespoons sugar
- 2 tablespoons kosher salt
- 6 cloves fresh garlic, peeled and sliced
- 2 teaspoons mustard seeds
- 1 teaspoon yellow mustard powder
- 1 teaspoon red pepper flakes (adjust to taste)
- 1 teaspoon black peppercorns
- 3 bay leaves
- 3 teaspoons dill seeds or 6 fresh dill sprigs
- 3 sterilized pint-sized mason jars with lids and bands
Instructions
- Wash your banana peppers thoroughly under cool running water and pat them completely dry with paper towels. This step is crucial for preventing excess moisture in your jars.
- Using a sharp knife or vegetable peeler, carefully slice a small slit near the stem end of each pepper. This allows the brine to penetrate the pepper and ensures they pickle evenly throughout.
- Bring a large pot of water to a rolling boil. Carefully add the prepared banana peppers and blanch them for exactly 3-4 minutes. You want them to soften just slightly while maintaining their crispness.
- Using a slotted spoon, transfer the blanched peppers to a colander and rinse them immediately under cold running water to stop the cooking process. Set them aside to cool and drain completely.
- In a large stainless steel pot, combine the white vinegar, water, sugar, and kosher salt. Stir well until the sugar and salt are completely dissolved.
- Add the mustard seeds, mustard powder, red pepper flakes, black peppercorns, and bay leaves to the brine. Bring the mixture to a gentle boil over medium-high heat.
- Reduce the heat to medium and let the brine simmer for 5 minutes to allow the spices to infuse fully into the liquid.
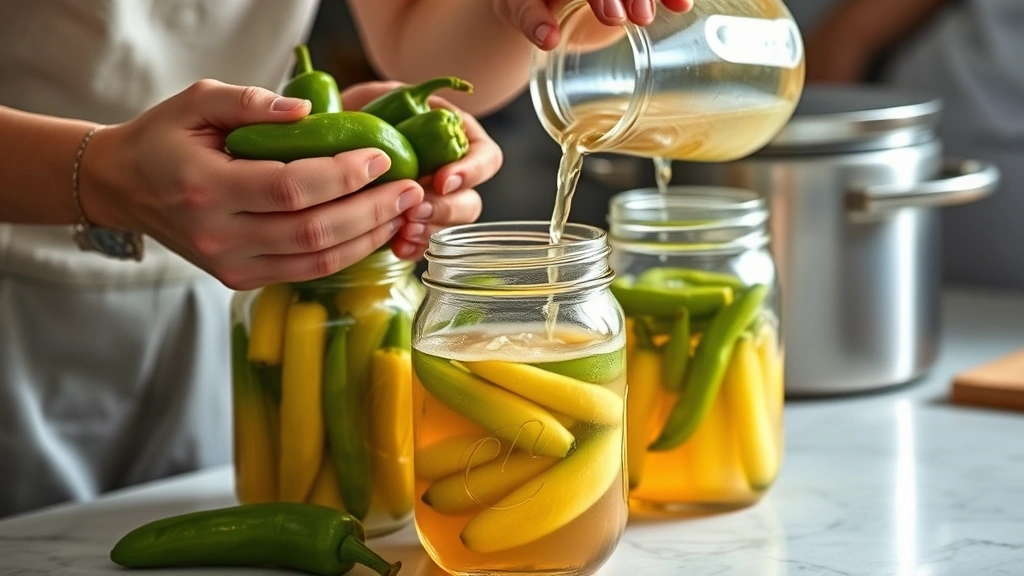
- While the brine is simmering, divide the sliced garlic and dill seeds equally among your three sterilized mason jars (about 2 cloves and 1 teaspoon dill per jar).
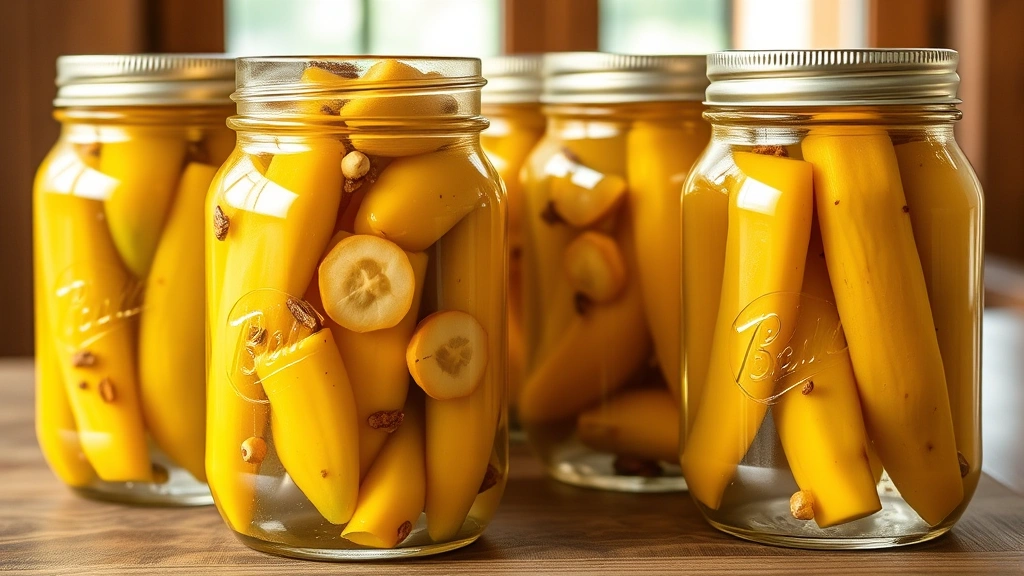
- Carefully pack the cooled banana peppers into each jar, standing them upright and arranging them as tightly as possible without crushing them. Leave about ½ inch of headspace at the top of each jar.
- Slowly pour the hot brine over the peppers, ensuring that all peppers are completely covered and the liquid reaches within ½ inch of the jar rim.
- Wipe the rims of each jar clean with a damp cloth to remove any residue or brine drips.
- Place the sterilized lids on the jars and screw the bands on firmly but not too tightly – they should be snug enough to stay in place but loose enough that air can escape during processing.
- For shelf-stable storage, process the jars in a boiling water bath for 10 minutes. If you prefer refrigerator storage, simply allow the jars to cool to room temperature, then refrigerate immediately.
- Allow the jars to cool completely at room temperature for at least 12 hours before opening. The peppers will continue to pickle and develop flavor during this time.
- Check the seals on water-bath processed jars by pressing the center of each lid – it should be concave (curved downward). If any lids pop back up, refrigerate those jars and use within 3 weeks.
- Label your jars with the date and store them in a cool, dark place. Check our complete food storage guidelines for optimal preservation.
- Once opened, keep jars refrigerated and use within 2-3 weeks for best quality and crispness.
Pro Tips
- **Pepper Selection**: Choose firm, unblemished banana peppers for the best results. Avoid any that show signs of softness or damage, as these won’t pickle well and may compromise your entire batch.
- **Blanching is Essential**: Don’t skip the blanching step! This brief cooking process softens the pepper skin just enough to allow brine penetration while maintaining that satisfying crunch you want in a pickled pepper.
- **Vinegar Matters**: Use vinegar with 5% acidity. White vinegar, distilled vinegar, and rice vinegar all work well. Avoid specialty vinegars or those with unknown acidity levels, as they may affect preservation.
- **Sterilization Process**: To sterilize your jars, wash them in hot soapy water, rinse thoroughly, and either run them through a hot dishwasher cycle or submerge them in boiling water for 10 minutes. Keep them hot until ready to fill.
- **Customization Options**: Add fresh herbs like oregano, basil, or thyme for Italian-inspired peppers. Include whole peppercorns for extra heat, or add a pinch of celery seed for complexity. You can also include thin slices of fresh ginger for an Asian twist.
- **Heat Level Control**: The red pepper flakes can be adjusted to your preference. Start with ½ teaspoon per jar for mild, 1 teaspoon for medium, and up to 2 teaspoons for very spicy peppers.
- **Storage Options**: Water-bath processed jars will keep in a cool, dark pantry for up to 1 year. Refrigerator-stored jars will keep for 2-3 weeks. Once opened, all jars must be refrigerated.
- **Flavor Development**: These peppers taste good immediately but are absolutely incredible after 2-3 weeks. The flavors meld and intensify over time, so if you can wait, do!
- **Uses and Serving**: Serve on nachos, tacos, hot dogs, sandwiches, or charcuterie boards. Chop them for pizza toppings, mix into cream cheese for a dip, or enjoy straight from the jar as a snack.
- **Troubleshooting**: If peppers become too soft, you either blanched them too long or your jars weren’t hot enough when filling. If they taste too vinegary, reduce vinegar by ¼ cup next time. If not tangy enough, increase vinegar slightly.
- **Gifting**: Pack these beautiful jars in a box with crusty bread, cheese, and cured meats for an impressive homemade gift. Include a label with the date and any special ingredients you used.