
Fire Resistance Potion is a legendary Minecraft brewing recipe that grants temporary immunity to fire and lava damage—perfect for exploring the Nether or battling blazes. This comprehensive guide walks you through every step of crafting this essential potion, from gathering your brewing ingredients to perfecting your technique.
In Minecraft, brewing potions is both an art and a science. The Fire Resistance Potion stands out as one of the most valuable survival potions you can create, offering complete protection from fire, lava, and magma blocks for up to 3 minutes (or 8 minutes with the Extended variant). Whether you’re a seasoned player planning a dangerous expedition or a newcomer looking to master the brewing stand, understanding how to craft Fire Resistance Potion is crucial for progression and survival.
The beauty of this potion lies in its straightforward brewing process. Unlike some complex potions that require multiple steps and ingredient combinations, Fire Resistance follows a simple formula: Awkward Potion + Magma Cream = Fire Resistance Potion. However, gathering the necessary components and understanding the mechanics behind successful brewing can be challenging for newer players.
Before you begin brewing, you’ll need to locate and gather several key ingredients. The foundation of any potion is the Awkward Potion, which itself requires specific components. You’ll also need to find or craft Magma Cream, which serves as the active ingredient that grants fire immunity. Understanding where to find these materials and how to prepare them will set you up for brewing success.
This guide covers everything you need to know: where to find Magma Cream in the wild, how to craft it if you prefer not to hunt, the step-by-step brewing process, and tips for maximizing your potion production. We’ll also explore variations like the Extended Fire Resistance Potion and discuss common brewing mistakes to avoid. By the end of this guide, you’ll be confidently brewing batches of Fire Resistance Potion and exploring the Nether with complete peace of mind.
See our guide on Minecraft Brewing Basics for foundational potion knowledge, or check out How to Make Awkward Potions for detailed instructions on preparing your base potion. For more Nether exploration tips, visit our Complete Nether Survival Guide. You might also find our Magma Cube Farming Setup helpful for sustainable ingredient gathering. Learn more about potion brewing mechanics at Minecraft Wiki’s Brewing Stand guide, explore potion strategies at Reddit’s Minecraft community, and check YouTube tutorials on potion brewing for visual demonstrations.
Ingredients
- 1 Brewing Stand (crafted or found in villages/Nether fortresses)
- 3 Glass Bottles (crafted from glass blocks)
- 3 Awkward Potions (made from water bottles + Nether Wart)
- 3 Magma Cream (dropped by Magma Cubes or crafted from Slimeballs + Blaze Powder)
- 1 Blaze Rod (from Blazes in Nether Fortress) – optional if crafting Magma Cream
- 1 Slimeball (from Slimes) – optional if crafting Magma Cream
- 3 Water Bottles (crafted glass bottles filled with water)
- 3 Nether Wart (grown in Soul Sand or found in Nether Fortress chests)
- 1 Cauldron (optional, for batch storage)

Instructions
- Locate or craft a Brewing Stand by placing Blaze Rod in the center of a crafting grid surrounded by Cobblestone blocks (Cobblestone in corners and edges, Blaze Rod in middle). If you can’t find Cobblestone, any stone-type block works as a substitute.
- Place your Brewing Stand on a flat surface where you plan to brew, ensuring it has adequate space around it for movement and organization of ingredients.
- Gather 3 Glass Bottles by crafting them from glass blocks in a V-shape pattern (3 glass blocks arranged like an upside-down U in the crafting grid). Glass is made by smelting Sand in a furnace.
- Fill each Glass Bottle with Water by right-clicking on a water source (river, ocean, or cauldron filled with water). You now have 3 Water Bottles—the base ingredient for all potions.
- Obtain Nether Wart by either growing it on Soul Sand in the Overworld or harvesting it from Nether Fortress structures where it grows naturally on Soul Sand blocks.
- Place your 3 Water Bottles into the three bottom slots of the Brewing Stand by right-clicking on the input slots at the base of the stand.
- Add Nether Wart to the top ingredient slot (the single slot at the peak of the Brewing Stand) by right-clicking with Nether Wart in hand.
- Wait 20 seconds as the Brewing Stand processes the ingredients. You’ll see the potion bottles glow with movement and particles will appear around the stand.
- Once brewing completes, your 3 Water Bottles will transform into 3 Awkward Potions, which appear slightly purple and are the foundation for all effect potions.
- Locate Magma Cubes in the Nether (they spawn in Magma Blocks areas, typically found in the Nether) or craft Magma Cream by combining Blaze Powder (obtained by smelting Blaze Rods) with Slimeballs in a crafting grid (2 ingredients anywhere in the grid creates 3 Magma Cream).
- Collect at least 3 Magma Cream by either farming Magma Cubes with a grinder or crafting batches from Blaze Powder and Slimeballs gathered from your collection runs.
- Return to your Brewing Stand and replace any empty Awkward Potion bottles with fresh ones if needed, or proceed with your current batch of 3 Awkward Potions.
- Place your 3 Awkward Potions back into the three bottom slots of the Brewing Stand (they should still be there from your previous brewing session).
- Add 1 Magma Cream to the top ingredient slot of the Brewing Stand by right-clicking with Magma Cream in your hand.
- Wait an additional 20 seconds as the Brewing Stand processes the Magma Cream into your Awkward Potions, converting them into Fire Resistance Potions.
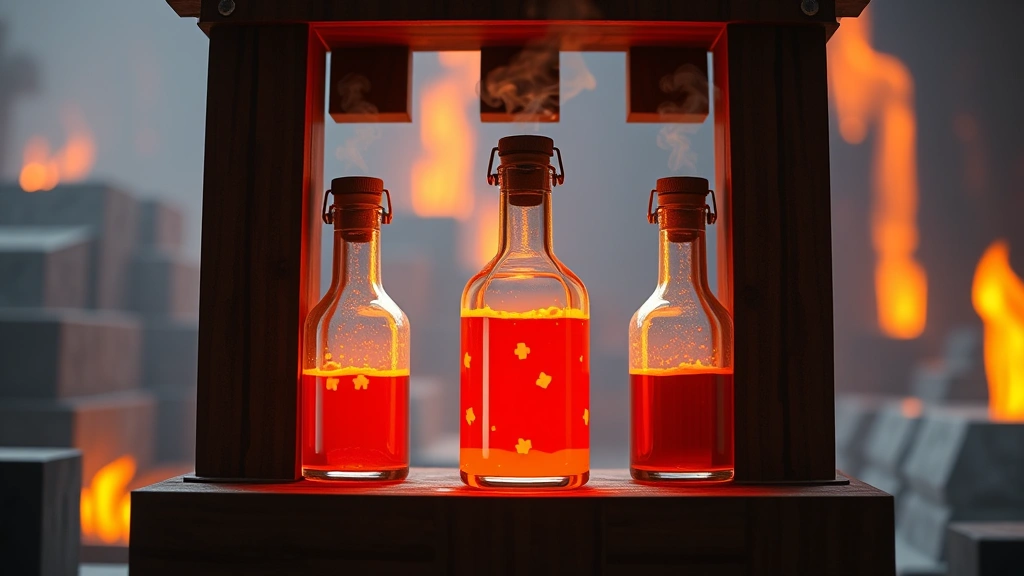
- Once brewing completes, your bottles will glow with a different color (orange-red tinted) and particles will indicate the brewing process has finished.
- Carefully remove your 3 Fire Resistance Potions from the Brewing Stand by right-clicking on each bottle slot, storing them in your inventory.
- Test one Fire Resistance Potion by right-clicking it to drink and verify you receive the Fire Resistance effect (you’ll see a visual effect and the status appears in your inventory).
- For Extended Fire Resistance Potions lasting 8 minutes instead of 3 minutes, place your Fire Resistance Potions back into the Brewing Stand and add Redstone to the top ingredient slot, then wait 20 seconds.
- Store your completed Fire Resistance Potions in a safe location, preferably in a barrel or chest in your base for easy access before Nether expeditions.

Pro Tips
- **Magma Cream Farming**: Create an efficient farm by building a grinding chamber with fall damage system to collect Magma Cream from Magma Cubes spawning naturally in Nether Magma areas. This provides sustainable ingredient supply for large-scale potion brewing.
- **Awkward Potion Preparation**: Always prepare multiple Awkward Potions in advance before attempting to brew Fire Resistance Potions, as running out mid-session requires restarting the brewing process completely.
- **Brewing Stand Fuel**: Note that Brewing Stands don’t require fuel—they operate via magic and can brew continuously as long as you have ingredients available, making them unique among Minecraft crafting stations.
- **Batch Brewing Efficiency**: Brew potions in batches of three by using all three Brewing Stand slots simultaneously. This maximizes efficiency compared to brewing single potions individually.
- **Extended Duration Variant**: After creating Fire Resistance Potions, you can extend their duration from 3 minutes to 8 minutes by adding Redstone dust (obtained from mining Redstone ore) in a second brewing session, though this sacrifices the splash potion upgrade path.
- **Splash Potion Conversion**: To create Splash Fire Resistance Potions (throwable versions), take regular Fire Resistance Potions and add Gunpowder (from Creepers) to the Brewing Stand. Splash potions affect all entities in the impact radius.
- **Nether Wart Growing**: Plant Nether Wart on Soul Sand in the Overworld for reliable renewable ingredient source. It grows faster with bone meal and provides a steady supply without Nether fortress farming.
- **Common Brewing Mistakes**: Forgetting to fill bottles with water before starting (always start with water bottles, not empty bottles), adding wrong ingredients to wrong slots, or attempting to use regular potions as base instead of Awkward Potions.
- **Storage and Organization**: Keep Fire Resistance Potions in organized chests labeled by effect and duration. Color-coded shulker boxes help quickly identify potion types during expeditions.
- **Pre-Expedition Preparation**: Brew Fire Resistance Potions well before planned Nether trips so you’re not rushed gathering ingredients. A prepared explorer carries multiple stacks of potions for extended safety.
- **Blaze Rod Collection**: Defeat Blazes in Nether Fortresses to collect Blaze Rods for Magma Cream crafting. Use a Looting III sword to increase drop rates, and collect at least 20-30 rods for comfortable brewing sessions.
- **Cauldron Storage**: Place a water-filled cauldron near your Brewing Stand for convenient refilling water bottles between brewing sessions, saving inventory space and travel time.