
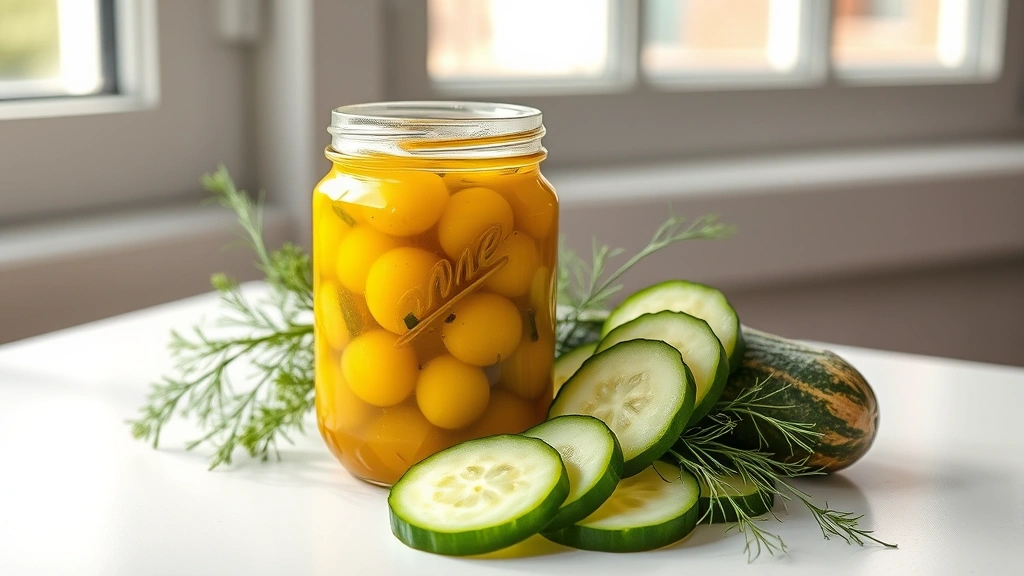
There’s nothing quite like homemade dill pickle relish to elevate your hot dogs, burgers, and sandwiches to gourmet status. This classic condiment is bursting with bright, tangy flavors and the perfect crunch that store-bought versions simply can’t match. What makes this recipe so special is the balance of fresh dill, crisp cucumbers, and just the right amount of vinegar and spices to create that addictive pickle flavor we all crave.
I’ve been making this relish for years, and it’s become a staple in my kitchen during summer when cucumbers are at their peak. The beauty of homemade relish is that you control every element—from the size of the pickle pieces to the intensity of the dill flavor. Whether you’re a seasoned home canner or just looking to try your hand at preserving, this recipe is forgiving and absolutely foolproof.
The process is surprisingly simple. You’ll start with fresh pickling cucumbers, finely dice them with crisp onions and red bell peppers, then combine everything with a flavorful brine infused with fresh dill, garlic, and traditional pickling spices. What I love most is that you can make this in small batches and enjoy it fresh from the refrigerator within just a few days, or go the traditional route and can it for long-term storage. Either way, you’ll have a homemade condiment that tastes infinitely better than anything you’ll find on a grocery store shelf.
This relish pairs beautifully with perfectly grilled hot dogs, classic burger recipes, and even charcuterie boards. You can also use it as a topping for fish tacos, cream cheese and crackers, or anywhere you’d use traditional pickle relish. The versatility is endless, and once you start making your own, you’ll never look back.
For detailed canning instructions, check out Serious Eats’ comprehensive guide to preserved vegetables, or visit Bon Appétit’s quick pickle method for faster results. The New York Times also offers excellent pickle-making techniques that complement this recipe beautifully.
Ingredients
- 4 pounds fresh pickling cucumbers (Kirby cucumbers), finely diced
- 2 medium yellow onions, finely diced
- 2 red bell peppers, finely diced
- 1/4 cup fresh dill, finely chopped (or 2 tablespoons dried dill)
- 1/4 cup fresh parsley, finely chopped
- 3 cloves garlic, minced
- 2 cups white vinegar (5% acidity)
- 1 cup apple cider vinegar
- 1/2 cup granulated sugar
- 3 tablespoons pickling salt (or kosher salt)
- 2 tablespoons mustard seeds
- 1 tablespoon celery seeds
- 1 tablespoon black peppercorns
- 1 tablespoon coriander seeds
- 1/2 teaspoon red pepper flakes
- 1/2 teaspoon turmeric
- 4-5 bay leaves
- Ice water as needed
Instructions
- Prepare your cucumbers by washing them thoroughly under cold running water and patting dry. Cut off the blossom ends (which contain enzymes that can make pickles soft) and discard. Finely dice the cucumbers into approximately 1/4-inch pieces, transferring them to a large colander as you work.
- Dice the onions and red bell peppers into similar-sized pieces to match the cucumbers. This ensures even flavor distribution and a consistent texture throughout your relish.
- Place the diced cucumbers in the colander and sprinkle with 2 tablespoons of pickling salt. Toss gently to coat, then set the colander over a large bowl. Let sit for 2-3 hours to allow the cucumbers to release their excess water. This step is crucial—it prevents a watery, diluted relish.
- After the cucumbers have drained, gather the colander contents in a clean kitchen towel and gently squeeze out as much liquid as possible. Transfer the drained cucumbers to a large, clean bowl.
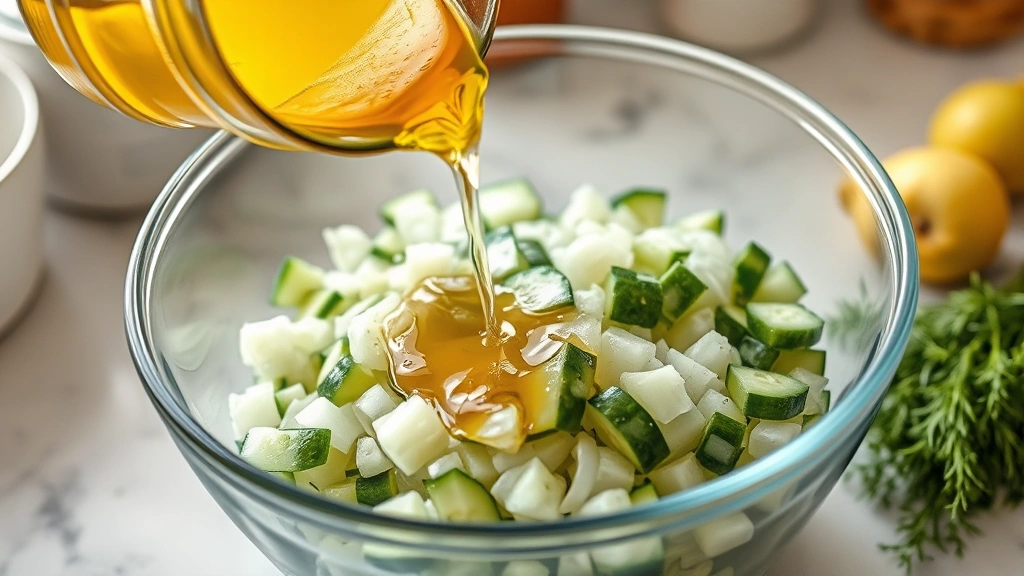
- Add the diced onions, red bell peppers, minced garlic, fresh dill, and fresh parsley to the cucumbers. Toss gently but thoroughly to combine all ingredients evenly.
- In a large stainless steel pot, combine the white vinegar, apple cider vinegar, sugar, and remaining 1 tablespoon of pickling salt. Bring to a gentle boil over medium-high heat, stirring occasionally until the sugar and salt completely dissolve.
- While the vinegar mixture heats, place the mustard seeds, celery seeds, black peppercorns, coriander seeds, and bay leaves in a small dry skillet. Toast over medium heat for 2-3 minutes, shaking the pan occasionally, until fragrant. This toasting step intensifies the spice flavors.
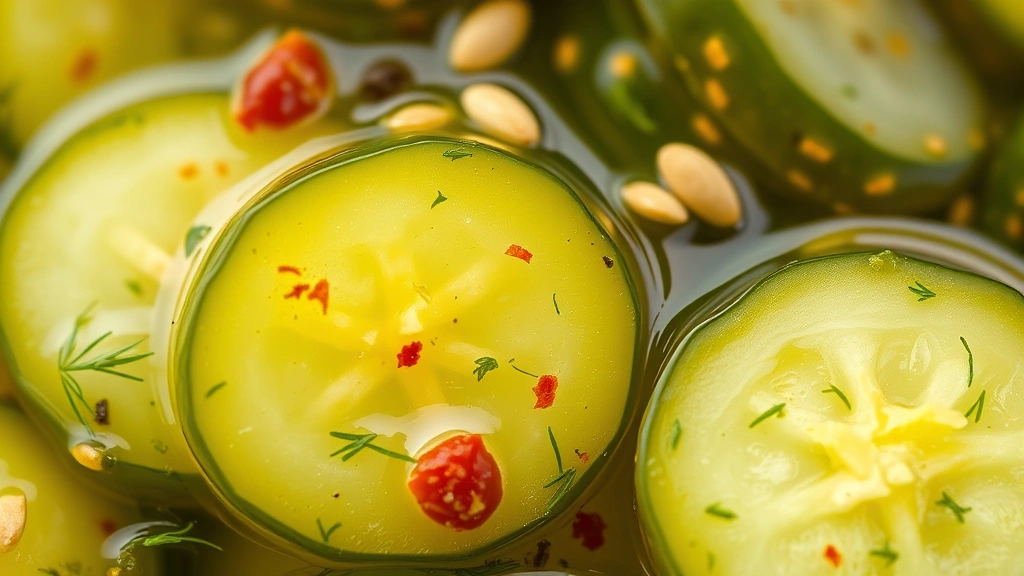
- Add the toasted spices and red pepper flakes to the simmering vinegar mixture, stirring well. Let simmer for 5 minutes to allow the spices to infuse into the brine.
- Stir in the turmeric until fully dissolved and the brine takes on a beautiful golden color.
- Pour the hot brine over the cucumber mixture, making sure all vegetables are completely submerged in the liquid. If needed, add a bit of ice water to ensure full coverage.
- Allow the relish to cool to room temperature, approximately 1-2 hours, before covering and refrigerating.
- For refrigerator storage: Transfer the cooled relish to clean glass jars, cover tightly, and refrigerate. The flavors will continue to develop and meld beautifully over the next 24-48 hours. It will keep refrigerated for up to 3 months.
- For water bath canning: Ladle the hot relish into hot, sterilized canning jars, leaving 1/2-inch headspace. Wipe jar rims clean, place sterile lids on top, and screw on bands until fingertip-tight. Process in a boiling water bath for 10 minutes (adjust time based on your altitude). Let cool completely before checking seals.
Pro Tips
- **Cucumber Selection**: Use fresh pickling cucumbers (Kirby varieties) rather than slicing cucumbers. They have fewer seeds and thinner skins, making them ideal for relish. Shop farmers’ markets in late summer for the freshest options.
- **The Salt-Draw Method**: Don’t skip the step of salting and draining the cucumbers. This removes excess water that would otherwise dilute your brine and result in a watery relish. It’s a professional technique that makes all the difference.
- **Fresh vs. Dried Dill**: Fresh dill provides the brightest flavor and is highly recommended if available. If using dried dill, reduce the amount to 2 tablespoons and add it directly to the brine rather than the cucumber mixture.
- **Spice Variations**: This recipe is highly customizable. Add a tablespoon of fresh tarragon for French-inspired flavors, or include a few slices of fresh ginger for a subtle warmth. Experiment with different spice combinations to find your perfect blend.
- **Texture Preferences**: For a chunkier relish, cut vegetables into larger pieces (1/2-inch). For a finer relish that works well on hot dogs, use a food processor with the pulse setting to achieve smaller, more uniform pieces.
- **Vinegar Choices**: The combination of white and apple cider vinegar provides complexity. However, you can use all white vinegar for a sharper flavor or all apple cider vinegar for a mellower taste.
- **Storage Timeline**: Refrigerator relish is ready to eat after 24 hours but tastes even better after 48 hours when flavors have fully melded. Properly canned relish will last 1-2 years in a cool, dark pantry.
- **Flavor Development**: The relish will taste quite vinegary initially. Don’t be alarmed—the flavors balance beautifully as it sits. The vegetables will soften slightly and the entire mixture becomes more harmonious.
- **Canning Safety**: If canning, follow proper food safety guidelines. Use sterilized jars, maintain proper headspace, and process for the recommended time. When in doubt, consult the National Center for Home Food Preservation.
- **Make-Ahead Friendly**: Prepare the diced vegetables up to 6 hours ahead. Keep refrigerated in separate containers, then combine and proceed with the recipe. The actual cooking process takes only 15 minutes.
- **Serving Suggestions**: Serve alongside summer BBQ sides, on gourmet hot dogs, or mixed into creamy potato salad for added brightness.
- **Batch Cooking**: Double this recipe easily. The process remains the same, just multiply all ingredients. Perfect for gift-giving or stocking your pantry for the entire year.