
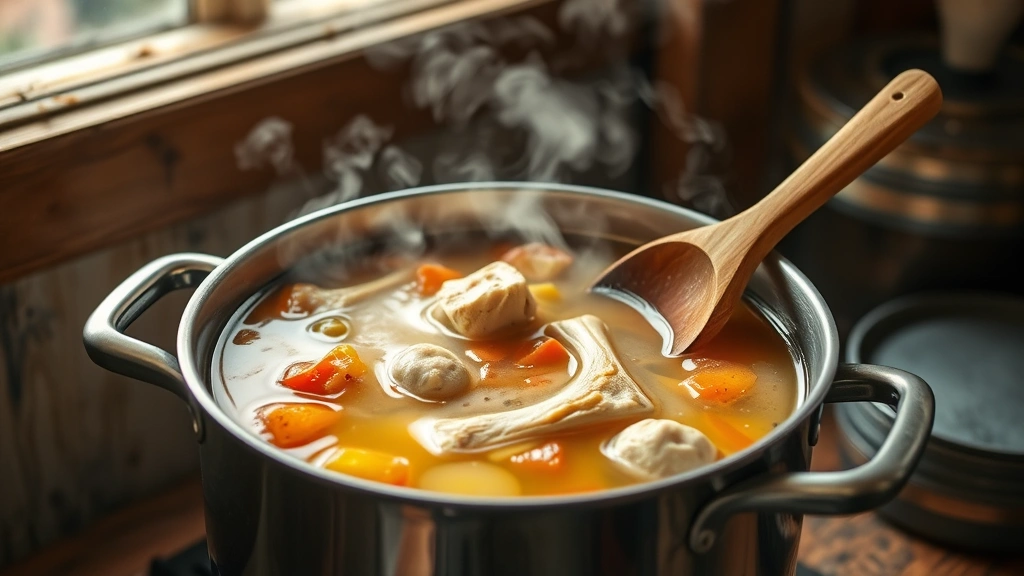
There’s something truly magical about homemade bone stock—it’s the foundation of so many beloved dishes, from silky soups to rich gravies and elegant sauces. Making bone stock might seem intimidating, but I promise it’s one of the easiest and most rewarding things you can do in your kitchen. This recipe has been passed down through my family for generations, and I’m so excited to share it with you today.
The beauty of bone stock lies in its simplicity. You need just a handful of ingredients and patience—that’s it! The long, slow simmer extracts all the collagen, gelatin, and minerals from the bones, creating a deeply flavorful, nutritious liquid that’s liquid gold in the kitchen. Whether you’re using chicken bones, beef bones, or even turkey bones, this method works beautifully every single time.
I love making bone stock on a lazy Sunday afternoon. There’s something so comforting about having a pot gently simmering away while you go about your day. Your entire house will smell absolutely incredible, and you’ll have homemade stock ready to use for the week ahead. Unlike store-bought versions, homemade bone stock has a rich, complex flavor that you simply cannot replicate. Plus, you know exactly what’s going into it—no weird additives or excess sodium.
This comprehensive guide to making bone broth will walk you through every step. The process is incredibly forgiving, and once you’ve made it a few times, you’ll develop an intuition for it. I’ve included tips for selecting the best bones, how to tell when your stock is perfectly done, and storage suggestions so you can enjoy your homemade stock for weeks to come.
One of my favorite things about this recipe is its versatility. Use it as the base for a nourishing chicken soup, incorporate it into risotto, use it for cooking grains, or sip it warm with a pinch of sea salt for a cozy, gut-friendly beverage. I’ve also used this exact method to make deeply flavorful beef bone stock with absolutely stunning results.
For those interested in the science behind bone stock, Serious Eats has an excellent breakdown of what happens during the simmering process. The collagen in bones breaks down into gelatin, which gives stock its luxurious mouthfeel and numerous health benefits. This Bon Appétit article on making perfect stock also provides wonderful insights into achieving the clearest, most beautiful stock possible.
I genuinely believe that learning to make bone stock is one of the best investments you can make in your cooking skills. It’s economical (you’re using bones you might otherwise discard), it’s healthy, and it elevates your everyday cooking to restaurant-quality levels. Once you taste the difference homemade stock makes in your cooking, you’ll never go back to store-bought. Let’s make some magic together!
For more detailed guidance on stock-making techniques, the New York Times has a fantastic guide to stocks and broths that covers various methods and troubleshooting tips. Whether you’re a seasoned cook or picking up a spatula for the first time, this bone stock recipe will become a staple in your kitchen.
Ingredients
- 3-4 pounds bones (chicken, beef, turkey, or a combination), preferably from pastured or organic sources
- 2 medium yellow onions, halved (skin left on for color)
- 4-5 large carrots, cut into rough chunks
- 4-5 celery stalks, cut into rough chunks
- 1 tablespoon whole black peppercorns
- 3-4 fresh bay leaves
- 4-5 sprigs fresh thyme
- 3-4 sprigs fresh parsley
- 1 tablespoon apple cider vinegar or white wine vinegar
- 12-16 cups filtered water (enough to cover bones by 2-3 inches)
- Fine sea salt to taste
- Optional: 1 inch piece of fresh ginger, 2-3 garlic cloves, 1 star anise
Instructions
- If using beef or darker poultry bones, consider blanching them first: place bones in a large pot, cover with cold water, bring to a boil, then drain and rinse under cold water. This creates a clearer stock. Skip this step for a richer, more golden stock. Pat the bones dry with paper towels.
- Place prepared bones in a large stockpot (at least 8-12 quarts). If the bones are large, break them into smaller pieces so they’ll release more flavor and fit better in your pot.
- Add the halved onions (with skins), carrot chunks, and celery chunks to the pot with the bones. Don’t worry about cutting them perfectly—rough chunks are ideal for stock making.
- Pour in the apple cider vinegar, which helps extract minerals and nutrients from the bones. The vinegar flavor won’t be noticeable in the final stock.
- Add the black peppercorns, bay leaves, thyme sprigs, and parsley sprigs directly to the pot. If using optional ingredients like ginger and garlic, add them now.
- Pour in enough cold filtered water to cover the bones by 2-3 inches. Using cold water helps extract maximum flavor and nutrition. Avoid using hot water as it can make the stock cloudy.
- Bring the entire pot to a boil over medium-high heat. Once boiling, immediately reduce heat to low and gently simmer. You want just a few lazy bubbles breaking the surface—never a rolling boil.
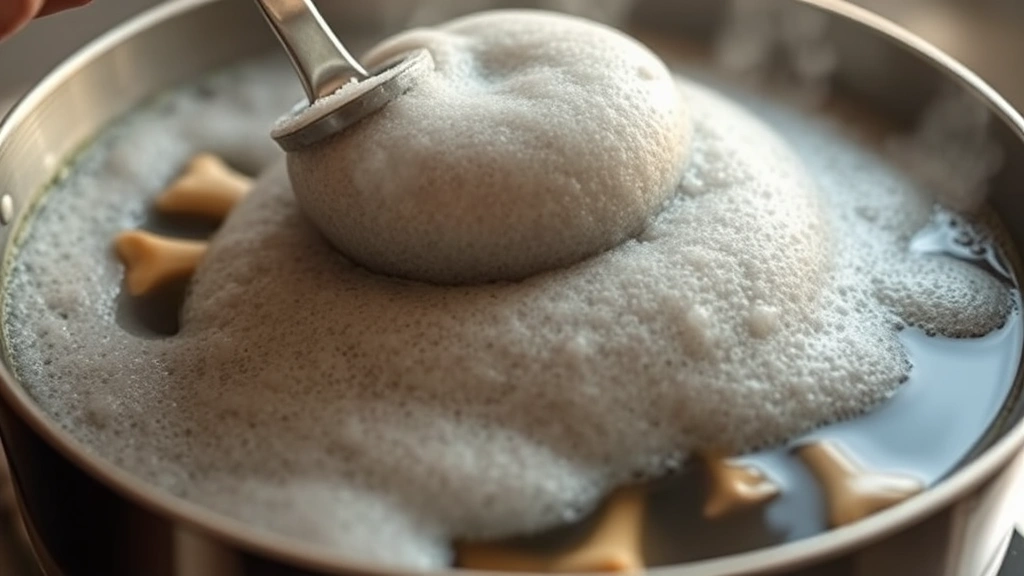
- During the first 20-30 minutes of simmering, you’ll notice a gray or brown foam rising to the surface. Skim this off with a fine-mesh skimmer or spoon and discard. This step creates a clearer, more refined stock.
- Once you’ve skimmed the foam, add a pinch of sea salt to the pot. This helps draw out additional flavor and minerals from the bones.
- Partially cover the pot with a lid, leaving it slightly ajar so steam can escape. This prevents the stock from becoming too concentrated while still allowing some evaporation.
- Simmer gently for at least 12 hours for chicken stock (24 hours is ideal for deeper flavor) or 24-48 hours for beef stock. The longer you simmer, the richer and more gelatinous your stock will become. Set a timer to remind yourself, but don’t stress about exact timing.
- The stock should reduce by about one-third to one-half. If it’s reducing too quickly, lower the heat further. If it’s barely reducing, slightly increase the heat.
- After the desired cooking time, carefully pour the stock through a fine-mesh strainer lined with cheesecloth into a large bowl or containers. This removes all the solids while keeping the precious liquid gold.
- Discard the solids (bones, vegetables, and herbs). Do not press or squeeze the solids—let the stock drain naturally for the clearest result.
- Allow the strained stock to cool to room temperature, about 2-3 hours. Once cooled, you’ll notice a layer of fat on top—this is perfectly normal and actually protects the stock during storage.
- For storage, you can leave the fat layer on (it acts as a seal) or remove it if you prefer. Divide the stock into portions using ice cube trays, small containers, or freezer bags for easy future use.
- Refrigerate stock for up to 5 days, or freeze for up to 3 months. The stock may gel when cold due to the gelatin from the bones—this is a sign of excellent quality. Simply warm it gently to return it to liquid form.
- To use frozen stock, simply thaw overnight in the refrigerator or place the container in a warm water bath. You can also add frozen stock directly to soups and braises without thawing.

Pro Tips
- **Selecting the Best Bones**: Use bones from pastured, organic animals whenever possible. They have better flavor and superior nutritional profiles. Ask your butcher for bones—they’re often inexpensive or even free. Chicken bones (especially from whole chickens or roasted chicken carcasses) make a delicate, versatile stock. Beef bones (knuckle, neck, and marrow bones) create a rich, deeply flavored stock perfect for French cooking.
- **The Vinegar Secret**: The apple cider vinegar is crucial—it lowers the pH of the stock, which helps extract minerals like calcium, magnesium, and phosphorus from the bones. You won’t taste the vinegar in the finished stock, but it makes a significant nutritional difference.
- **Achieving Crystal-Clear Stock**: Skimming the foam during the first 30 minutes is essential for clarity. Never let the stock boil rapidly; a gentle simmer is perfect. Some chefs line their strainer with cheesecloth for the most transparent results.
- **Time vs. Depth of Flavor**: While 12 hours produces good stock, 24 hours creates exceptional stock with a richer mouthfeel and deeper flavor. Beef stock genuinely benefits from the full 24-48 hour treatment.
- **Storage Solutions**: Freeze stock in ice cube trays, then transfer cubes to freezer bags for compact storage. This allows you to use small amounts without thawing an entire container. Label containers with the date and type of stock.
- **Using Your Stock**: Homemade stock is perfect for soups, stews, risottos, sauces, and grain cooking. Sip it warm with sea salt as a nutritious beverage. Use it anywhere a recipe calls for broth or stock.
- **The Gel Factor**: When your stock gels in the refrigerator, celebrate! This indicates high collagen content and excellent quality. Simply reheat gently to return to liquid form.
- **Troubleshooting**: If your stock tastes too weak, simmer longer to concentrate flavors. If it’s too strong or salty, dilute with water. If it’s cloudy, use a finer strainer or cheesecloth next time. These adjustments are easy and worth making!
- **Sustainable Cooking**: Making stock is the ultimate zero-waste cooking practice. You’re transforming bones you might discard into something incredibly valuable and delicious.
Pingback: Easy White Chicken Chili Crock Pot Recipe (So Tasty!) – Simple Recipe Finder