
Biltong is a South African dried meat delicacy that’s absolutely divine—think beef jerky’s more sophisticated, flavor-packed cousin. This recipe is wonderfully simple yet yields restaurant-quality results that will have everyone asking for your secret. The magic happens when quality beef meets the perfect spice blend and time does all the work for you.
Making biltong at home is easier than you might think, and the results are so much better than store-bought versions. You’ll need just a few quality ingredients, some patience, and a proper drying setup. The beauty of this recipe is that it requires minimal hands-on time—mostly just waiting for those gorgeous strips to cure and dry to perfection. Once you master this technique, you’ll find yourself making batch after batch.
The key to exceptional biltong starts with selecting the right cut of beef. I always recommend using a lean cut like eye of round or sirloin tip, which has just enough marbling to stay tender while drying. The spice blend is traditional South African, featuring coriander seeds, black pepper, and a touch of garlic—nothing fancy, but perfectly balanced. Our beef recipes collection has more inspiration for quality beef preparations.
What makes this biltong recipe so special is the combination of dry curing and air drying, which concentrates flavors while creating that signature chewy-yet-tender texture. Unlike jerky, biltong uses vinegar in the cure, which adds complexity and helps preserve the meat naturally. Learn more about our curing techniques for other preservation methods.
This recipe yields about a pound of finished biltong from roughly two pounds of fresh beef, as the meat loses moisture during drying. The timeline typically takes about 5-7 days depending on your climate and humidity levels, but the active preparation time is minimal. Check out our make-ahead recipes for other projects you can prepare in advance.
I’m sharing my tested method that accounts for various humidity levels and kitchen conditions. Whether you’re in a dry climate or somewhere more humid, these instructions will guide you to success. For detailed guidance on other curing projects, Serious Eats has excellent resources on cured meats.
The spice profile here is authentic but adjustable to your preferences. Some people love extra garlic, others add a pinch of cayenne for heat. The beauty of homemade biltong is making it exactly how you love it. For more South African-inspired recipes, Bon Appétit features wonderful South African cuisine.
Once you’ve made your first batch, you’ll understand why biltong is so beloved. It’s perfect for snacking, adding to charcuterie boards, or even incorporating into salads. The deep, concentrated beef flavor with warm spices is absolutely addictive. See our charcuterie board ideas for serving suggestions.
This recipe is naturally gluten-free and works beautifully for anyone following low-carb or keto diets. It’s also shelf-stable once dried, making it perfect for meal prep or gifting to food-loving friends. For more preservation techniques and make-ahead options, The New York Times has wonderful preservation resources.
Ingredients
- 2 pounds beef (eye of round, sirloin tip, or similar lean cut), trimmed of excess fat
- 3 tablespoons whole coriander seeds
- 2 tablespoons whole black peppercorns
- 1 tablespoon kosher salt
- 1 teaspoon brown sugar
- ½ teaspoon pink curing salt (sodium nitrite)
- 4 cloves garlic, minced
- ¼ cup apple cider vinegar or white vinegar
- 2 tablespoons Worcestershire sauce
- ½ teaspoon ground ginger (optional)
- ¼ teaspoon cayenne pepper (optional, for heat)
Instructions
- Slice your beef with the grain into strips approximately ¼-inch thick. For easier slicing, partially freeze the beef for 1-2 hours first. Pat the strips completely dry with paper towels—this step is crucial for proper curing.
- Toast the coriander seeds in a dry skillet over medium heat for 2-3 minutes, stirring frequently, until fragrant. Add the black peppercorns and toast for another minute. Pour the toasted spices onto a cutting board and let cool slightly.
- Coarsely crush the cooled spices using a mortar and pestle or the bottom of a heavy pan—you want some texture, not fine powder. Transfer to a small bowl.
- Add the kosher salt, brown sugar, pink curing salt, minced garlic, ginger (if using), and cayenne (if using) to the crushed spices. Stir until well combined.
- In a separate small bowl, whisk together the apple cider vinegar and Worcestershire sauce.
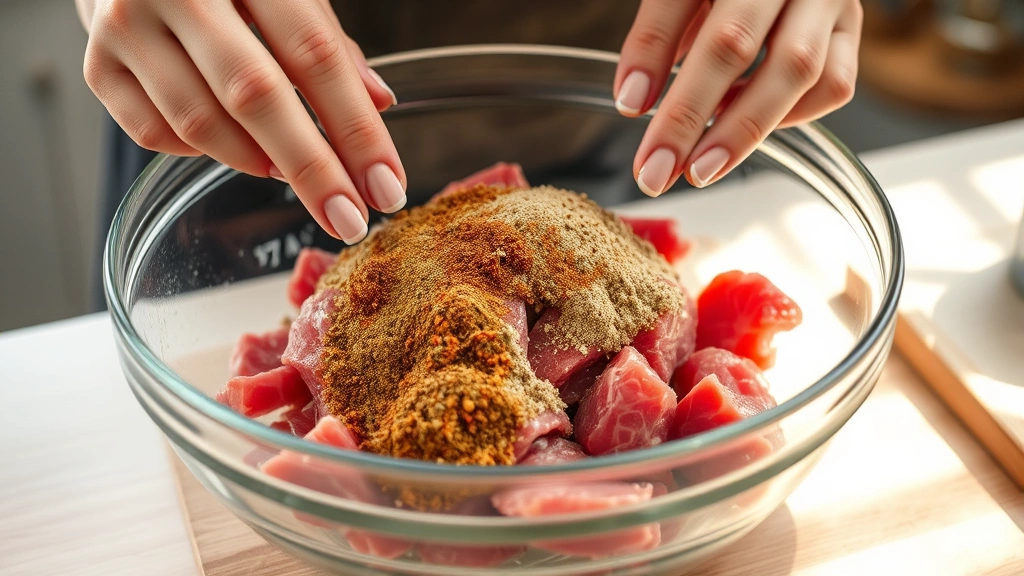
- Layer the beef strips in a large glass bowl or container, sprinkling the spice mixture evenly over each layer. Drizzle the vinegar mixture over the spiced beef as you layer.
- Once all beef is layered, gently toss everything together with your hands, ensuring every piece gets coated with the spice and vinegar mixture. This should take about 2-3 minutes of gentle tossing.
- Cover the bowl tightly with plastic wrap and refrigerate for 24 hours. During this time, the beef will begin releasing moisture and the flavors will meld beautifully.
- After 24 hours, remove the beef from the refrigerator and prepare your drying setup. You’ll need an oven on the lowest setting (or a food dehydrator set to 160°F) and a way to allow air circulation around the meat.
- If using an oven: Line oven racks with aluminum foil to catch any drips. Arrange beef strips on oven racks, leaving space between each piece for air circulation. Crack the oven door open slightly (prop it with a wooden spoon) to allow moisture to escape.
- If using a dehydrator: Arrange strips on dehydrator trays in a single layer without overlapping.
- Dry the biltong at 160°F for 5-7 days, depending on your climate and desired texture. Check periodically—the meat should be completely dry but still slightly pliable, not brittle. The drying time is shorter in dry climates and longer in humid environments.
- Around day 3-4, check the biltong and rotate the trays if using an oven to ensure even drying. Some pieces may dry faster than others depending on thickness.
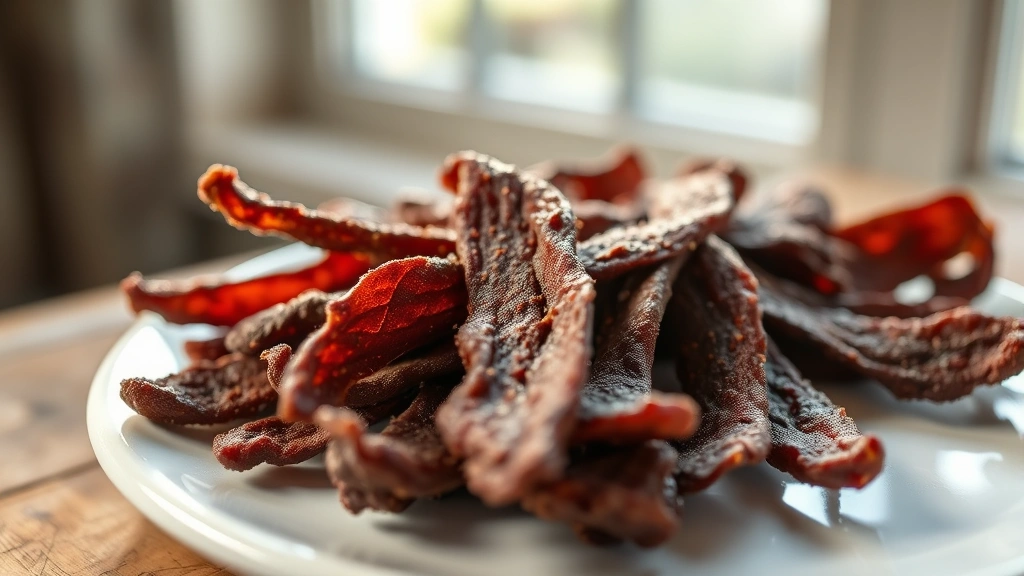
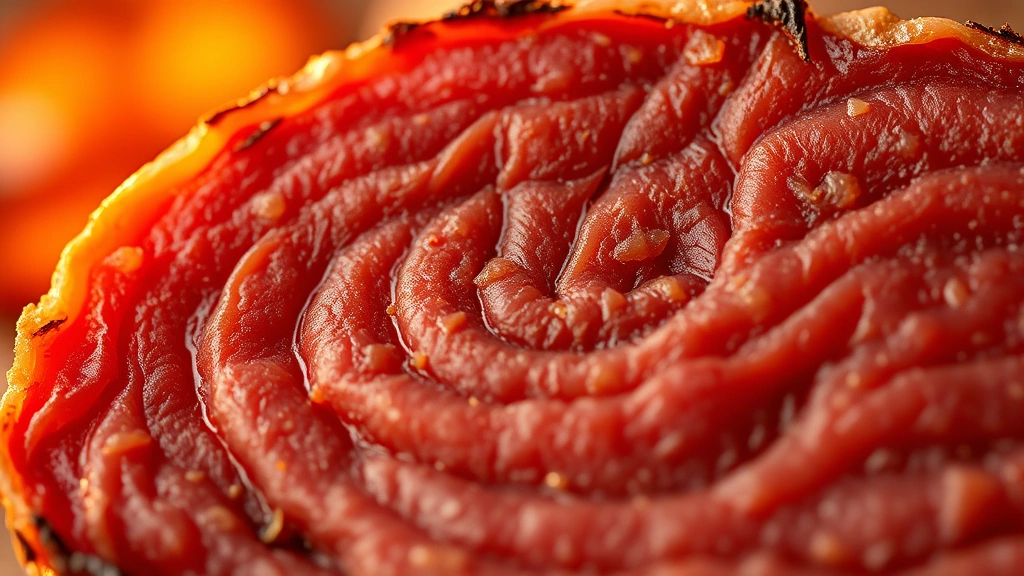
- The biltong is ready when it bends without breaking and has no moisture when squeezed. It should have a dark, rich color and feel completely dry to the touch.
- Remove the finished biltong from the oven or dehydrator and let it cool completely to room temperature on a clean surface, about 1-2 hours.
- Store the cooled biltong in an airtight container in a cool, dark place. It will keep for several weeks, though it rarely lasts that long in most households.
- To serve, slice into bite-sized pieces or tear into strips. Enjoy it as a snack, on charcuterie boards, or incorporated into salads and grain bowls.
Pro Tips
- Quality beef selection is absolutely essential—choose a lean cut with minimal fat, as excess fat can go rancid during the long drying process. Eye of round and sirloin tip are ideal.
- The pink curing salt (sodium nitrite) is optional but traditional in biltong. It gives the characteristic pink color and adds subtle flavor. Regular salt can be substituted if needed, though the color and preservation qualities will differ.
- Humidity is your biggest variable. In dry climates (under 40% humidity), biltong dries in 5 days. In humid environments, it may take 7-10 days. A dehumidifier in your kitchen can significantly speed up the process.
- Never skip the 24-hour refrigeration step—this allows the cure to penetrate the meat fully and ensures even flavor distribution and proper preservation.
- The vinegar in this recipe serves multiple purposes: it adds flavor, helps preserve the meat, and balances the richness of the beef.
- Temperature control is important. Too hot (above 160°F) and you’ll cook the outside while leaving the inside undried. Too cool and the process takes much longer.
- For a spicier biltong, increase the cayenne pepper to ½ teaspoon or add a pinch of chili powder. For garlic lovers, increase minced garlic to 6 cloves.
- If you notice any mold developing during drying, it’s typically surface mold from humidity rather than contamination due to the curing salts. Carefully trim away any moldy areas with a clean knife.
- Store finished biltong in airtight containers, glass jars, or vacuum-sealed bags. You can also wrap individual pieces in parchment paper for easy portioning.
- Homemade biltong makes an exceptional gift for food enthusiasts. Package it in glass jars with a handwritten label noting the preparation date.
- Biltong is naturally shelf-stable due to the curing and drying process, but refrigerating it extends shelf life significantly. Some people prefer the texture after a day or two in the refrigerator.