

There’s nothing quite like the satisfaction of making your own pickled peppers at home. This best pickled peppers recipe combines crisp, colorful peppers with a perfectly balanced brine that’s tangy, slightly sweet, and infused with aromatic spices. Whether you’re a pickling novice or a seasoned preservationist, this foolproof method will have you creating restaurant-quality pickled peppers that rival anything you’d find in a specialty store.
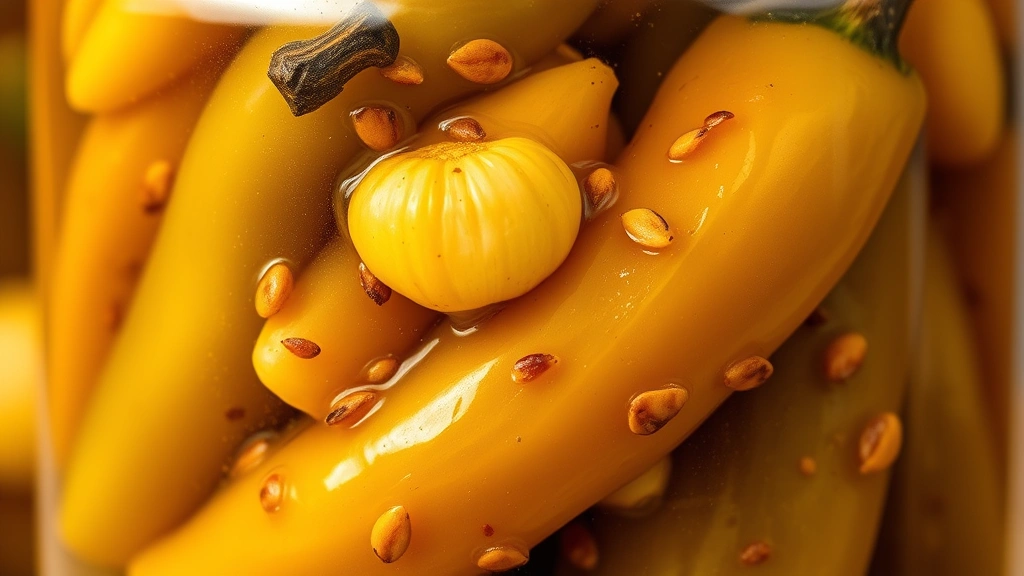
Pickled peppers are one of those magical condiments that elevate everything from tacos and sandwiches to charcuterie boards and grain bowls. The beauty of making them yourself is that you control every element—the heat level, the spice profile, and how crispy or soft you prefer them. This recipe uses a combination of jalapeños, banana peppers, and sweet bell peppers, but you can absolutely customize it based on what’s available at your farmer’s market or local grocery store.
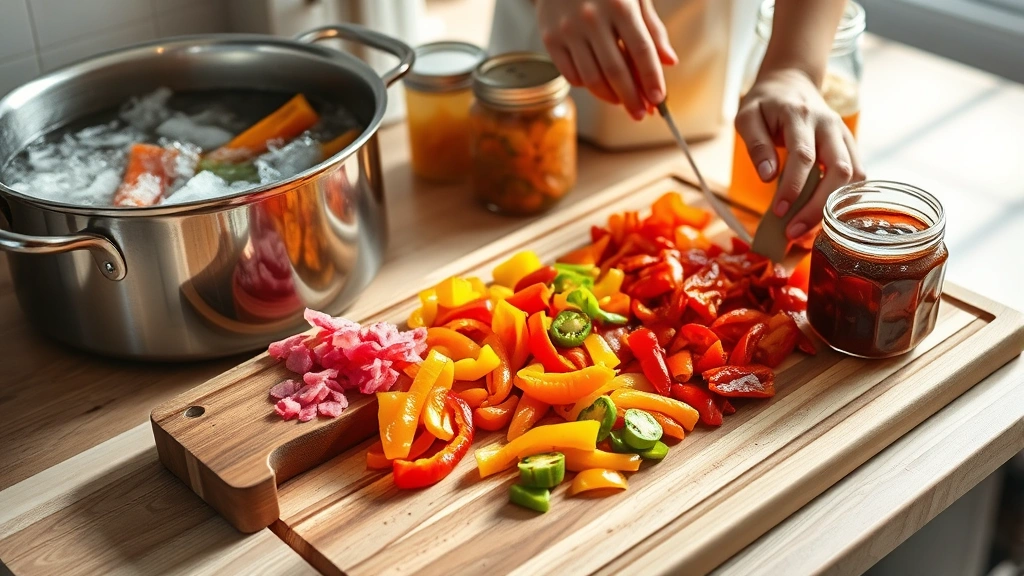
The key to achieving the best pickled peppers lies in a few crucial steps. First, you’ll want to prepare your peppers properly by washing them thoroughly and slicing them into uniform sizes so they pickle evenly. The brine itself is where the magic happens—a combination of vinegar, water, sugar, and salt creates the perfect balance of flavors. I’ve also included garlic, mustard seeds, coriander seeds, and red pepper flakes to add depth and complexity. For a detailed guide on preserving vegetables at home, check out our comprehensive resource.
One of the best things about this pickled peppers recipe is its versatility and shelf life. When properly canned using the water bath method, these peppers will last up to a year in your pantry, making them perfect for gift-giving or meal prep. But honestly, they rarely last that long in my house—they’re too delicious! The crispy texture and zingy flavor make them impossible to resist straight from the jar, let alone as a condiment on virtually any savory dish.
This recipe is inspired by traditional Mexican escabeche preparations and incorporates techniques from classic American pickling traditions. If you’re looking for more pickling inspiration, the team at Serious Eats has an excellent guide to pickling that covers everything from quick refrigerator pickles to long-term preservation. The process is simpler than you might think, and the results are absolutely worth the minimal effort involved.
Whether you’re preparing for a summer gathering, looking to preserve your garden harvest, or simply wanting to have a gourmet condiment on hand, this best pickled peppers recipe is your answer. The combination of fresh, crisp peppers and an aromatic, perfectly balanced brine creates something truly special. Serve them at your next party, pack them in jars as gifts, or simply enjoy them straight from the jar as a snack. Either way, you’re in for a treat.
For those interested in exploring other preservation techniques, our guide to fermentation basics offers interesting alternatives to vinegar-based pickling. You might also enjoy learning about proper canning safety tips to ensure your pickled peppers remain delicious and safe to eat. And if you want to explore more creative condiment recipes, Bon Appétit’s pickled vegetables collection is absolutely worth browsing.
The best part about making your own pickled peppers is the complete customization available to you. Want them spicier? Add more red pepper flakes or include some habanero peppers in the mix. Prefer them sweeter? Adjust the sugar content to your liking. Like fresh herbs? Throw some dill, oregano, or cilantro into the jars. This recipe serves as your foundation, but it’s really a launching point for your own creative variations. Once you master this basic technique, you’ll find yourself pickling everything from cucumbers and green beans to onions and watermelon rinds.
The canning process ensures that your pickled peppers remain shelf-stable and safe to eat for months. However, if you’re not interested in canning, you can simply refrigerate these peppers in airtight containers for up to three weeks. They’re perfect for quick weeknight meals when you need a burst of flavor and don’t have time to cook elaborate side dishes. Toss them into tacos, layer them in sandwiches, pile them on nachos, or serve them alongside grilled meats and seafood.
I’ve made this recipe dozens of times, and it never fails to impress. The balance of vinegar, sugar, and salt creates a brine that’s neither too sour nor too sweet, allowing the natural flavor of the peppers to shine through. The spices add warmth and complexity without overpowering the delicate pepper flavor. And the crispy texture—achieved by not overcooking the peppers during the pickling process—makes each bite satisfying and enjoyable.
If you’re new to pickling, don’t be intimidated by the canning process. It’s actually quite straightforward and requires minimal equipment. You’ll need sterilized glass jars, a large pot for the water bath, and basic kitchen tools. For detailed canning instructions, The New York Times has an excellent guide to quick pickling that covers both traditional and modern approaches.
This best pickled peppers recipe is truly a game-changer for anyone who loves bold, tangy flavors and wants to elevate their home cooking. Whether you’re an experienced home cook or just starting out, you’ll find success with this straightforward, foolproof method. The result is something truly special—pickled peppers that taste like they came straight from a high-end specialty shop, but with the satisfaction of knowing you made them yourself.
Ingredients
- 3 pounds mixed fresh peppers (jalapeños, banana peppers, and bell peppers), washed and dried
- 4 cups white vinegar (5% acidity)
- 2 cups water
- 3 tablespoons kosher salt
- 2 tablespoons granulated sugar
- 8 cloves garlic, peeled and lightly crushed
- 2 tablespoons yellow mustard seeds
- 1 tablespoon coriander seeds
- 1 tablespoon black peppercorns
- 1 teaspoon red pepper flakes (adjust to desired heat level)
- 4 bay leaves
- 4 sprigs fresh dill (optional but recommended)
- 4 sprigs fresh oregano or thyme (optional)
- 1 teaspoon turmeric (optional, for color)
Instructions
- Prepare your canning equipment by washing four 1-pint glass jars and their lids with hot soapy water, then sterilize them by placing them in a pot of boiling water for 10 minutes. Alternatively, run them through a hot dishwasher cycle. Remove the jars with tongs and set them on a clean kitchen towel to drain, keeping them warm.
- While the jars sterilize, prepare the peppers by rinsing them thoroughly under cool running water and patting them dry with paper towels. Using a sharp knife, remove the stem ends and carefully slice the peppers into ¼-inch to ½-inch rings, depending on your preference. For larger bell peppers, you may want to cut them into strips rather than rings. Try to keep the pepper pieces relatively uniform in size so they pickle evenly.
- Place the vinegar, water, salt, and sugar into a large stainless steel pot. Bring the mixture to a boil over medium-high heat, stirring occasionally to ensure the salt and sugar dissolve completely. Once boiling, reduce the heat to medium and let it simmer for about 2 minutes.
- While the brine comes to a boil, divide the mustard seeds, coriander seeds, and black peppercorns evenly among the four sterilized jars—approximately ½ tablespoon of each per jar. Place one bay leaf in each jar, along with 2 cloves of garlic and about ¼ teaspoon of red pepper flakes per jar. Add one sprig each of fresh dill and oregano to each jar if desired.
- Add the sliced peppers to the hot brine, ensuring they’re completely submerged. Stir gently and allow the mixture to return to a gentle simmer. Simmer for exactly 3 minutes—this step is crucial for achieving the perfect texture. You want the peppers to remain crispy and not become soft or mushy.
- Using a slotted spoon, carefully transfer the hot peppers from the brine into the prepared jars, distributing them evenly among all four containers. Pack the peppers fairly tightly but don’t crush them.
- Pour the hot brine into each jar, filling them to within ½ inch of the rim. Use a clean bubble remover or thin spatula to gently release any air bubbles trapped in the peppers. Wipe the rim of each jar thoroughly with a clean, damp cloth to remove any brine or pepper particles that could prevent a good seal.
- Place a sterilized lid on each jar and screw on the band fingertight—not too tight, as steam needs to escape during processing. Place the jars in a large pot of boiling water, ensuring they’re covered by at least 1 inch of water.
- Process the jars in the boiling water bath for 10 minutes for both pint and half-pint sizes (adjust processing time if you’re using quart-sized jars—process for 15 minutes). Start timing after the water returns to a full boil.
- Using jar tongs, carefully remove the hot jars from the water bath and place them on a clean kitchen towel, spacing them several inches apart. Allow them to cool completely at room temperature, undisturbed, for at least 12 hours. You should hear a satisfying ‘pop’ as each jar seals.
- Once completely cooled, check the seals by pressing down on the center of each lid—it should be slightly concave and not flex when pressed. Any jars that didn’t seal should be refrigerated and used within 3 weeks. Sealed jars can be stored in a cool, dark pantry for up to 1 year.
- For best flavor development, allow the pickled peppers to cure for at least 1 week before opening, though they’re technically ready to eat immediately. The flavor becomes increasingly complex and delicious as the peppers cure.
Pro Tips
- This recipe uses the water bath canning method for long-term shelf storage. If you prefer not to can these peppers, simply allow them to cool completely and refrigerate in airtight containers for up to 3 weeks.
- The type of peppers you choose will affect both the heat level and the final result. Jalapeños provide medium heat, banana peppers offer a mild, slightly tangy flavor, and bell peppers add sweetness and color. Mix and match based on your preferences and what’s available at your market.
- For a spicier version, include 2-3 habanero peppers or increase the red pepper flakes to 2 teaspoons. For a milder version, omit the jalapeños and use only banana peppers and bell peppers, reducing the red pepper flakes to ½ teaspoon.
- White vinegar is recommended for this recipe as it provides the classic pickled pepper flavor and won’t discolor the peppers. Apple cider vinegar or white wine vinegar can be substituted, but they’ll produce slightly different flavor profiles.
- The 3-minute simmer time is crucial for maintaining crispness. If you prefer softer peppers, simmer for up to 5 minutes. If you want them even crispier, reduce the simmering time to 1-2 minutes, though this may affect preservation qualities.
- Always use kosher salt or pickling salt, not table salt, as table salt contains anti-caking agents that can cloud your brine and affect the final product.
- Fresh herbs like dill, oregano, and thyme add wonderful flavor complexity. Experiment with different combinations to find your favorite, or even try adding a small piece of fresh horseradish or a few coriander seeds.
- Proper sterilization of jars and careful attention to the canning process ensures food safety. Never skip the sterilization step or the water bath processing, as these are critical for preventing botulism and other foodborne illnesses.
- Store your finished pickled peppers in a cool, dark place away from direct sunlight. The colder you can keep them, the longer they’ll maintain their quality and crispness.
- These pickled peppers are incredibly versatile. Use them on tacos, nachos, sandwiches, grain bowls, pizza, or straight from the jar as a snack. They’re also wonderful on charcuterie boards and pair beautifully with cheese and cured meats.