
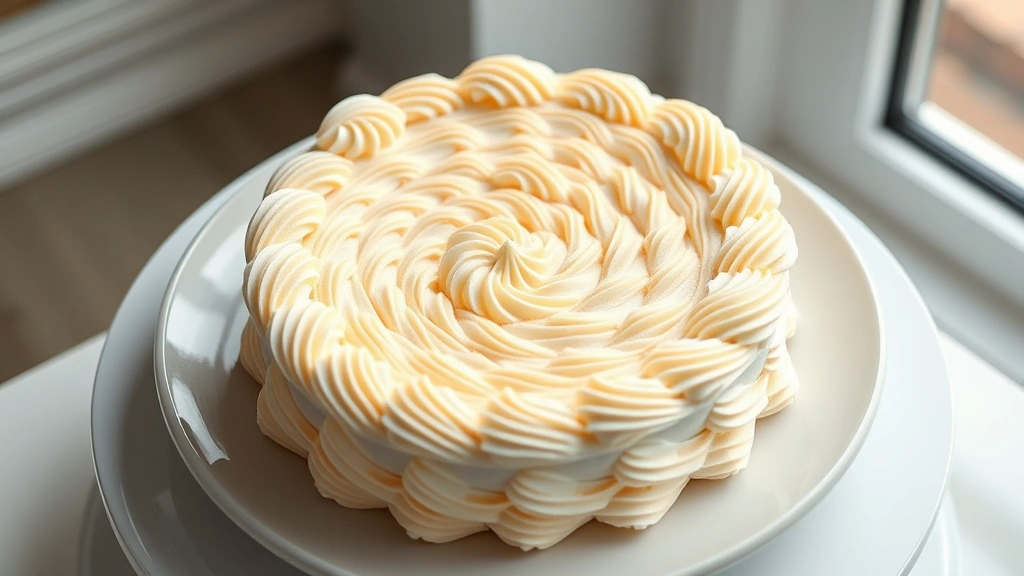
A Cultist Circle is a stunning and delicious dessert that’s absolutely perfect for beginners! This beautiful cake features layers of soft vanilla sponge, creamy frosting, and a gorgeous circular design that looks far more complicated than it actually is. Don’t let the name intimidate you – this recipe is all about creating something magical in your own kitchen with simple, accessible ingredients.
The beauty of mastering a Cultist Circle recipe is that once you understand the basic technique, you can customize it endlessly. Whether you’re hosting a dinner party, celebrating a special occasion, or simply want to impress your family with homemade dessert, this cake delivers both on presentation and flavor. I love how this recipe comes together – it’s truly a beginner-friendly introduction to cake decorating that yields professional-looking results.
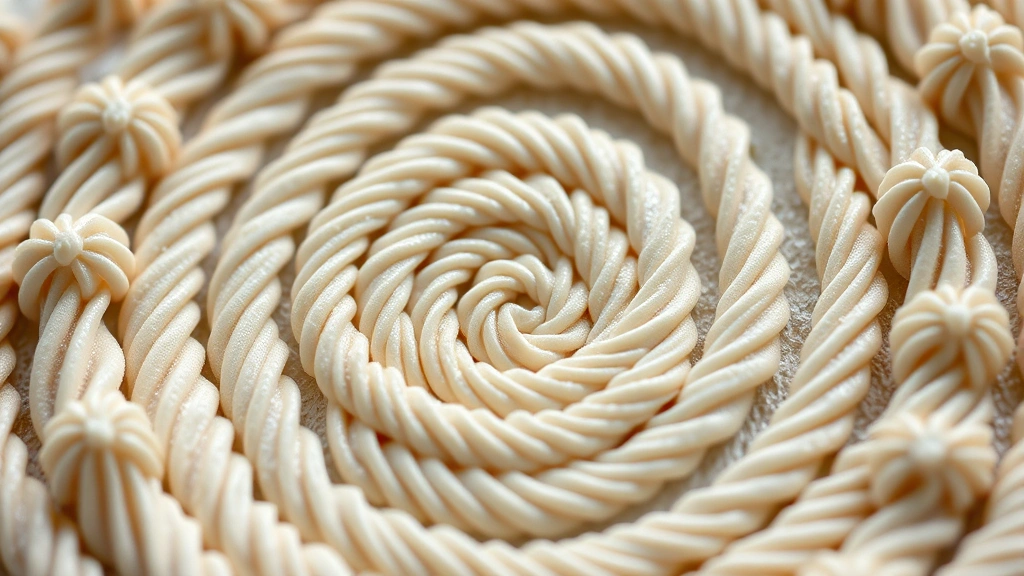
What makes this Cultist Circle recipe so special is the way the frosting creates those mesmerizing concentric circles. The technique is simpler than you’d think, and I’m excited to walk you through every single step. You’ll start with a basic vanilla cake, build your frosting, and then create that iconic spiral pattern that makes this dessert so Instagram-worthy. If you’re interested in creamy sauces, you’ll appreciate how this frosting comes together smoothly.
One of the reasons I adore teaching this recipe is because it builds confidence in the kitchen. Just like mastering a creamy pasta base, understanding cake layers opens up a world of dessert possibilities. This Cultist Circle isn’t just a recipe – it’s your gateway into more advanced baking projects.
Before you begin, gather all your ingredients and read through the instructions completely. This mise en place approach ensures smooth sailing. Similar to how you’d prep ingredients for a dinner party dish, having everything ready makes the process enjoyable rather than stressful. The frosting technique is where the magic happens, and I promise it’s easier than it looks.
For those looking to pair this with a lighter option, a fresh chickpea salad makes a wonderful contrast at any gathering. And if you’re serving this at a brunch, pickled red onions add a bright note to other dishes on your table.
Let me share some professional tips I’ve learned: room temperature ingredients truly make a difference in cake texture, and investing in an offset spatula transforms your decorating experience. For more advanced techniques, Bon Appétit offers wonderful cake decorating tutorials. Serious Eats has excellent information about baking science that helps you understand why certain steps matter. The New York Times Cooking section features inspiring cake designs that might inspire your next creation.
This recipe makes a stunning 8-inch round cake that serves 8-10 people generously. The preparation is straightforward, but the result looks like you spent hours in a professional pastry kitchen. I genuinely believe this is one of the best beginner baking projects because it teaches fundamental skills while delivering show-stopping results. Your friends and family won’t believe you made this yourself!
Ingredients
- 2 cups all-purpose flour
- 2 teaspoons baking powder
- 1/2 teaspoon salt
- 1/2 cup (1 stick) unsalted butter, softened to room temperature
- 1 cup granulated sugar
- 2 large eggs, room temperature
- 1 teaspoon vanilla extract
- 3/4 cup whole milk, room temperature
- 1 cup (2 sticks) unsalted butter, softened for frosting
- 3 cups powdered sugar
- 1/4 cup heavy cream
- 2 teaspoons vanilla extract
- 1/4 teaspoon salt
- Food coloring (optional, your choice of color)
Instructions
- Preheat your oven to 350°F (175°C). Grease and flour two 8-inch round cake pans, or line the bottoms with parchment paper for easy removal. This prevents sticking and ensures even baking.
- In a small bowl, whisk together the all-purpose flour, baking powder, and salt. Set this dry mixture aside – this step prevents lumps in your batter.
- In a large mixing bowl, cream together the softened butter and granulated sugar using an electric mixer on medium-high speed. Beat for 3-4 minutes until the mixture is light, fluffy, and pale in color. This incorporates air into the batter, creating a tender crumb.
- Add the room temperature eggs one at a time, beating well after each addition. This ensures even distribution throughout the batter.
- Stir in the vanilla extract until fully combined.
- Alternate adding the flour mixture and milk to the butter mixture, beginning and ending with the flour. Add about one-third of the flour mixture, then half the milk, then half the remaining flour, then the rest of the milk, and finally the remaining flour. Mix on low speed after each addition until just combined – overmixing develops gluten, which makes the cake tough.
- Divide the batter evenly between the prepared cake pans, smoothing the tops with a spatula.
- Bake for 30-35 minutes, or until a toothpick inserted into the center comes out clean or with just a few moist crumbs. The cakes should be golden brown around the edges.
- Remove the cakes from the oven and allow them to cool in the pans for 10-15 minutes. This cooling time is crucial – it allows the structure to set before turning out.
- Turn the cakes out onto wire cooling racks and allow them to cool completely to room temperature. This typically takes 45 minutes to 1 hour. Frosting warm cake will result in melting frosting and potential sliding.
- While the cakes cool, prepare the frosting. In a large mixing bowl, beat the softened butter on medium speed for 1-2 minutes until creamy and smooth.
- Gradually add the powdered sugar, one cup at a time, beating on low speed after each addition to prevent powdered sugar from flying everywhere. Once all sugar is incorporated, increase speed to medium and beat for 2-3 minutes.
- Add the heavy cream, vanilla extract, and salt to the frosting. Beat on medium-high speed for 2-3 minutes until light, fluffy, and spreadable. The frosting should have a consistency that holds peaks but spreads smoothly.
- If desired, divide the frosting and add food coloring to achieve your preferred color. Mix thoroughly until the color is evenly distributed.
- Place one cooled cake layer on a cake turntable or serving plate. If your cake layer is domed on top, you can trim it slightly with a serrated knife for a level surface, but this isn’t necessary for beginners.
- Spread a generous layer of frosting (about 1/2 inch thick) on top of the first cake layer using an offset spatula or butter knife.
- Carefully place the second cake layer on top of the frosted first layer, aligning the edges as closely as possible.
- Apply a thin layer of frosting around the entire outside of the cake – this is called a crumb coat. This layer seals in any loose crumbs and provides a smooth base for the final frosting layer. Refrigerate for 15-20 minutes.
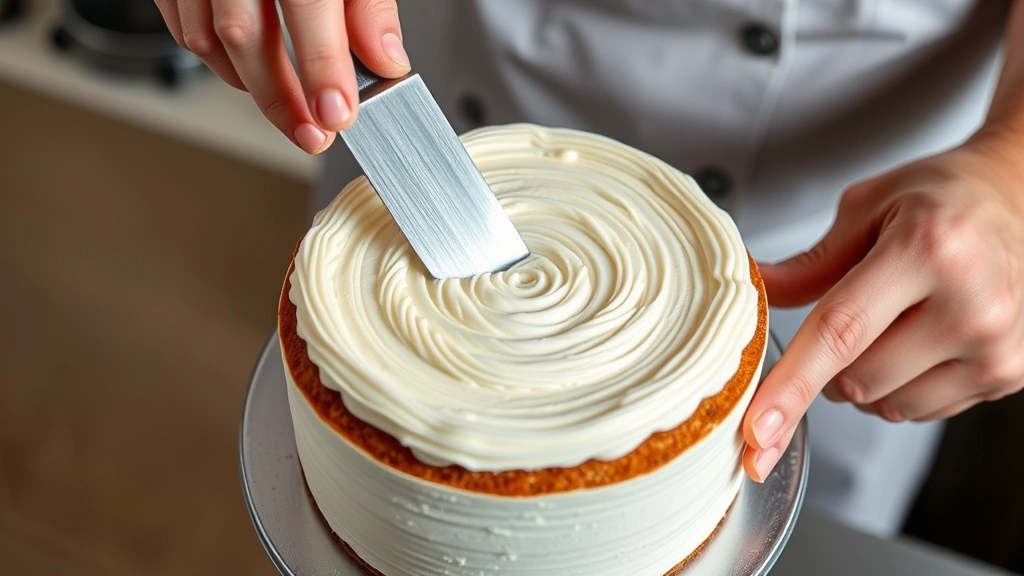
- Apply the final thick layer of frosting to the top and sides of the cake, smoothing it as much as possible with an offset spatula.
- To create the iconic Cultist Circle pattern, place the cake on a turntable. Starting from the center of the top, pipe concentric circles of frosting outward using a piping bag fitted with a small round tip, or create circles using a small spoon.
- Using a thin offset spatula or knife blade, gently drag through the circles from the center outward in even intervals, creating the signature spiral effect. Alternatively, drag from the outside toward the center – both techniques work beautifully.
- Refrigerate the finished cake for at least 30 minutes before serving. This helps the frosting firm up and makes slicing cleaner.
- Slice with a hot, wet knife, wiping between each cut, for clean, beautiful slices that showcase your work.
Pro Tips
- Room temperature ingredients are essential for this recipe. Cold eggs and butter don’t incorporate properly, resulting in a dense, heavy cake. Remove all ingredients from the refrigerator 30 minutes before baking.
- Don’t overmix your batter once you’ve added the dry ingredients. Mix until just combined – small lumps are perfectly fine and will disappear during baking. Overmixing develops gluten, which creates a tough, rubbery crumb.
- The frosting consistency is crucial for the spiral decoration. If it’s too soft, it won’t hold its shape; if it’s too stiff, it’ll be difficult to pipe. The mixture should look like soft peaks when you lift your beaters.
- For a cleaner spiral, chill the frosted cake for 20-30 minutes before adding the decorative circles. Cold frosting holds shape better and creates sharper lines.
- If your frosting breaks or becomes grainy, it’s likely too cold. Let it sit at room temperature for 5 minutes, then re-whip it. If it’s too warm and slides off the cake, refrigerate for 15 minutes.
- This cake can be made one day in advance. Wrap unfrosted cooled cake layers individually in plastic wrap and store at room temperature, or refrigerate if your kitchen is very warm. Frosted cake keeps refrigerated for up to 3 days – cover loosely with plastic wrap.
- For variations, try adding 1/2 teaspoon of almond extract to the cake batter, or lemon zest for a citrus note. Chocolate frosting is also gorgeous with this design – simply add 1/2 cup cocoa powder to the frosting recipe.
- If you don’t have a turntable, no problem! You can create the spiral pattern without one – it just takes a bit more patience. Simply rotate the plate manually as you pipe.
- Invest in quality vanilla extract and room-temperature eggs – these small details significantly impact the final flavor and texture.
- Practice your spiral pattern on a piece of parchment paper first if you’re nervous. The motion becomes intuitive after one or two attempts.