

There’s something truly magical about an Easter Bunny Cake—it’s whimsical, delightful, and absolutely perfect for your spring celebration. This recipe has been passed down through generations, and it’s the kind of dessert that makes everyone smile the moment it appears on the table. The beauty of this cake is that it’s not as complicated as it looks, but it certainly impresses!
My grandmother always said that the secret to a perfect Easter Bunny Cake lies in three things: using quality ingredients, taking your time with the decorating, and most importantly, baking it with love. This adorable bunny-shaped cake starts with a classic vanilla or chocolate cake base, and then we transform it into an Easter showstopper with simple decorating techniques that anyone can master.
The cake itself is light, fluffy, and incredibly moist—the kind of cake that melts in your mouth with every bite. I love serving this alongside fresh spring salads like our Best Chickpea Salad Recipe for a complete Easter brunch. The combination of textures and flavors makes for an unforgettable meal.
What makes this recipe so special is how versatile it is. You can bake it a day ahead, which takes the stress out of party planning. The frosting is a creamy American buttercream that’s stable enough to hold decorations but soft enough to be absolutely delicious. Whether you’re baking this for a small family gathering or a larger Easter celebration, this bunny cake never fails to be the star of the show.
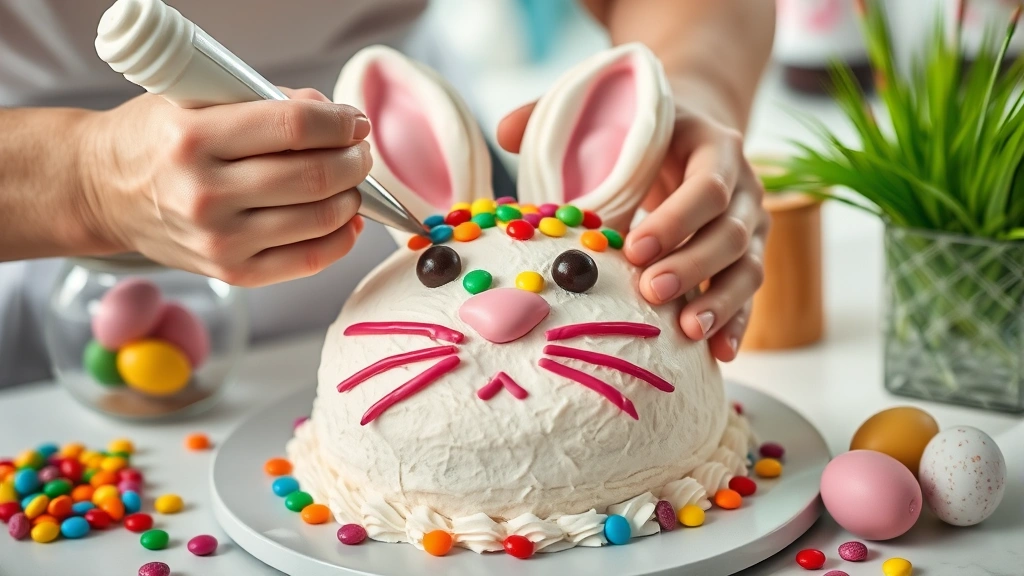
The decorating process is where the real fun begins. Using simple piping techniques and colorful candies, you’ll create a bunny face that’s almost too cute to eat—almost! Children especially love helping with the decorating, making this a perfect project to do together. Don’t worry if your bunny isn’t perfectly symmetrical; that’s part of its charm and personality.
For more spring-inspired baking ideas and Easter entertaining, check out trusted sources like Bon Appétit and Serious Eats for additional inspiration. I also recommend exploring New York Times Cooking for their collection of holiday recipes.
Ingredients
- 2 1/4 cups all-purpose flour
- 2 1/2 teaspoons baking powder
- 1/2 teaspoon salt
- 1/2 cup (1 stick) unsalted butter, softened
- 1 1/2 cups granulated sugar
- 3 large eggs, room temperature
- 1 teaspoon vanilla extract
- 1 cup whole milk, room temperature
- 1 cup (2 sticks) unsalted butter, softened (for frosting)
- 4 cups powdered sugar
- 3-4 tablespoons heavy cream or milk
- 1 teaspoon vanilla extract (for frosting)
- Pink gel food coloring (optional)
- 2 pink frosting-covered wafer cookies or rolled fruit leather strips (for ears)
- 2 black licorice pieces or black candies (for eyes)
- 1 pink gumdrop or red licorice piece (for nose)
- White frosting or whipped cream (for tail)
- Shredded coconut or pearl sugar (for bunny texture, optional)
Instructions
- Preheat your oven to 350°F (175°C). Grease and flour two 9-inch round cake pans, or line them with parchment paper for easy removal. This ensures your cakes will release perfectly and bake evenly.
- In a medium bowl, whisk together the flour, baking powder, and salt. Set this dry mixture aside. Whisking these together ensures the leavening agent is evenly distributed throughout the cake.
- In a large mixing bowl, cream together the softened butter and granulated sugar using an electric mixer on medium speed for 3-4 minutes until the mixture is light, fluffy, and pale in color. This aerating process is crucial for a tender crumb.
- Add the eggs one at a time to the butter mixture, beating well after each addition. Pour in the vanilla extract and mix until fully combined. Make sure to scrape down the sides of the bowl to ensure even mixing.
- Alternate adding the flour mixture and milk to the butter mixture, starting and ending with the flour. Add about one-third of the flour mixture, then half the milk, then another third of the flour, then the remaining milk, and finally the last of the flour. Beat on low speed between each addition just until combined.
- Divide the batter evenly between the prepared pans and smooth the tops with a spatula. Tap each pan gently on the counter to release any air bubbles.
- Bake for 35-40 minutes, or until a toothpick inserted in the center comes out clean and the tops are golden brown. The cakes should spring back when lightly touched.
- Remove the cakes from the oven and let them cool in the pans for 10 minutes. Then turn them out onto wire racks to cool completely, at least 1 hour. This cooling time is essential before frosting.
- While the cakes cool, prepare your frosting by creaming together the softened butter in a large bowl using an electric mixer on medium speed for about 2 minutes until pale and fluffy.
- Gradually add the powdered sugar, one cup at a time, beating well after each addition. The frosting will look dry at first—this is normal.
- Add the heavy cream and vanilla extract, then beat on medium-high speed for 2-3 minutes until the frosting is light, fluffy, and spreadable. Add more cream if needed to reach the right consistency.
- If desired, tint the frosting with a few drops of pink gel food coloring to give your bunny a rosy appearance. Mix until the color is evenly distributed.
- Once the cakes are completely cool, place one layer on your serving plate or cake board. Spread a generous layer of frosting on top using an offset spatula.
- Stack the second cake layer on top and frost the entire cake with a crumb coat first—a thin layer of frosting that seals in the crumbs. Refrigerate for 15 minutes.
- Apply the final layer of frosting to the entire cake, making it smooth or creating a textured finish with the back of a spoon for a more rustic look.
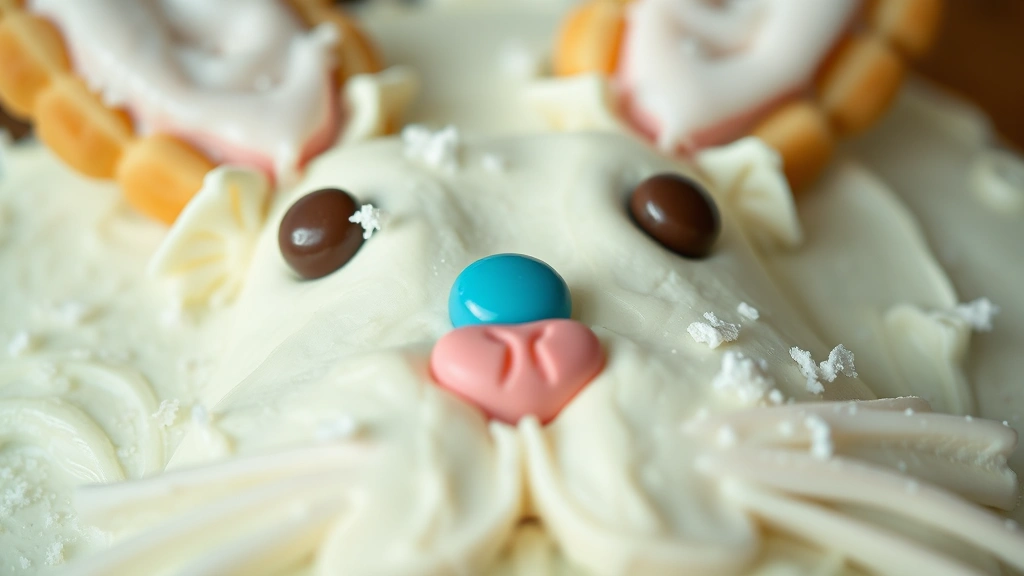
- Now for the fun part: creating the bunny face. Position the two frosting-covered wafer cookies at the top of the cake as ears, pressing gently into the frosting to secure them.
- Place the black candies or licorice pieces where the eyes should be, positioning them to give your bunny a friendly expression. You can use a small amount of frosting as ‘glue’ if needed.
- Position the pink gumdrop or licorice piece in the center of the cake for the nose.
- Using a piping bag fitted with a large round tip, pipe a white frosting pom-pom at the bottom front of the cake to create the bunny’s tail. Alternatively, use a dollop of whipped cream.
- If desired, sprinkle shredded coconut around the bunny’s face or over the frosting for added texture and a fluffy appearance. You can also use pearl sugar for a sparkly effect.
- Refrigerate the finished cake for at least 30 minutes before serving to allow the frosting to set properly and the flavors to meld together beautifully.
Pro Tips
- This cake can be baked up to one day in advance. Simply wrap the cooled, unfrosted cake layers in plastic wrap and store at room temperature. Frost the day you plan to serve it for the best appearance.
- For a chocolate version of this beloved Easter cake, substitute 3/4 cup of all-purpose flour with unsweetened cocoa powder. The measurements and baking time remain the same.
- If you don’t have gel food coloring, you can use liquid food coloring, though you may need to add a bit more powdered sugar to compensate for the extra liquid.
- The frosting can be made up to two days ahead and stored in an airtight container in the refrigerator. Let it come to room temperature and give it a quick stir before using.
- When decorating, work quickly as the frosting can become soft in a warm kitchen. If needed, refrigerate the cake between decorating steps.
- For extra stability with the cookie ears, you can insert wooden picks or thick pretzel sticks into the frosting before placing the cookies on top.
- This cake pairs wonderfully with fresh strawberries, whipped cream, or fresh spring vegetables like our Best Shishito Peppers Recipe for a complete Easter meal.
- Keep the finished cake at room temperature for serving if possible, as refrigerated frosting can be quite firm. If refrigerating overnight, remove it 30 minutes before serving.
- The cake serves 12-14 people comfortably, making it perfect for a medium-sized Easter gathering.
- To make the bunny ears more stable, you can use pink-tinted modeling chocolate or candy melts shaped into ear shapes instead of wafer cookies.
- This recipe is easily doubled if you’re serving a larger crowd. Simply use four 9-inch pans and double all ingredients for the frosting.