

There’s something absolutely magical about blowing bubbles on a sunny afternoon! Whether you’re planning a backyard birthday party, a whimsical photoshoot, or just want to create some delightful entertainment for the kids, homemade bubble solution is the perfect solution. This timeless activity brings joy to people of all ages, and the best part? You probably already have everything you need in your kitchen right now.
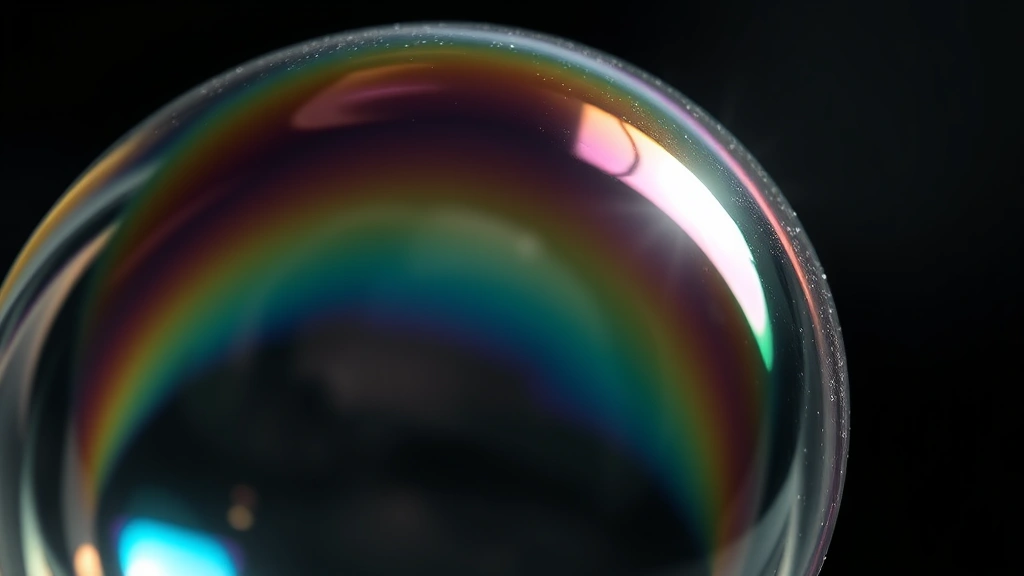
I’ve been making bubble solutions for years, and I’m thrilled to share my foolproof recipe that creates the most magnificent, long-lasting bubbles. Unlike store-bought versions that often disappoint, this homemade bubble solution produces bubbles that float gracefully through the air, don’t pop on contact with your wand, and create those stunning iridescent colors we all love. The secret lies in the combination of ingredients and the simple technique that allows the solution to develop the perfect consistency and elasticity.
This recipe is incredibly versatile and budget-friendly. You can make it in small batches for a quick afternoon activity or prepare a large batch for a big event. The best part is that it stores beautifully in an airtight container for weeks, so you can always have bubble solution ready whenever inspiration strikes. I love using this for children’s parties, outdoor events, engagement photo sessions, and those spontaneous moments when we all need a little bit of magic in our lives.
What makes this bubble solution truly special is how easy it is to customize. You can add food coloring for tinted bubbles, create giant bubbles with a special wand, or make tiny bubbles for a more whimsical effect. The basic formula remains the same, but the possibilities are endless. I’ve included tips for troubleshooting common issues and suggestions for creating the perfect bubbles every single time. This is one of those recipes that becomes a family favorite and gets requested again and again. Let me walk you through everything you need to know to become a bubble-blowing expert!
For the best results, pair this bubble solution with special treats and refreshments during your outdoor gathering. You might also enjoy setting up a pasta picnic alongside your bubble activities. Check out our Chicken Alfredo Recipe for the perfect outdoor meal, or keep things light with a Greek Salad Recipe. For additional inspiration on hosting the perfect outdoor event, consult Bon Appétit’s entertaining guide and Serious Eats’ outdoor cooking tips.
Ingredients
- 1 cup water (distilled water works best)
- 2 tablespoons dish soap (Dawn brand works wonderfully)
- 1 tablespoon granulated sugar
- 1 tablespoon corn syrup or light honey
- 1/4 teaspoon baking powder (optional, but recommended)
- Food coloring (optional, for tinted bubbles)
- Essential oils (optional, for scented bubbles)
Instructions
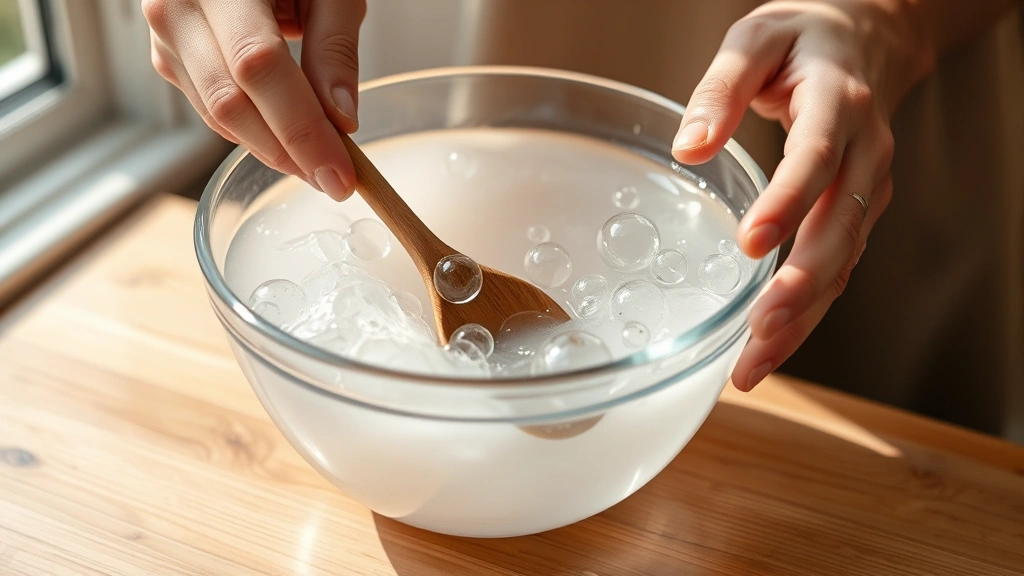
- Gather all your ingredients and find a clean bowl or container. Using distilled water is ideal because it doesn’t contain minerals that might interfere with bubble formation, but tap water works in a pinch.
- Pour the 1 cup of water into your bowl or measuring cup. If you’re using tap water, let it sit for a few minutes to allow any chlorine to dissipate.
- Add the 2 tablespoons of dish soap to the water. Pour it in gently to minimize foaming. Stir slowly and carefully, mixing until the soap is fully incorporated. Avoid creating bubbles at this stage.
- Add 1 tablespoon of granulated sugar to the mixture. The sugar acts as a stabilizing agent and helps create stronger, longer-lasting bubbles. Stir gently until the sugar dissolves completely.
- Add 1 tablespoon of corn syrup or light honey to the solution. This ingredient is crucial as it increases the elasticity of the bubble film, allowing bubbles to stretch further before popping. Mix thoroughly but gently.
- If you want to use the optional baking powder, sprinkle 1/4 teaspoon into the solution. This helps stabilize the bubbles even further. Stir until fully dissolved.
- If you’d like colored bubbles, add 2-3 drops of food coloring at this point. Stir until the color is evenly distributed throughout the solution.
- For scented bubbles, add 1-2 drops of your favorite essential oil, though this step is entirely optional and doesn’t affect bubble performance.
- Pour the bubble solution into a clean container with a tight-fitting lid. If possible, let it rest for at least 1 hour before using. This resting period allows the ingredients to fully integrate and creates superior bubbles.
- When you’re ready to blow bubbles, pour some solution into a shallow dish or bubble container. Your bubble wands are now ready to create magical moments!
Pro Tips
- **The Best Dish Soap:** Dawn is my absolute favorite choice for bubble solution because it creates superior bubble films. Blue Dawn works slightly better than other varieties, but any Dawn brand will produce excellent results. Avoid dish soaps with added moisturizers or antibacterial agents, as these can interfere with bubble formation.
- **Water Matters:** While distilled water produces the best results, you can use tap water or even rainwater. If using tap water, let it sit overnight to allow chlorine to evaporate, which can sometimes interfere with bubble quality.
- **The Resting Period:** Allowing your bubble solution to rest for at least one hour before use is genuinely important. During this time, the ingredients fully integrate, and the solution develops optimal elasticity. For even better results, let it sit for 24 hours. You can make it the night before your event!
- **Storage Instructions:** Store your bubble solution in an airtight container at room temperature. It will keep for several weeks, making it perfect for having on hand whenever you need it. If you notice the solution becoming cloudy or developing an odor, it’s time to make a fresh batch.
- **Customization Ideas:** Create giant bubbles by adding a tablespoon of glycerin (available at pharmacies) to the recipe. Make bubble solution for sensitive skin by using baby shampoo instead of dish soap. Create glow-in-the-dark bubbles by adding highlighter pen ink diluted in water.
- **Troubleshooting:** If bubbles pop immediately, your solution might need more corn syrup or additional resting time. If the solution is too thick and won’t flow properly, add a tablespoon of water. If bubbles are forming but immediately collapsing, increase the sugar content by another teaspoon.
- **Wand Alternatives:** Beyond traditional bubble wands, try using pipe cleaners twisted into shapes, cookie cutters held upright, or straws bundled together with string. Each creates different bubble sizes and patterns.
- **Perfect Conditions:** Bubble blowing works best on calm, humid days. Avoid windy conditions, direct sunlight, and very dry days. Early morning or late evening often provides ideal humidity levels.
- **Food Coloring Tips:** If using food coloring, remember that it will stain clothing. Gel food coloring produces more vibrant colors than liquid varieties. You can also use watercolor paints thinned with a little water for beautiful effects.
- **Making it Educational:** Use bubble solution as a fun way to teach children about surface tension, elasticity, and physics. Watch how light refracts through the bubble film to create those gorgeous rainbow colors.