
The Ninja Creami has revolutionized how we make frozen treats at home, and honestly, once you master this machine, you’ll never go back to traditional ice cream makers. This guide will walk you through creating the most luxurious, creamy Ninja Creami ice cream that rivals any gelato shop.
The secret to the best Ninja Creami ice cream lies in understanding how the machine works and preparing your base correctly. Unlike traditional churning methods, the Creami freezes your mixture solid, then shaves it into silky-smooth ice cream using specialized blades. This means your base needs the right balance of fat, sugar, and stabilizers to freeze properly and shave beautifully.
What makes homemade Ninja Creami ice cream so special is the control you have over ingredients. No artificial additives, no mysterious stabilizers you can’t pronounce—just pure, delicious ice cream made exactly how you want it. Whether you’re a beginner or an experienced home cook, this method is foolproof and incredibly satisfying. The best part? You can have gourmet ice cream ready in just a few hours, making this perfect for summer gatherings or spontaneous dessert cravings.
I’ve tested dozens of recipes and techniques, and I’m sharing my proven formula that delivers restaurant-quality results every single time. From classic vanilla to creative flavor combinations, this base will become your go-to foundation for creating incredible frozen desserts that your family will absolutely love.
The technique I’m sharing incorporates professional pastry methods that ensure proper emulsification and freezing. You’ll learn the importance of chilling your base thoroughly, the exact consistency you’re aiming for, and how to troubleshoot if something doesn’t freeze quite right. This comprehensive guide covers everything from ingredient selection to serving suggestions, plus tips for creating variations that will keep your dessert game exciting.
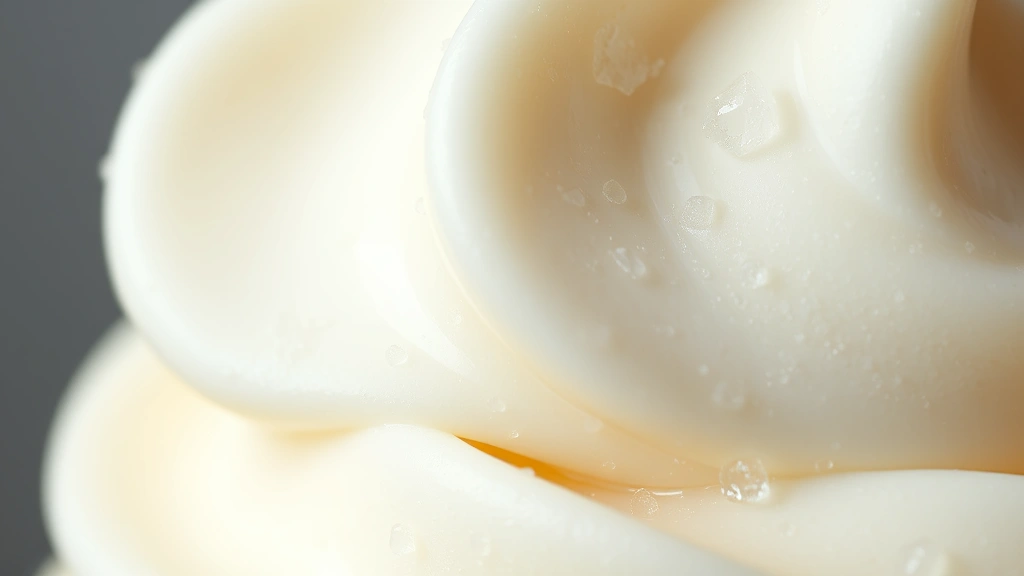
One of the biggest advantages of the Ninja Creami method is the texture—it’s impossible to achieve the same silky consistency with other home methods. The machine’s engineering creates ice crystals so fine they’re virtually undetectable on your palate, resulting in ice cream that feels indulgent and premium. Combined with a properly formulated base, you’re looking at ice cream that tastes like it came from an upscale ice cream parlor.
I recommend making multiple batches and keeping them in your freezer for quick desserts throughout the week. You can prepare different flavors simultaneously, and they’ll keep beautifully for up to two weeks in the Creami containers. This makes hosting dinner parties or unexpected guests so much easier—just pop a container in, select your desired texture, and serve within minutes.
The beauty of mastering this technique is that you’ll develop the confidence to experiment with flavors. Once you understand how the base works, you can easily incorporate extracts, spices, mix in various additions, or create seasonal variations. Your Ninja Creami becomes a gateway to endless creative possibilities, limited only by your imagination.
This recipe serves as your foundation for success. I’ve carefully balanced each ingredient to ensure optimal freezing and shaving performance. The egg yolks provide richness and help create a smooth texture, while the sugar contributes both flavor and prevents excessive ice crystal formation. The vanilla extract adds that classic flavor everyone loves, but you can absolutely customize this to your preferences.
Throughout this guide, you’ll notice I emphasize patience—allowing your base to chill thoroughly is non-negotiable for the best results. Many home cooks rush this step, and it shows in the final product. By taking time to do it right, you’re investing in ice cream that genuinely tastes better and has superior texture. It’s these small details that separate good homemade ice cream from exceptional ice cream.
Whether you’re making this for a special occasion or just because it’s Wednesday and you deserve something delicious, this Ninja Creami ice cream recipe will become a staple in your kitchen. Your friends and family will be amazed that you made this at home, and you’ll love the simplicity of the process once you’ve done it once or twice. Let’s create something magical together!
Ingredients
- 2 cups heavy cream, cold
- 1 cup whole milk, cold
- 3/4 cup granulated sugar
- 5 large egg yolks
- 2 teaspoons vanilla extract
- 1/4 teaspoon sea salt
- 1 tablespoon corn syrup

Instructions
- Pour the heavy cream and whole milk into a large mixing bowl and whisk together until combined. Set this mixture aside in the refrigerator.
- In a separate medium bowl, whisk together the egg yolks and granulated sugar until the mixture is pale, thick, and reaches the ribbon stage—about 3-4 minutes of continuous whisking.
- Slowly pour the cold cream and milk mixture into the egg yolk mixture while whisking constantly to create an emulsion. This prevents the eggs from scrambling and ensures a smooth, creamy texture.
- Add the vanilla extract, sea salt, and corn syrup to the mixture and whisk until fully incorporated and smooth.
- Pour the entire ice cream base through a fine-mesh strainer into a clean bowl to remove any lumps or cooked egg bits, ensuring a silky-smooth final product.
- Cover the bowl with plastic wrap and refrigerate the base for at least 8 hours, or preferably overnight. This chilling time is crucial for proper freezing and texture.
- Pour the chilled base into your Ninja Creami containers, filling them to the indicated line—do not overfill or the machine won’t work properly.
- Place the filled containers in your freezer and freeze for at least 24 hours until completely solid. The mixture should be rock-hard.
- Remove one frozen container from the freezer and insert it into your Ninja Creami machine according to manufacturer instructions.
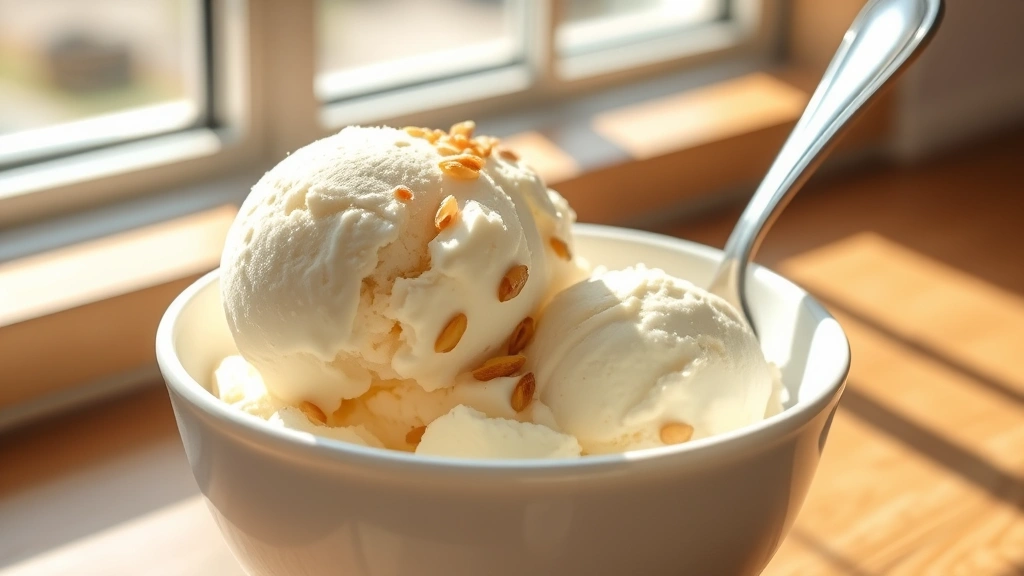
- Select your desired texture setting: Sorbet mode for a lighter consistency, Slushi mode for a partially frozen texture, or Gelato mode for the creamiest result.
- Press the start button and let the machine run until it completes its cycle—typically 1-2 minutes depending on your machine model.
- Carefully remove the container and scoop the freshly shaved ice cream into serving bowls or cones immediately for the best texture.
- If you’re not serving immediately, transfer the shaved ice cream to a pre-chilled serving dish and return it to the freezer, though texture is best when served right after shaving.
- For best results, consume within 2-3 hours of shaving, though it will keep in your freezer for up to 2 weeks in an airtight container.
Pro Tips
- The key to perfect Ninja Creami ice cream is using cold ingredients and thoroughly chilling your base—this step cannot be rushed. Temperature control directly impacts texture and the machine’s ability to shave properly.
- Egg yolks are essential for creating that luxurious, creamy texture that makes homemade ice cream so special. They act as an emulsifier, preventing ice crystals from becoming too large. Never skip this ingredient.
- Corn syrup might seem optional, but it’s actually a secret weapon. It lowers the freezing point slightly and prevents the mixture from freezing rock-solid, making it easier for your machine to shave into smooth ice cream.
- The fine-mesh strainer step is crucial—it removes any bits of cooked egg and ensures perfectly smooth ice cream with no grainy texture. Don’t skip this even if your mixture looks smooth.
- If your ice cream isn’t freezing solid enough after 24 hours, your freezer might not be cold enough. A standard freezer should be at 0°F or below. If you have an older freezer, you may need to extend freezing time to 30-36 hours.
- Conversely, if your ice cream is too hard and the machine struggles to shave it, remove the container and let it sit at room temperature for 2-3 minutes before inserting it back into the machine.
- Flavor variations are endless: add 1 teaspoon of espresso powder for coffee ice cream, substitute 1/2 teaspoon almond extract for part of the vanilla, or infuse your cream with fresh mint, lavender, or cinnamon before straining.
- For chocolate ice cream, whisk 1/4 cup unsweetened cocoa powder with the sugar before adding to the eggs—this prevents lumps and ensures even chocolate distribution.
- You can make multiple batches simultaneously if you have multiple containers. Just prepare them all at once and freeze them together, then rotate which one you serve.
- Storage is important: keep filled Creami containers in the back of your freezer where temperature is most consistent. Avoid the door, which experiences temperature fluctuations from opening and closing.
- If you’re concerned about raw eggs, use pasteurized eggs or egg yolks—these are increasingly available at most grocery stores and completely safe for this application.
- The mixture can be refrigerated for up to 48 hours before freezing if you need to prepare it ahead, making this recipe perfect for meal planning and entertaining.