
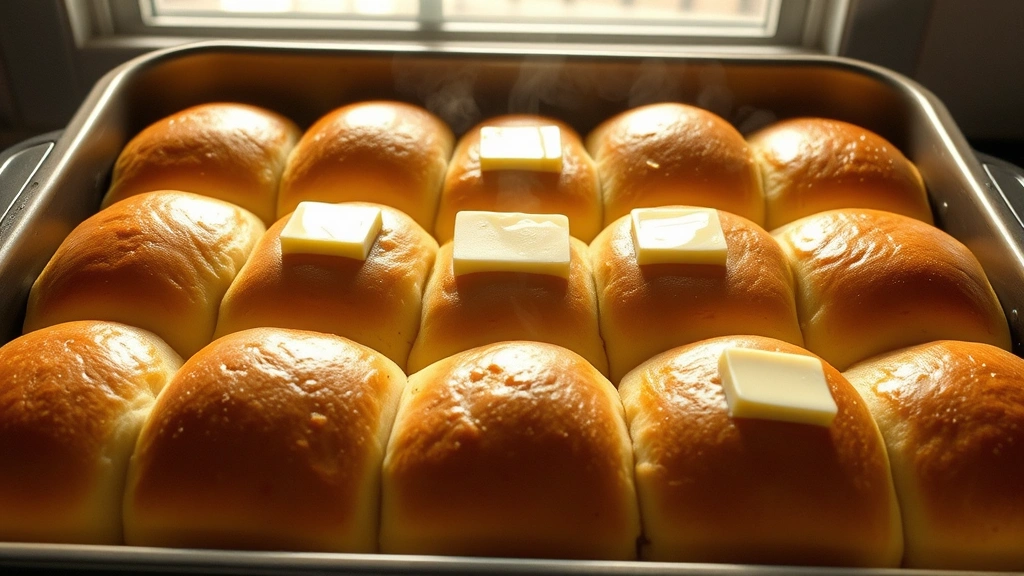
There’s nothing quite like the aroma of homemade yeast rolls baking in the oven – it’s pure comfort and nostalgia all rolled into one! This homemade yeast rolls recipe is an absolute game-changer for any baker, whether you’re a seasoned pro or just starting your bread-making journey. These soft, pillowy rolls are perfectly golden, wonderfully fluffy, and absolutely irresistible straight from the oven with a pat of butter melting on top.
What makes these rolls so special is the balance of simplicity and technique. The dough comes together quickly with basic pantry staples – flour, yeast, butter, sugar, salt, eggs, and milk – but the magic happens during the rise and shaping process. I’m going to walk you through every single step to ensure your rolls turn out absolutely perfect every single time.
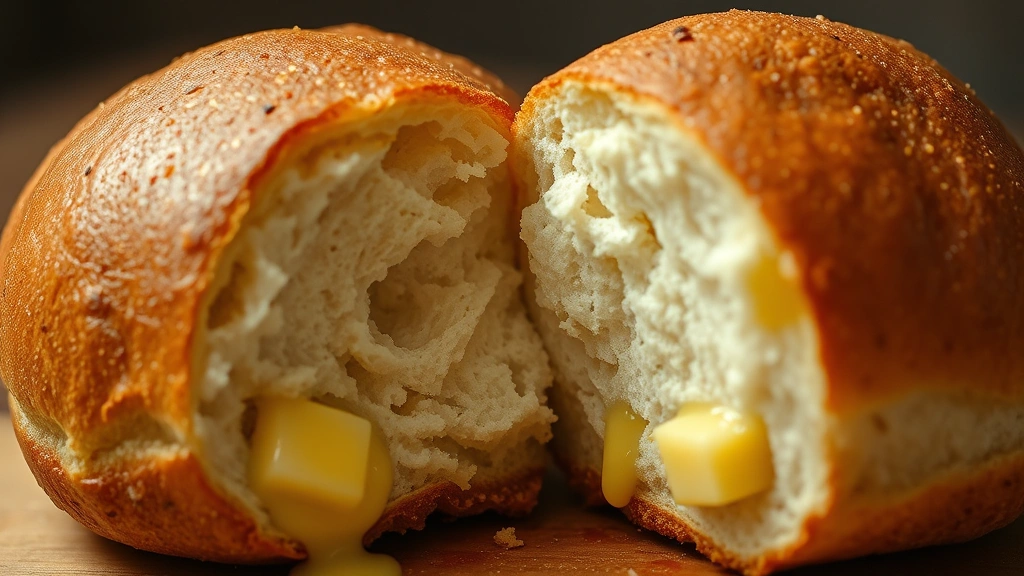
These rolls are ideal for holiday dinners, weekend family gatherings, or whenever you want to impress your loved ones with something homemade and delicious. They’re soft enough to pull apart with your fingers, sturdy enough to hold up to generous amounts of butter and jam, and honestly, they’re so good that they often disappear before the main course is even served! Whether you’re serving them alongside a beautiful pasta like Perfect Creamy Pasta or as part of a traditional holiday spread, these rolls will absolutely steal the show.
One of my favorite things about this recipe is how forgiving it is. Even if your timing isn’t perfect or your kitchen is a bit cool, these rolls will still turn out beautifully. The key is understanding the dough – it should be soft and slightly sticky, not dry and stiff. When you’re learning how to make perfect homemade yeast rolls, this texture is absolutely crucial for achieving that cloud-like crumb structure.
I’ve also included several helpful tips throughout this recipe to troubleshoot common issues and help you achieve bakery-quality results at home. From proofing times to shaping techniques, I’m sharing all my secrets so you can confidently make these rolls again and again. Once you master this homemade yeast rolls recipe, you’ll be making them for every occasion!
For the best results, use bread flour if you have it – it has a higher protein content which creates a more tender crumb. However, all-purpose flour works beautifully too. If you want to add extra flavor, try brushing the baked rolls with cream sauce mixed with herbs, or simply top them with flaky sea salt for an elegant touch.
These homemade yeast rolls are perfect for building a complete meal. Serve them alongside your favorite main dishes, or create a beautiful bread basket as a centerpiece. The beauty of this recipe is its versatility – you can make them ahead, freeze them, and reheat them fresh whenever you need them. This homemade yeast rolls recipe truly is a staple that every home baker should have in their collection.
For additional inspiration on complementary sides, check out this Best Pickled Red Onion Recipe or this Best Chickpea Salad Recipe to round out your meal. Now, let’s get baking!
For more detailed bread-baking techniques and inspiration, I recommend checking out Serious Eats for scientific baking insights, Bon Appétit for stunning food photography and techniques, and New York Times Cooking for classic recipes and expert advice.
Ingredients
- 1 cup whole milk, warmed (about 110°F)
- 2¼ teaspoons active dry yeast (one 0.25-ounce packet)
- ½ cup granulated sugar
- 6 tablespoons unsalted butter, melted
- 1 large egg, room temperature
- 1 teaspoon salt
- 3½ cups all-purpose flour or bread flour
- 2 tablespoons butter, softened, for brushing after baking
- Flaky sea salt for finishing (optional)
Instructions
- Pour the warm milk into a large mixing bowl. Sprinkle the active dry yeast over the warm milk and let it sit for about 1 minute to bloom. The yeast will begin to foam and activate, which means it’s alive and ready to work its magic.
- Whisk the bloomed yeast and milk together until combined. Add the granulated sugar, melted butter, egg, and salt to the bowl. Stir everything together until well combined, making sure the egg is fully incorporated into the wet mixture.
- Add the flour to the wet ingredients, one cup at a time, stirring well after each addition. Start with 3 cups of flour and mix until a shaggy dough forms. The dough should start pulling away from the sides of the bowl.
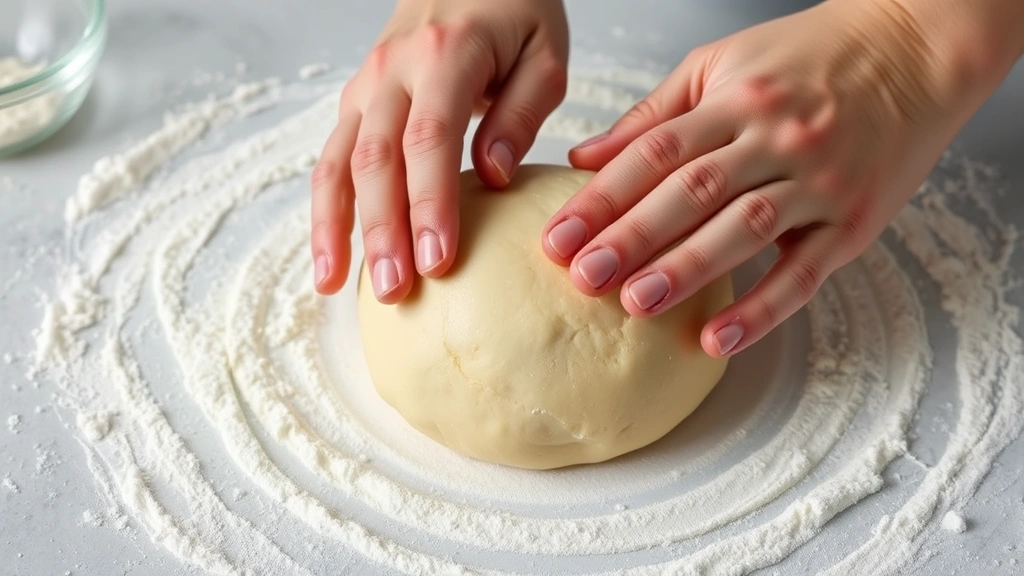
- Transfer the dough to a clean countertop and begin kneading by hand. If the dough is too sticky to handle, sprinkle the remaining ½ cup flour over the top gradually as you knead. Knead for about 8-10 minutes until the dough becomes smooth, elastic, and slightly sticky but no longer sticking to your hands.
- Lightly grease a large bowl with cooking spray or oil. Shape the dough into a smooth ball and place it in the prepared bowl. Turn the dough to coat it lightly with oil on all sides. This prevents a dry crust from forming during rising.
- Cover the bowl with plastic wrap or a damp kitchen towel. Place it in a warm, draft-free location to rise for about 1 to 1½ hours, or until the dough has doubled in size. You can test if it’s ready by gently poking it – if the indent slowly springs back, it needs more time; if it springs back slowly or stays slightly indented, it’s perfect.
- Once the dough has doubled, gently punch it down to release the gases that have built up during rising. This step is important but handle the dough gently to maintain the light texture you’ve worked to develop.
- Turn the dough out onto a lightly floured work surface. Divide it into 12 equal pieces using a dough scraper or sharp knife. You can weigh each piece for accuracy – each should be about 1.5 ounces – or simply eyeball it for roughly equal sizes.
- Take each piece of dough and gently shape it into a tight ball by rolling it between your palms, tucking the edges underneath to create tension on the surface. This shaping technique helps create a beautiful, rounded roll with a smooth exterior.
- Grease a 9×13-inch baking pan with butter or cooking spray. Arrange the 12 shaped rolls in the pan, placing them close together so they touch slightly. They should fit snugly in three rows of four rolls each.
- Cover the pan with plastic wrap or a damp kitchen towel. Allow the rolls to rise for about 45 minutes to 1 hour until they’re puffy and have expanded to fill the pan. They should look light and airy, and when you gently poke one, it should spring back slowly.
- While the rolls are rising, preheat your oven to 375°F (190°C). Make sure the oven is fully preheated before baking for even, consistent results.
- Once the rolls have finished their second rise and the oven is preheated, place the pan in the oven on the middle rack. Bake for 18-22 minutes until the rolls are golden brown on top. The exact time depends on your oven, so start checking around the 18-minute mark.
- Remove the pan from the oven and immediately brush the hot rolls with softened butter. This creates that beautiful, tender crust and adds richness and flavor. If desired, sprinkle with flaky sea salt while the butter is still melting.
- Let the rolls cool in the pan for about 5 minutes before serving. They’re delicious warm or at room temperature, and they’ll stay soft for several days when stored in an airtight container.
Pro Tips
- **Make-Ahead Tip**: You can prepare these rolls up to the point of the second rise, then cover and refrigerate overnight. The next morning, let them come to room temperature and rise for 30-45 minutes before baking. This slow, cold rise actually develops more flavor!
- **Freezing Instructions**: After shaping and the first rise, you can freeze the unbaked rolls on a baking sheet until solid, then transfer them to a freezer bag for up to 3 months. Thaw overnight in the refrigerator, then let them come to room temperature and complete their second rise before baking.
- **Milk Temperature is Critical**: Make sure your milk is around 110°F (43°C). If it’s too hot (above 120°F), it will kill the yeast. If it’s too cold, the yeast won’t activate properly. Use a kitchen thermometer for best results.
- **Dough Texture**: The dough should be soft and slightly tacky after kneading, but not so wet that it sticks aggressively to your hands. If it’s too stiff, your rolls will be dense. If it’s too wet, they’ll spread out flat instead of rising up.
- **Rising Time Variables**: The rising time can vary based on your kitchen temperature. In a warm kitchen (75-80°F), rolls may rise faster. In a cool kitchen, they’ll take longer. You’re looking for the dough to double in size, not a specific time.
- **Customization Ideas**: Add 1 teaspoon of vanilla extract to the dough for subtle sweetness, or brush the baked rolls with cinnamon sugar mixture for a sweet variation. You can also add herbs like rosemary or thyme for savory rolls.
- **Brush with Egg Wash**: For a more golden, shiny appearance, brush the rolls with an egg wash (1 egg beaten with 1 tablespoon water) just before baking instead of brushing with butter afterward.
- **Storage**: Keep baked rolls in an airtight container at room temperature for up to 3 days. Reheat by wrapping them in foil and warming in a 300°F oven for about 10 minutes.
- **Troubleshooting Dense Rolls**: If your rolls come out dense, the dough may have been over-kneaded, the yeast may have been dead, or the water temperature was incorrect. Start fresh with new yeast and check your milk temperature carefully.
- **Troubleshooting Dry Rolls**: Make sure to brush with butter immediately after baking while they’re hot. Also, don’t overbake – pull them out when they’re just golden brown, not dark brown.
Pingback: How to make the BEST Orange Chicken Sauce Recipe! – Simple Recipe Finder