

There’s something absolutely magical about homemade coconut bread – that tender crumb, the subtle sweetness, and the unmistakable tropical aroma wafting through your kitchen. This isn’t just any coconut bread recipe; it’s the one that will have everyone asking for seconds (and your secret ingredient!). I’ve perfected this over years of baking, and I’m thrilled to share it with you today.
What makes this coconut bread truly exceptional is the combination of both shredded coconut and creamy coconut milk, which creates an incredibly moist and flavorful loaf that stays fresh for days. Unlike denser coconut breads, this one has a delicate, almost cake-like texture that melts in your mouth. The beauty of this recipe is its simplicity – with just pantry staples and a few minutes of mixing, you’ll have a showstopper that looks and tastes like you spent hours in the kitchen.
I love serving this for breakfast with a cup of coffee, or as an elegant dessert with a dollop of whipped cream. It’s also perfect for gift-giving during the holidays – just wrap it up with a pretty ribbon and watch faces light up! Whether you’re an experienced baker or just starting your baking journey, this recipe-friendly approach makes success practically guaranteed.
The secret to preventing a dry coconut bread is understanding the science behind moisture retention. That’s why this recipe includes both sour cream and coconut milk – they work together to keep every slice tender and delicious. Plus, the careful balance of ingredients ensures your bread rises beautifully without becoming tough or dense.
If you’re looking to expand your baking repertoire, I also recommend checking out my favorite baking techniques and exploring how different ingredients interact. Understanding the ‘why’ behind each component will make you a better baker overall. This coconut bread is an excellent foundation recipe that teaches you proper mixing methods and ingredient ratios.
For the glaze topping, I recommend using Bond Appétit’s glazing techniques for a professional finish. You can also explore Serious Eats’ comprehensive bread guide for variations and troubleshooting tips. For additional inspiration on coconut-forward recipes, check out the New York Times recipe collection.
This coconut bread recipe has become a staple in my kitchen, and I guarantee it will become one in yours too. The combination of flavors, the ease of preparation, and the consistently beautiful results make it a recipe I return to again and again. So grab your mixing bowls, preheat that oven, and let’s make some absolutely delicious coconut bread together!
Ingredients
- 2 cups all-purpose flour
- 1½ teaspoons baking powder
- ½ teaspoon baking soda
- ½ teaspoon salt
- 1 cup shredded unsweetened coconut
- ½ cup (1 stick) butter, softened
- ¾ cup granulated sugar
- 2 large eggs, room temperature
- ½ cup sour cream
- ½ cup full-fat coconut milk
- 2 teaspoons vanilla extract
- ½ teaspoon coconut extract (optional but recommended)
- For the glaze: 1 cup powdered sugar, 2-3 tablespoons coconut milk, ¼ teaspoon vanilla extract, ¼ cup toasted shredded coconut for garnish
Instructions
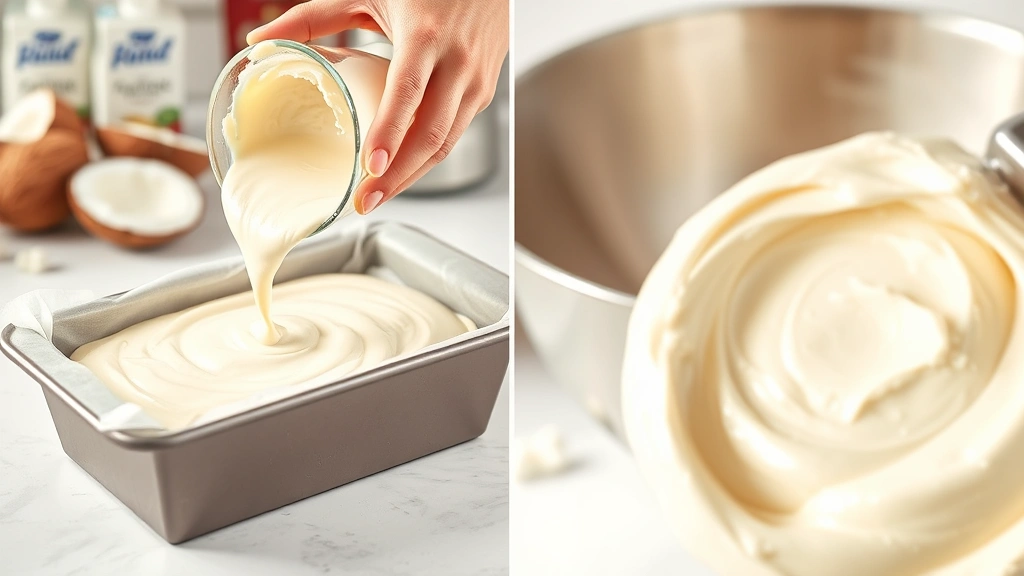
- Preheat your oven to 350°F (175°C). Grease a 9×5-inch loaf pan thoroughly with butter or cooking spray, and line the bottom with parchment paper for easy removal. This step ensures your bread won’t stick and will release perfectly.
- In a medium bowl, whisk together the flour, baking powder, baking soda, and salt. Set this dry mixture aside. Make sure to break up any lumps in the baking soda to ensure even distribution throughout the bread.
- Stir in the shredded unsweetened coconut into your dry mixture, making sure each strand is well coated with flour. This prevents the coconut from sinking to the bottom during baking.
- In a large mixing bowl, beat the softened butter and granulated sugar together on medium speed for 3-4 minutes until the mixture is light, fluffy, and pale in color. This is called creaming and incorporates air into your batter for a tender crumb.
- Add the eggs one at a time, beating well after each addition (about 30 seconds per egg). Make sure each egg is fully incorporated before adding the next one. The mixture should look smooth and well combined.
- In a small bowl, whisk together the sour cream, coconut milk, vanilla extract, and coconut extract until well combined. Let this mixture sit for a moment so the flavors meld together.
- Add the dry ingredients to the butter mixture in three additions, alternating with the coconut milk mixture. Start and end with the dry ingredients. Mix on low speed until just combined after each addition – don’t overmix, as this can develop too much gluten and result in a tough bread.
- Pour the batter into your prepared loaf pan, smoothing the top with the back of a spatula or an offset knife. Tap the pan gently on the counter a few times to release any air bubbles.
- Bake for 55-65 minutes, or until a toothpick inserted into the center comes out clean or with just a few moist crumbs. The top should be golden brown. If the top is browning too quickly, tent it loosely with aluminum foil after 45 minutes.
- Remove the bread from the oven and let it cool in the pan for 15 minutes. Then turn it out onto a wire rack to cool completely before glazing.
- While the bread cools, make the glaze by whisking together the powdered sugar, coconut milk (start with 2 tablespoons and add more if needed for desired consistency), and vanilla extract until smooth and pourable.
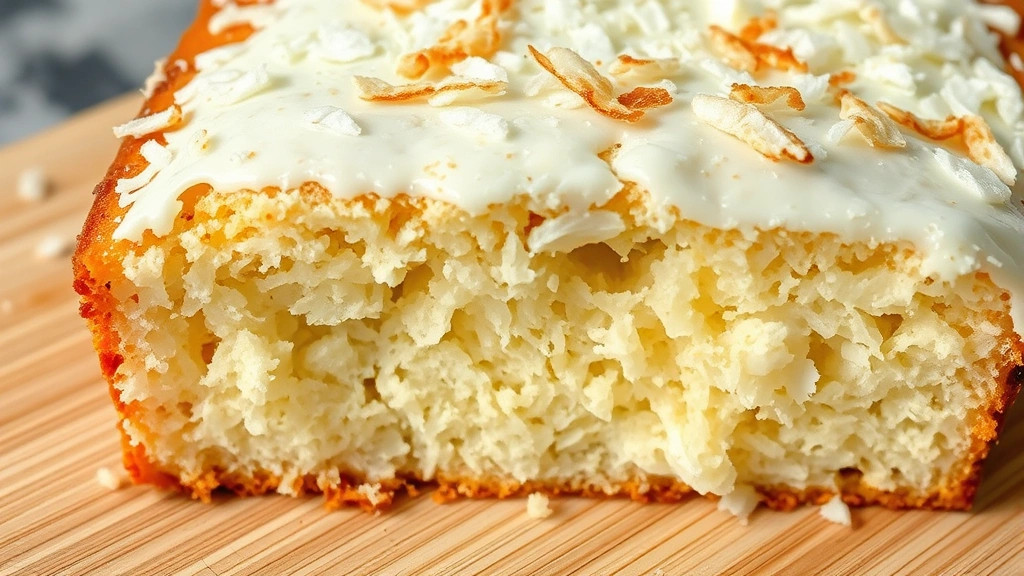
- Once the bread is completely cool, drizzle the glaze over the top and sprinkle with toasted shredded coconut for a beautiful, professional-looking finish.
- Allow the glaze to set for about 15 minutes before slicing. Slice with a serrated knife using a gentle sawing motion to avoid compressing the bread.
Pro Tips
- **Make-Ahead Magic**: This coconut bread actually improves after a day or two as the flavors meld together. Store it wrapped tightly in plastic wrap at room temperature for up to 4 days, or freeze for up to 3 months. To freeze, wrap the cooled bread tightly in plastic wrap and then aluminum foil before placing in a freezer-safe container.
- **Coconut Selection Matters**: Use unsweetened shredded coconut for this recipe – sweetened versions will make the bread overly sweet and can throw off the moisture balance. Look for it in the baking aisle or specialty grocery stores. If you can only find sweetened, reduce the sugar in the recipe by 2 tablespoons.
- **Room Temperature Ingredients**: This is crucial for a smooth, well-incorporated batter. Cold eggs and butter can create a lumpy mixture that doesn’t rise properly. Remove ingredients from the refrigerator 30 minutes before baking.
- **Glaze Consistency**: Your glaze should be thick enough to cling to the bread but thin enough to drizzle smoothly. If it’s too thick, add more coconut milk one teaspoon at a time. If it’s too thin, add more powdered sugar.
- **Toasted Coconut Topping**: To toast your coconut garnish, spread it on a baking sheet and toast at 325°F for 5-7 minutes, stirring occasionally, until golden and fragrant. This adds incredible depth of flavor compared to raw coconut.
- **Substitution Notes**: If you don’t have sour cream, use plain Greek yogurt or Mexican crema as a substitute. Can’t find coconut extract? Skip it – the coconut milk and shredded coconut provide plenty of flavor. For a dairy-free version, use coconut yogurt instead of sour cream.
- **Moisture Check**: If your bread seems dry, you may need to increase the coconut milk by a couple of tablespoons. Conversely, if it seems too wet, reduce the coconut milk slightly. Every oven is different, so slight adjustments may be necessary.
- **Loaf Pan Size**: This recipe is specifically designed for a 9×5-inch loaf pan. Using a different size will affect baking time – smaller pans may need less time, larger pans may need more.
- **Vanilla and Coconut Extract Balance**: The coconut extract is optional but really elevates the coconut flavor. However, a little goes a long way, so don’t exceed ½ teaspoon or it can taste artificial. Always use pure extracts, not imitation.
- **Perfect Slicing Technique**: Use a long serrated bread knife and gently saw back and forth rather than pressing down. Dip the knife in hot water and wipe between cuts for cleaner slices. The bread cuts best when completely cooled.