
Making condensed milk at home is easier than you might think, and the results are absolutely divine! This simple recipe transforms just two basic ingredients into the creamy, sweet condensed milk that’s perfect for desserts, coffee, and so much more. Whether you’re whipping up a batch for cream-based sauces, using it in creamy pasta dishes, or creating the most decadent desserts, homemade condensed milk is a game-changer. I absolutely love having this in my kitchen pantry because it’s versatile, cost-effective, and tastes infinitely better than store-bought versions.
The beauty of this recipe lies in its simplicity. You need just whole milk and sugar—that’s it! By gently heating and reducing these two humble ingredients, you’ll create a thick, silky condensed milk that works beautifully in everything from rich pasta carbonara to decadent desserts. The process is straightforward enough for beginners but produces professional-quality results that will impress everyone at your table.
What I love most about making condensed milk at home is the control you have over sweetness and thickness. You can adjust both to your preference, creating a product that’s perfectly tailored to your needs. Plus, when you make it yourself, you know exactly what goes into it—no mysterious additives or preservatives, just pure, wholesome ingredients. This recipe has become a staple in my kitchen, and I’m thrilled to share it with you today.
The technique is gentle and requires just a bit of patience. As the milk reduces over low to medium heat, it transforms into something magical. The natural sugars caramelize slightly, creating depth of flavor that you simply cannot achieve with store-bought versions. Within about 45 minutes to an hour, you’ll have thick, luxurious condensed milk ready to use in your favorite recipes.
Ingredients
- 4 cups whole milk (full-fat works best)
- 1 cup granulated sugar
- 1 tablespoon butter (optional, for richness)
- 1 teaspoon vanilla extract (optional, for flavor)
Instructions
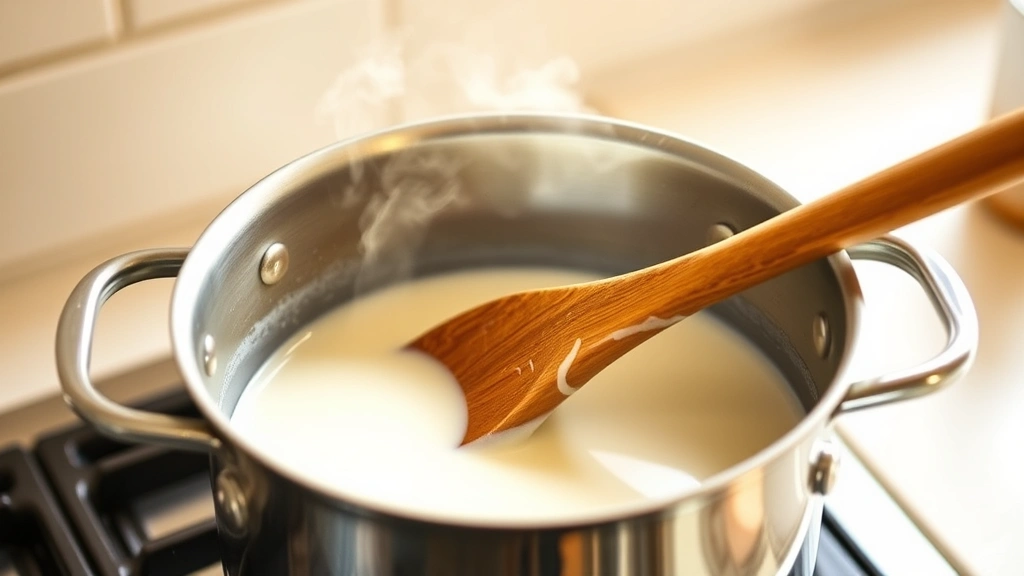
- Pour the whole milk into a heavy-bottomed saucepan or Dutch oven. This is important because a heavy pan distributes heat evenly and prevents scorching on the bottom.
- Add the granulated sugar to the milk and stir well until the sugar is completely dissolved. Make sure to break up any sugar clumps before heating.
- Place the saucepan over medium heat and bring the mixture to a gentle simmer. You’re not looking for a rolling boil—just a steady, gentle simmer.
- Once simmering, reduce the heat to medium-low and let it simmer gently, uncovered. Stir occasionally (about every 5-10 minutes) to ensure even cooking and to prevent a skin from forming on top.
- Continue simmering for 45-60 minutes, watching as the mixture gradually reduces and thickens. The milk should reduce to about one-third its original volume. This is the key to achieving that thick, condensed consistency.
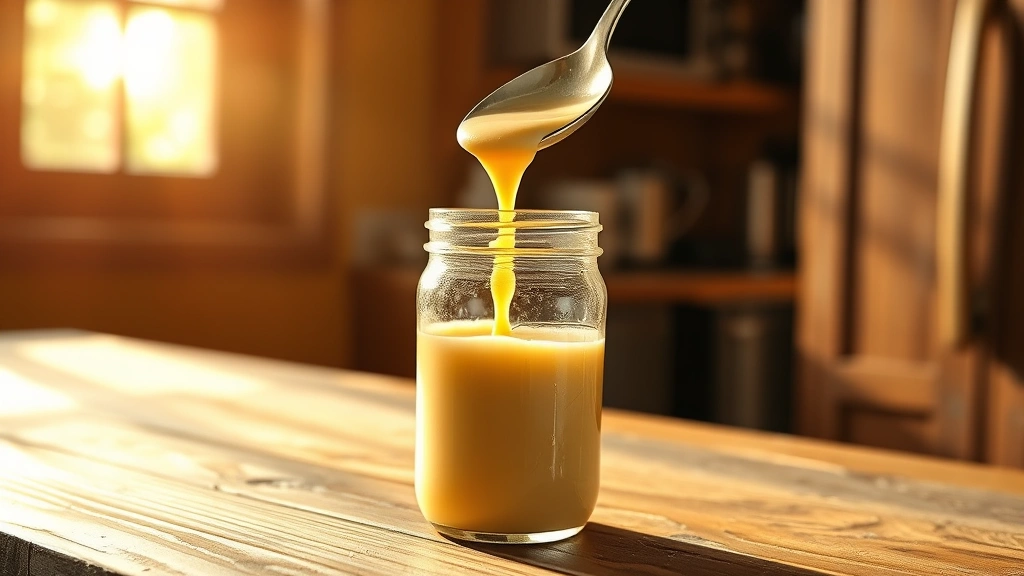
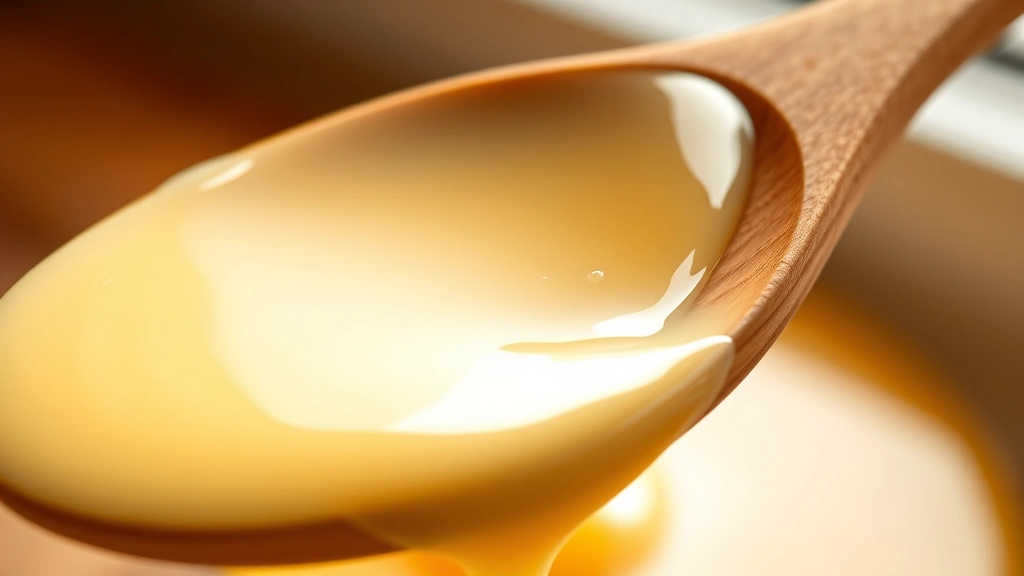
- You’ll know it’s ready when the mixture coats the back of a spoon and runs slowly when you draw your finger across it. It should be golden and noticeably thickened.
- If using butter and vanilla extract, add them in the final 2 minutes of cooking, stirring well to combine. These additions add richness and depth of flavor.
- Remove from heat and allow the condensed milk to cool slightly before transferring to a clean glass jar or container.
- As it cools, it will thicken further—this is completely normal and exactly what you want! The condensed milk will continue to thicken as it cools to room temperature.
- Once completely cooled, cover the jar tightly and store in the refrigerator for up to 3 weeks, or in the freezer for up to 3 months.
Pro Tips
- **Milk Selection Matters**: Use full-fat whole milk for the best results. Skim or low-fat milk won’t reduce properly and won’t achieve the desired creamy consistency. The fat content is essential for creating that luxurious texture.
- **The Reduction Process**: Don’t rush this step by turning up the heat. High heat can cause the milk to scorch on the bottom, resulting in a burnt flavor. Patience is key—slow and steady wins the race with condensed milk.
- **Stirring Technique**: Stir occasionally but not constantly. Stirring too frequently can prevent the mixture from reducing efficiently, while not stirring enough allows scorching. Find a happy medium with regular but not constant stirring.
- **Signs of Doneness**: The condensed milk should coat the back of a spoon thickly when done. If you draw your finger across the coated spoon, the line should remain visible rather than immediately running back together.
- **Sweetness Control**: If you prefer your condensed milk less sweet, reduce the sugar to ¾ cup. If you want it sweeter, you can add up to 1¼ cups sugar. Taste as you go to find your preferred sweetness level.
- **Flavor Variations**: Beyond vanilla, try adding a pinch of cinnamon, a splash of almond extract, or a teaspoon of espresso powder for different flavor profiles. These additions create wonderful variations for specific recipes.
- **Storage Options**: Refrigerate in an airtight glass container for up to 3 weeks. For longer storage, freeze in ice cube trays, then transfer the frozen cubes to a freezer bag for up to 3 months. This makes portioning easy for future recipes.
- **Brown Sugar Version**: For a deeper, more caramel-like flavor, replace half the white sugar with packed brown sugar. This creates a delicious variation with complex sweetness.
- **Using in Recipes**: This homemade condensed milk works beautifully in desserts, coffee drinks, sweet and savory dishes, and more. It’s particularly excellent in no-bake desserts and coffee preparations.
- **Thickness After Cooling**: The condensed milk will be noticeably thicker once fully cooled than it appears when hot. This is normal and desirable. If it seems too thick after cooling, you can thin it slightly with a splash of milk.