
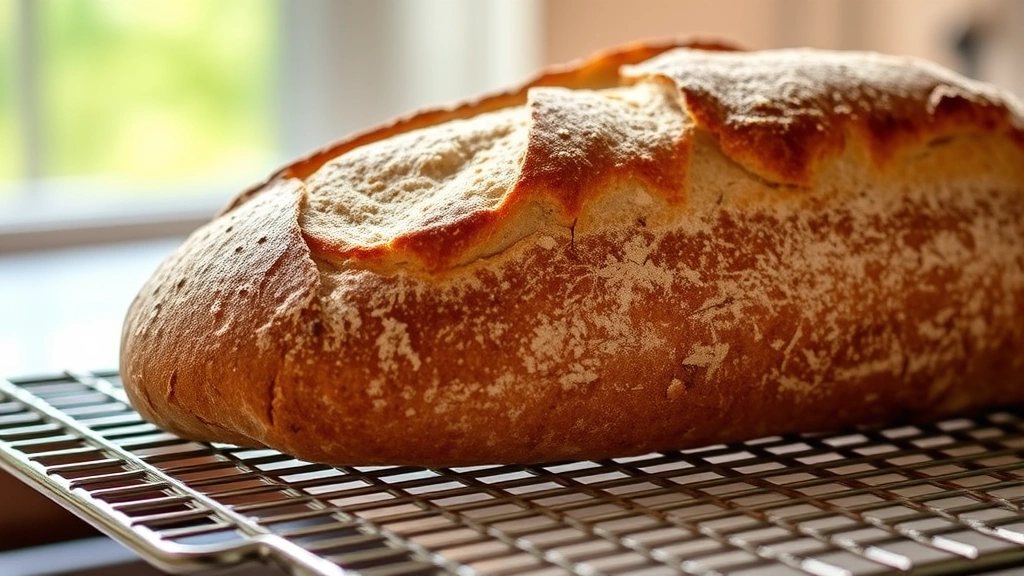
There’s nothing quite like the satisfaction of baking sourdough bread, and this recipe proves that you don’t need a perfectly maintained starter to create something absolutely delicious. Sourdough discard bread is the perfect solution for anyone who feeds their starter regularly—instead of throwing away that excess starter, you’ll transform it into a rustic, flavorful loaf that rivals bakery-quality bread.
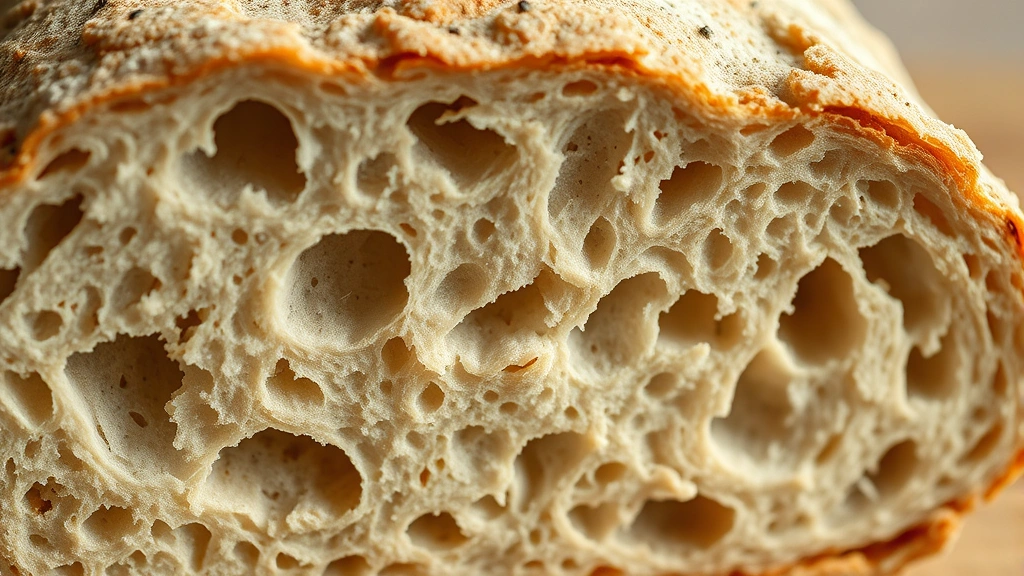
This recipe has become my go-to whenever my sourdough starter needs feeding. The beauty of using discard is that you don’t need to wait for it to reach peak activity; the tangy flavor develops beautifully during the bulk fermentation, and the crumb structure turns out incredibly tender and open. I’ve tested this method dozens of times, and it consistently delivers that perfect balance of crispy crust and soft interior that makes sourdough so irresistible.
What makes this bread particularly special is how forgiving it is. Unlike traditional sourdough that requires precise timing with your starter, this version works with your discard on whatever schedule works best. The long, cool fermentation develops complex flavors while making the dough incredibly easy to work with. Whether you’re a seasoned sourdough baker or just starting your fermentation journey, this recipe will deliver impressive results.
I love serving thick slices of this bread with creamy sauces or alongside pasta dishes. It’s also fantastic for making sandwiches or simply toasted with good butter. The tangy notes complement both pickled vegetables and fresh spreads beautifully. For more detailed bread-baking guidance, check out Serious Eats’ sourdough guide, which offers excellent technical information about fermentation and shaping techniques.
The dough comes together quickly with minimal mixing, then develops flavor through a long, cool fermentation that fits perfectly into a busy schedule. You can mix the dough in the morning, let it ferment in the refrigerator overnight, and bake it fresh the next day. The result is a loaf with beautiful scoring, an impressive ear, and that signature sourdough tang that makes people ask for your recipe.
This approach also works wonderfully if you’re looking to expand your bread-making repertoire. Once you master this basic formula, you’ll find it incredibly versatile. You can add mix-ins like roasted vegetables or herbs, or experiment with different hydration levels. The techniques you’ll learn here form the foundation for countless other bread varieties. For additional inspiration and troubleshooting tips, the Bon Appétit recipe collection offers excellent variations on classic bread formulas.
What I appreciate most about this recipe is how it transforms something that would otherwise be discarded into something truly special. There’s an element of resourcefulness and sustainability that makes baking with discard particularly satisfying. Every time you feed your starter, you’re actually creating an opportunity to make exceptional bread. This recipe has saved me from starter anxiety and turned feeding day into something I actually look forward to.
Ingredients
- 200g active sourdough discard (unfed starter, room temperature)
- 350g all-purpose flour or bread flour
- 150g water (room temperature)
- 7g fine sea salt
- 1g instant yeast (optional, helps if starter is sluggish)
Instructions
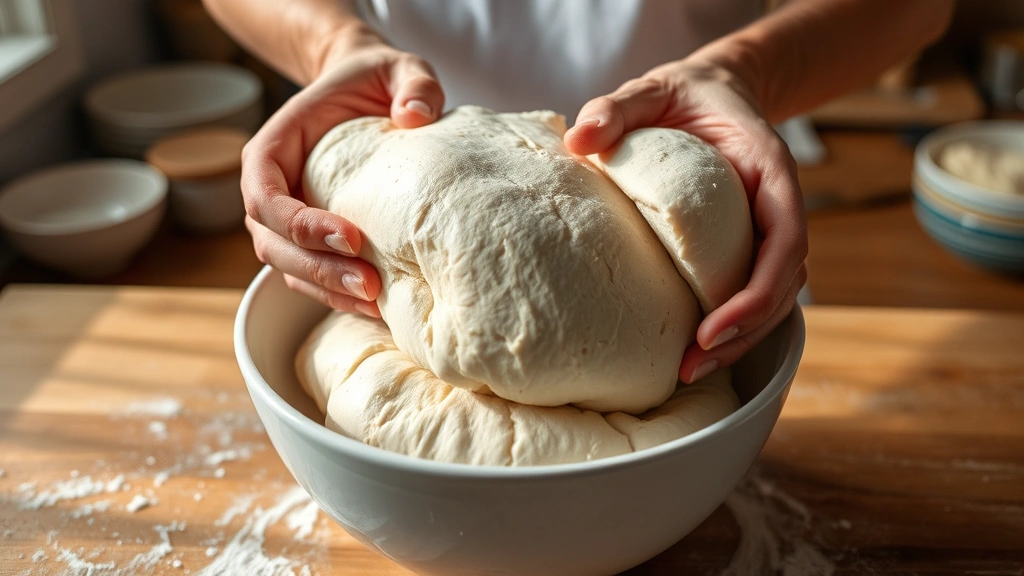
- In a large mixing bowl, combine your sourdough discard, water, and flour. Mix until all flour is incorporated and no dry bits remain—the dough will be shaggy and rough at this stage. Cover the bowl with a kitchen towel and let rest for 30 minutes at room temperature. This autolyse period allows the flour to fully hydrate, making the dough easier to work with and developing better gluten structure.
- After the rest, sprinkle the salt (and optional instant yeast if using) over the dough and incorporate it by pinching and folding the dough in the bowl for about 5 minutes. The dough should start coming together and become smoother. If it feels too dry, wet your hands slightly before continuing.
- Begin bulk fermentation by performing a series of stretch-and-folds. Every 30 minutes for the next 2 hours, wet your hand and gently stretch one section of dough from the edge toward the center, fold it over itself, rotate the bowl 90 degrees, and repeat 4 times total. This builds strength without aggressive kneading. After the final set of folds, the dough should feel noticeably stronger and slightly domed on top.
- Let the dough rest undisturbed for 2-3 hours at room temperature until it increases by about 50-75% in volume. You’re looking for visible bubbles on the surface and a dough that jiggles slightly when you gently shake the bowl. The exact timing depends on your kitchen temperature—warmer environments ferment faster.
- Once bulk fermentation is complete, perform a pre-shaping by turning the dough out onto a lightly floured surface and gently shaping it into a round. Let it rest for 20-30 minutes to relax the gluten—this bench rest prevents the dough from shrinking too much during final shaping.
- Shape the dough into a tight round or oval, depending on your banneton basket shape. Start by gently stretching the dough into a circle, then fold the edges toward the center, roll it toward you to create tension, and flip it seam-side down. The surface should be taut and smooth. Place it seam-side up into a floured banneton basket or bowl lined with a kitchen towel.
- Cover the basket with a plastic bag or shower cap and refrigerate for at least 12 hours, ideally 16-18 hours. The cold fermentation develops incredible flavor complexity and makes the dough much easier to score and handle. You can also do a shorter room-temperature proof of 2-4 hours if you’re in a hurry, though the flavor won’t be quite as developed.
- About 45 minutes before baking, preheat your oven to 500°F with a Dutch oven or covered baking stone inside. The vessel needs to be completely preheated to ensure a crispy crust and good oven spring.
- Once the oven is hot, carefully turn your chilled dough out onto parchment paper. Using a sharp bread lame or knife, score the top with a single long slash or your preferred pattern, cutting about ¼-inch deep at a 45-degree angle. This controls where the bread expands and creates the beautiful ear.
- Carefully transfer the dough (still on parchment) into the preheated Dutch oven. Cover with the lid and reduce oven temperature to 450°F. Bake covered for 20 minutes to trap steam, which creates that coveted crispy crust.
- Remove the Dutch oven lid and continue baking for 15-20 minutes until the crust is deep golden brown. The internal temperature should reach 205-210°F when measured with a thermometer inserted into the thickest part of the loaf.
- Transfer the bread to a wire cooling rack and let it cool for at least 1 hour before slicing. This cooling period allows the crumb structure to set properly—cutting too early results in a gummy texture. Resist the temptation! The bread will continue to develop flavor as it cools.
Pro Tips
- **About Sourdough Discard:** This is the starter you remove before feeding your active culture. It doesn’t need to be at peak—in fact, using unfed or even sluggish discard adds more complexity to your bread. If your discard is very young and not bubbly at all, add the optional instant yeast to ensure reliable fermentation.
- **Hydration and Adjustments:** This recipe uses approximately 50% hydration, which creates an open, extensible dough that’s beginner-friendly. If you prefer a more open crumb with larger holes, increase water to 160g. If the dough feels too slack, reduce to 140g. Keep notes on what works best in your kitchen.
- **Temperature Matters:** Bulk fermentation time varies significantly based on kitchen temperature. At 68°F, expect 3-4 hours; at 75°F, expect 2-3 hours. A warmer environment speeds fermentation, so adjust accordingly. Use the visual cues (50-75% rise) rather than strict timing.
- **Overnight Cold Fermentation:** This is the secret weapon in this recipe. The long, cold fermentation in the refrigerator develops incredible flavor, makes the dough easier to score, and improves oven spring. If you only have 4 hours, it will still work, but the flavor will be milder.
- **Dutch Oven Alternatives:** If you don’t have a Dutch oven, use a covered baking stone or create a steam environment by placing a shallow pan of boiling water on the bottom oven rack and baking your loaf on the middle rack. The Dutch oven method is superior, but steaming works in a pinch.
- **Scoring Techniques:** The score guides where your bread expands. A single long slash creates the classic ear and allows for expansion. Alternatively, try an X pattern or cross-hatch for a different aesthetic. Sharp blades are essential—dull knives drag and damage the dough.
- **Storage and Keeping:** Store cooled bread cut-side down on a cutting board at room temperature for up to 3 days. For longer storage, wrap tightly and freeze for up to 1 month. Toast from frozen for quick breakfast or afternoon snacks. Never refrigerate bread—cold accelerates staling.
- **Troubleshooting Tips:** If your bread is too dense, you likely needed more fermentation time. If it’s too sour, reduce bulk fermentation or use fresher discard. If the crust isn’t crispy, ensure your Dutch oven was fully preheated and consider adding more steam time.
- **Feeding Your Starter:** After using discard, feed your remaining active starter with equal parts flour and water, and let it reach peak (doubled in size) before your next bake or feeding. This maintains a healthy, vigorous culture.
- **Customization Ideas:** Once comfortable with the basic formula, add 50g of mix-ins like toasted seeds, dried herbs, or sun-dried tomatoes after the first set of folds. This doesn’t significantly change fermentation time but adds wonderful complexity.