

There’s something truly magical about sourdough scones—they’re the perfect marriage of tangy sourdough flavor and tender, buttery pastry that’ll have everyone asking for your secret. These Simple Sourdough Scones are a game-changer for breakfast, afternoon tea, or whenever you need something impressive but surprisingly easy to make.
I’ve been baking for years, and I can tell you that sourdough adds this wonderful depth of flavor that regular scones just can’t match. The active sourdough starter creates a subtle tang that pairs beautifully with clotted cream and jam, and the texture—oh, the texture—is absolutely divine. Crispy on the outside, fluffy and moist on the inside, these scones will become your new obsession.
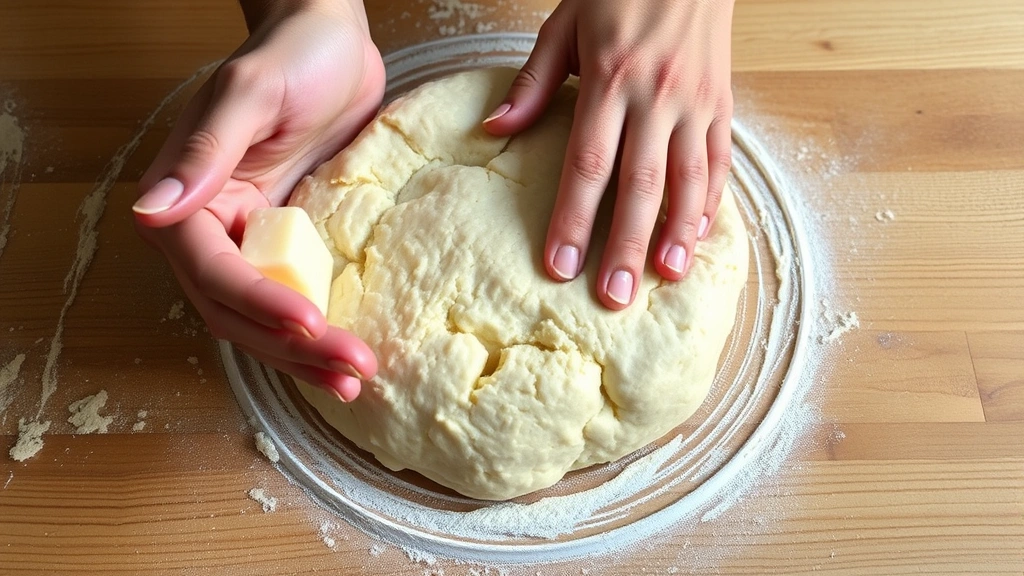
What I love most about this recipe is that it doesn’t require any special equipment or complicated techniques. You likely have everything in your pantry already. The key is keeping your butter cold, handling the dough gently, and not overworking it. These are the fundamentals of great scone-making, and once you master them, you’ll be whipping up batch after batch.
I typically serve these with a generous dollop of homemade pickled red onions for a savory twist, or go traditional with jam and cream. They’re also wonderful alongside a warm cup of tea or coffee. Some friends have even used them as the base for shortcakes with fresh berries—the possibilities are truly endless.
The beauty of sourdough scones is that they actually improve with time. The tang develops more fully within a few hours of baking, making them perfect for preparing ahead. I often bake a batch on Sunday and enjoy them throughout the week. They’re also freezer-friendly, so you can bake them whenever the craving strikes.
Let me walk you through this straightforward process. Whether you’re a seasoned baker or picking up the sourdough hobby for the first time, these scones will exceed your expectations. The combination of technique and ingredient quality really shines through in every bite. Ready to impress your family and friends? Let’s get started!
Before you begin, make sure your sourdough starter is active and bubbly—usually fed 4-8 hours before baking. Cold ingredients are non-negotiable for that perfect scone texture. I recommend chilling your mixing bowl and even your flour if your kitchen runs warm. You can also check out my guide on creating amazing flavor combinations to think about what toppings might pair best with your scones.
Ingredients
- 1 cup active sourdough starter (fed and bubbly)
- 2 cups all-purpose flour
- 3 tablespoons granulated sugar
- 1 tablespoon baking powder
- 1/2 teaspoon salt
- 6 tablespoons cold butter, cubed
- 1/2 cup cold heavy cream (plus more for brushing)
- 1 large egg (for egg wash)
- 1 tablespoon water (for egg wash)
- Zest of 1 lemon (optional but recommended)
- 1 teaspoon vanilla extract
Instructions
- Preheat your oven to 400°F and line a baking sheet with parchment paper. This ensures even baking and prevents sticking.
- In a large mixing bowl, whisk together flour, sugar, baking powder, salt, and lemon zest if using. Make sure these dry ingredients are evenly distributed.
- Add the cold cubed butter to the flour mixture and use a pastry cutter or your fingertips to work it in until the mixture resembles coarse breadcrumbs. Don’t overwork this step—you want small pea-sized pieces of butter throughout.
- In a small bowl, whisk together your active sourdough starter, cold heavy cream, and vanilla extract until just combined.
- Create a well in the center of your dry ingredients and pour the wet mixture in gradually, folding gently with a spatula until just combined. The dough should be slightly shaggy—do not overmix.
- Turn the dough out onto a lightly floured surface and gently form it into a disk about 3/4 inch thick. Handle it as little as possible to maintain those precious pockets of butter.
- Using a sharp knife or pastry wheel, cut the disk into 8 equal wedges, like you’re cutting a pizza.
- Place each scone on your prepared baking sheet, leaving about 2 inches between them for expansion.
- In a small bowl, whisk together the egg and water to create an egg wash. Brush the top of each scone generously with this mixture.
- Bake for 16-18 minutes, until the scones are golden brown on top and a toothpick inserted into the center comes out clean or with just a few moist crumbs.
- Remove from the oven and let cool on the baking sheet for 5 minutes before transferring to a wire rack to cool completely.

Pro Tips
- **Sourdough Starter Strength**: Make sure your starter is at peak activity—bubbly and doubled in size after feeding. An inactive starter will result in dense, heavy scones rather than light, fluffy ones.
- **Temperature Matters**: Every step should involve cold ingredients. Keep your butter in the freezer until the last minute, use cold cream straight from the refrigerator, and even chill your mixing bowl beforehand. This ensures maximum flakiness and prevents the butter from melting into the flour prematurely.
- **Don’t Overmix**: This is the golden rule of scone-making. Once your wet and dry ingredients are combined, stop mixing. Overworking develops gluten, which makes tough, dense scones instead of tender, crumbly ones.
- **Flavor Variations**: Try adding 1/2 cup of dried cranberries, chocolate chips, or candied ginger to the dry ingredients. You can also substitute the vanilla extract with almond extract for a different flavor profile.
- **Serving Suggestions**: These scones are absolutely divine with clotted cream (or whipped cream in a pinch) and jam—strawberry, raspberry, and blackberry are all excellent choices. For a savory option, skip the sugar and add fresh herbs like rosemary or thyme, then serve with butter and spreadable accompaniments.
- **Make-Ahead Instructions**: You can prepare the dough up to 2 hours ahead of time. Cut the scones, place them on the baking sheet, cover with plastic wrap, and refrigerate. Bake directly from the refrigerator, adding 2-3 minutes to the bake time.
- **Freezing**: Baked scones freeze beautifully for up to 3 weeks. Wrap them individually in plastic wrap, place in a freezer bag, and thaw at room temperature for about an hour before serving. You can also refresh them in a 300°F oven for 5 minutes.
- **Egg Wash Alternatives**: If you don’t have eggs, brush the scones with a little extra heavy cream or milk mixed with a touch of honey for a beautiful golden finish.
- **Texture Tips**: For extra-fluaky scones, try using cultured butter instead of regular butter. The tang complements the sourdough beautifully and adds another layer of complexity. Additionally, understanding how dairy interacts with baked goods can help you perfect your technique.
- **Lemon Zest**: While optional, the lemon zest brightens the sourdough tang and adds a sophisticated touch. If you use it, reduce the sugar slightly as lemon can feel acidic without this adjustment.
- **Baking Sheet Size**: Use a standard 9×13-inch baking sheet or a large cookie sheet. If your sheet is too small and the scones are crowded, they’ll steam rather than bake, resulting in a softer crust.