

There’s something truly magical about savory yeast recipes—they’re the backbone of so many beloved dishes that bring comfort and joy to our tables. Whether you’re a seasoned baker or just starting your culinary journey, mastering savory yeast recipes opens up a world of possibilities that go far beyond traditional bread.
Savory yeast recipes are incredibly versatile and rewarding. From focaccia topped with herbs and sea salt to cheese-filled dinner rolls, these recipes showcase how yeast transforms simple ingredients into something extraordinary. The beauty of working with yeast lies in understanding the basic principles: proper hydration, temperature control, and patience. When you nail these fundamentals, you’ll create bakery-quality results right in your own kitchen.
What makes savory yeast recipes so special is their ability to complement virtually any meal. I love serving warm, freshly baked savory rolls alongside a hearty soup or stew. You can also use savory yeast dough as the foundation for Quick Tasty Bacon Carbonara or pair it with Best Heavy Cream Alfredo Sauce for an elevated dinner experience.
One of my favorite aspects of savory yeast baking is the endless customization options. You can infuse the dough with garlic, rosemary, thyme, or Italian seasoning. Add sharp cheddar cheese, caramelized onions, or crispy bacon pieces. The dough becomes a canvas for your culinary creativity. I often prepare a batch on Sunday and use portions throughout the week for different meals.
The science behind yeast fermentation is fascinating. Yeast cells consume sugars and produce carbon dioxide and alcohol, which creates the rise and develops complex flavors. This process, called fermentation, is what gives savory yeast recipes their characteristic tender crumb and rich taste. Unlike quick breads that rely on chemical leaveners, yeast-based recipes develop flavor over time, making them superior in taste and texture.
I’ve tested countless savory yeast recipes over the years, and I’m excited to share my foolproof method with you. This recipe yields tender, flavorful rolls that are perfect for entertaining or meal prep. The dough is forgiving, which means even if you’re new to working with yeast, you’ll have success. I always tell people that baking with yeast is less about precision and more about understanding how the dough should feel and look at each stage.
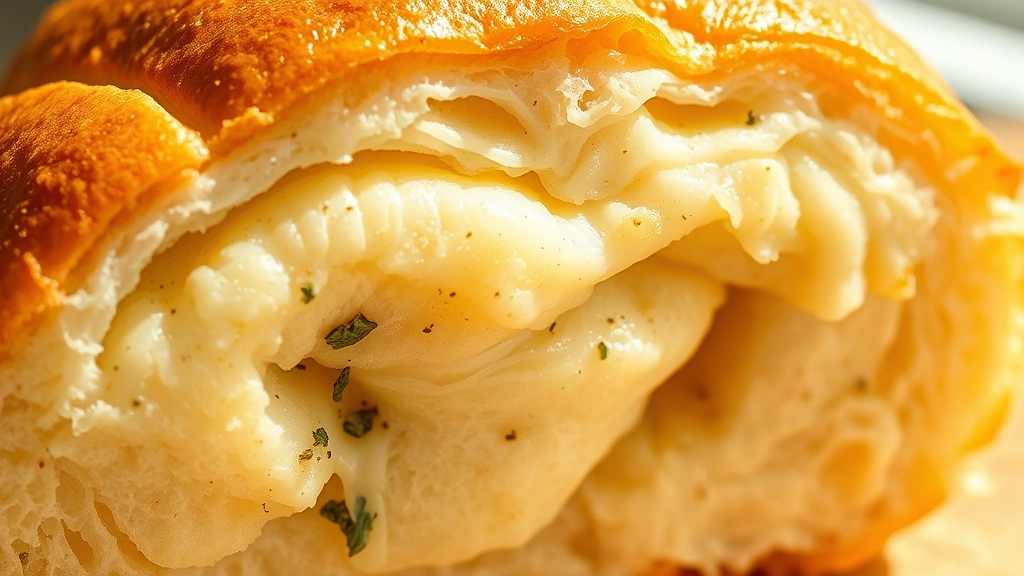
When you bite into a perfectly baked savory yeast roll, you’ll taste the difference homemade makes. The golden exterior gives way to a soft, pillowy interior infused with savory flavors. Pair these with Delicious Heavy Cream Pasta for a restaurant-quality meal, or serve alongside Best Chickpea Salad Recipe for a lighter option.
My personal tips for success include using room-temperature ingredients, which allows the yeast to activate more efficiently. I also recommend investing in a simple kitchen thermometer—it removes all guesswork from achieving the perfect dough temperature. Additionally, don’t rush the rising process. Slower fermentation develops better flavor, which is why I often let my dough rise overnight in the refrigerator.
These savory yeast rolls are perfect for meal prep since they freeze beautifully. I often make a double batch, freeze half, and simply thaw and reheat when needed. You can also prepare the dough ahead, let it rise slowly in the fridge, and bake fresh rolls whenever you want. This flexibility makes savory yeast recipes incredibly practical for busy home cooks.
For serving suggestions, I love brushing warm rolls with herb-infused butter and fresh garlic. You can also top them with Perfect Pickled Red Onions for a tangy contrast, or finish with a sprinkle of flaky sea salt and fresh herbs. These rolls also make excellent sandwich bases for leftover roasted chicken or vegetables.
Learning to make savory yeast recipes is an investment in your cooking skills that pays dividends for years to come. Once you understand how yeast works and develop a feel for the dough, you can create variations endlessly. Try adding everything bagel seasoning, sun-dried tomatoes, or fresh herbs like dill and chives. The possibilities are truly limitless.
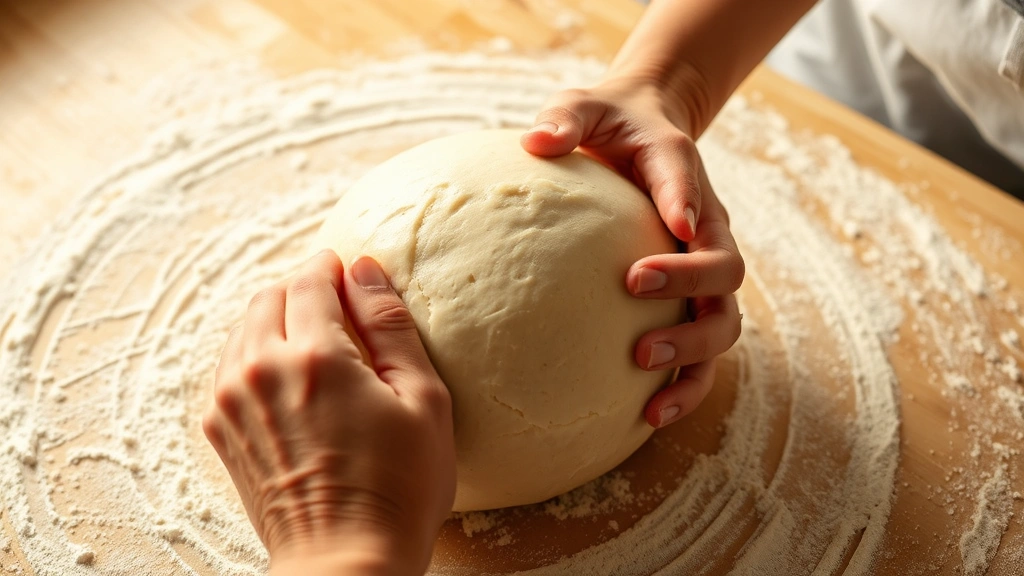
I’ve included detailed instructions below to guide you through every step. Pay attention to the visual cues—dough should be soft and slightly tacky, not dry or overly wet. Trust your instincts, and don’t be afraid to adjust based on your kitchen’s humidity levels. Each kitchen is different, so flexibility is key when working with yeast dough.
For additional inspiration and techniques, I highly recommend checking out Serious Eats’ comprehensive baking guides and Bon Appétit’s yeast recipes. You can also explore New York Times Cooking for professional techniques. These resources have taught me so much about yeast baking over the years.
I’m confident that once you master this savory yeast recipe, you’ll be making it regularly. Your family will love the homemade taste, and you’ll love how impressive these rolls look and taste. Welcome to the wonderful world of savory yeast baking!
Ingredients
- 500g (4 cups) all-purpose flour
- 7g (2 1/4 teaspoons) active dry yeast
- 300ml (1 1/4 cups) warm water (110°F/43°C)
- 10g (2 teaspoons) salt
- 30ml (2 tablespoons) olive oil
- 30g (2 tablespoons) honey
- 100g (1 cup) sharp cheddar cheese, finely grated
- 4 cloves garlic, minced
- 10g (2 tablespoons) fresh rosemary, finely chopped
- 5g (1 tablespoon) fresh thyme, finely chopped
- Black pepper to taste
- 30ml (2 tablespoons) olive oil for brushing
- Flaky sea salt for topping
- Extra fresh herbs for garnish
Instructions
- In a large mixing bowl, combine warm water and honey, stirring until the honey dissolves completely. This activates the yeast and provides it with food to begin fermenting.
- Sprinkle active dry yeast over the warm water mixture and let it sit undisturbed for 5-10 minutes until foamy. This indicates the yeast is alive and ready to work.
- Add the flour and salt to the yeast mixture. Using a wooden spoon or your hands, mix until a shaggy dough forms. The dough should come together but will appear rough at this stage.
- Turn the dough out onto a lightly floured work surface and knead for 8-10 minutes. The dough should become smooth and elastic. You can also use a stand mixer with the dough hook for 6-8 minutes on medium speed.
- During the last minute of kneading, add olive oil gradually while continuing to knead. This creates a silky texture and improves the dough’s extensibility.
- In a small bowl, combine minced garlic, rosemary, thyme, grated cheddar cheese, and black pepper. Set this mixture aside for folding into the dough.
- Gently knead the cheese and herb mixture into the dough until evenly distributed throughout. Be careful not to overwork the dough at this point, as you want to maintain its elasticity.
- Shape the dough into a ball and place it in a lightly oiled bowl. Cover with a damp kitchen towel or plastic wrap.
- Let the dough rise in a warm, draft-free location for 1-1.5 hours until doubled in size. You can also place it in an oven with just the light on for consistent warmth.
- While the dough rises, preheat your oven to 400°F (200°C). Line two baking sheets with parchment paper.
- Once the dough has doubled, gently turn it out onto a lightly floured work surface. Do not punch it down aggressively, as this preserves the air bubbles that create a tender crumb.
- Divide the dough into 12 equal pieces. You can weigh them (approximately 65g each) for consistency, or divide them by eye.
- Shape each piece into a tight ball by gently pulling the dough toward the center from all sides, creating surface tension. This helps the rolls maintain their shape during baking.
- Place 6 rolls on each prepared baking sheet, spacing them about 2 inches apart to allow room for expansion.
- Cover the shaped rolls with a damp towel and let them proof for 30-40 minutes until they’re puffy and light. They should increase in size by about 50 percent.
- In a small bowl, combine the 30ml of olive oil with additional minced garlic, finely chopped fresh rosemary, and thyme for the final brushing mixture.
- Gently brush the proofed rolls with the herb-infused olive oil mixture, being careful not to deflate them.
- Sprinkle flaky sea salt and cracked black pepper over each roll, and add a small sprig of fresh rosemary on top if desired.
- Bake for 20-25 minutes until the rolls are golden brown and sound hollow when tapped on the bottom. The internal temperature should reach 205-210°F (96-99°C).
- Remove the rolls from the oven and transfer them to a wire cooling rack. Brush with additional herb oil while still warm for extra flavor.
- Let the rolls cool for 5-10 minutes before serving. They’re best enjoyed warm but can be stored in an airtight container for up to 3 days.
- To freeze, let the rolls cool completely, then place them in a freezer bag and freeze for up to 3 months. Thaw at room temperature or reheat directly in a 350°F (175°C) oven for 8-10 minutes.
Pro Tips
- **Yeast Temperature Matters**: Water that’s too hot (above 120°F/49°C) will kill the yeast, while water that’s too cold (below 100°F/38°C) will slow fermentation significantly. Using a kitchen thermometer takes all the guesswork out of this crucial step.
- **Dough Consistency**: The dough should feel soft and slightly tacky but not sticky or wet. If it’s too wet, add flour by the tablespoon. If it’s too dry, add water by the teaspoon. Your kitchen’s humidity affects this, so adjust as needed.
- **Overnight Cold Fermentation**: For even better flavor development, you can refrigerate the dough after the first rise for up to 24 hours. This slow fermentation creates complex, deeper flavors that rival artisanal bakeries.
- **Customization Options**: Feel free to substitute or add different cheeses (Gruyère, Parmesan, Fontina), swap herbs (oregano, basil, dill), or add mix-ins like sun-dried tomatoes, caramelized onions, or crispy bacon bits. These variations keep your savory yeast recipes exciting and adaptable to your preferences.
- **Proofing Signals**: Properly proofed rolls should spring back slowly when poked gently with your finger. If they spring back immediately, they need more time. If the indent remains, they’re overproofed.
- **Scoring Optional**: For a more bakery-like appearance, you can score the top of each roll with a sharp knife before baking. Make a small X or slash about 1/4-inch deep.
- **Oven Spring**: Most oven spring happens in the first 10 minutes of baking. Don’t open the oven during this critical time, as temperature fluctuations can negatively impact rise.
- **Storage and Reheating**: Store cooled rolls in an airtight container at room temperature for up to 3 days. Reheat in a 350°F (175°C) oven for 8-10 minutes, or wrap in foil and warm for 10-12 minutes. Alternatively, microwave individual rolls for 20-30 seconds for quick reheating.
- **Troubleshooting Dense Rolls**: Dense rolls usually indicate insufficient rise time, dead yeast, or water that was too cold. Ensure your yeast is fresh (check the expiration date), use properly warmed water, and allow adequate rising time.
- **Bread Flour Alternative**: For slightly chewier rolls with more structure, substitute 100g of the all-purpose flour with bread flour. This increases gluten development and creates a more rustic texture.
- **Scaling the Recipe**: This recipe doubles easily. Simply multiply all ingredients by two and adjust rising times as needed. The larger dough mass may take slightly longer to rise.
- **Serving Suggestions**: Serve alongside soups, salads, or as sandwich bases. These rolls also pair beautifully with compound butters, cheese spreads, or homemade dips.