
There’s something absolutely magical about a ball cake—it’s elegant, impressive, and surprisingly easier to create than you might think! This showstopping dessert features a perfectly moist and fluffy cake sphere filled with luxurious frosting and topped with stunning decorations. Whether you’re celebrating a birthday, anniversary, or simply want to impress your guests, this ball cake recipe delivers restaurant-quality results from your own kitchen.
The beauty of a ball cake lies in its versatility. You can customize the flavors to match any occasion—vanilla with chocolate ganache, red velvet with cream cheese frosting, or lemon with raspberry filling. The spherical shape creates an elegant presentation that’s sure to be the centerpiece of any dessert table. Plus, once you master this technique, you’ll find it’s not nearly as intimidating as it appears.
I’ve been making ball cakes for years, and I’ve perfected this method to ensure you get a gorgeous, structurally sound cake every single time. The key is using the right baking pans, proper frosting consistency, and a few clever tricks that make assembly foolproof. In this guide, I’ll walk you through each step, from baking perfectly even cake layers to crumb coating and applying your final frosting.
For more cake inspiration, check out our baking basics and explore different frosting techniques that will elevate your desserts. You might also enjoy learning about complementary dessert accompaniments, and don’t forget to check out our creative garnish ideas.
For professional tips and techniques, I recommend consulting resources like Bon Appétit’s cake tutorials, Serious Eats’ baking science, and The New York Times cooking section for additional inspiration and troubleshooting advice.
Ingredients
- 2 cups all-purpose flour
- 1¾ cups granulated sugar
- 2¼ teaspoons baking powder
- ½ teaspoon salt
- ¾ cup whole milk, room temperature
- ½ cup vegetable oil
- 3 large eggs, room temperature
- 2 teaspoons vanilla extract
- ¾ cup hot water
- 1 pound unsalted butter, softened
- 4 cups powdered sugar, sifted
- 3 tablespoons heavy cream
- 1 teaspoon vanilla extract
- ¼ teaspoon salt
- 2-3 tablespoons food coloring (optional)
- 1 cup chocolate ganache or jam for filling
- Sprinkles, fresh berries, or edible flowers for decoration

Instructions
- Preheat your oven to 350°F. Grease and flour two 8-inch round baking pans, then line the bottoms with parchment paper for easy removal.
- In a large mixing bowl, whisk together flour, sugar, baking powder, and salt until well combined and no lumps remain.
- In another bowl, whisk together milk, oil, eggs, and vanilla extract until smooth and fully incorporated.
- Pour the wet ingredients into the dry ingredients and stir until just combined—do not overmix, as this can create a dense cake.
- Carefully add the hot water to the batter and stir until smooth. The batter will be thin, which is perfectly normal and creates a moist cake.
- Divide the batter evenly between the prepared pans and smooth the tops with a spatula.
- Bake for 30-35 minutes, or until a toothpick inserted in the center comes out clean and the cakes are light golden brown.
- Remove from the oven and allow the cakes to cool in their pans for 15 minutes, then turn out onto wire racks to cool completely.
- Once cooled, level the cake layers using a cake leveler or serrated knife to create flat, even surfaces for stacking.
- In a large bowl, beat softened butter on medium-high speed for 2-3 minutes until pale and fluffy.
- Gradually add sifted powdered sugar, one cup at a time, beating well after each addition to prevent lumps.
- Add heavy cream, vanilla extract, and salt, then beat on medium speed for 2-3 minutes until light and airy. Add food coloring if desired.
- Place one cake layer on a serving plate or cake board and spread a thin layer of frosting on top using an offset spatula.
- Add your chosen filling (chocolate ganache, jam, or more frosting) in the center, leaving about ½ inch from the edge.
- Place the second cake layer on top and gently press down to secure. Use a crumb coat by applying a thin layer of frosting over the entire cake.
- Refrigerate the crumb-coated cake for at least 30 minutes to set this base layer.
- Using a serrated knife or cake leveler, carefully trim the sides of the stacked cake into a rounded dome shape, working slowly and rotating as you go.
- Continue shaping until you’ve created a smooth, rounded ball. You’ll have some trimmed pieces—save these for cake crumbs if needed.
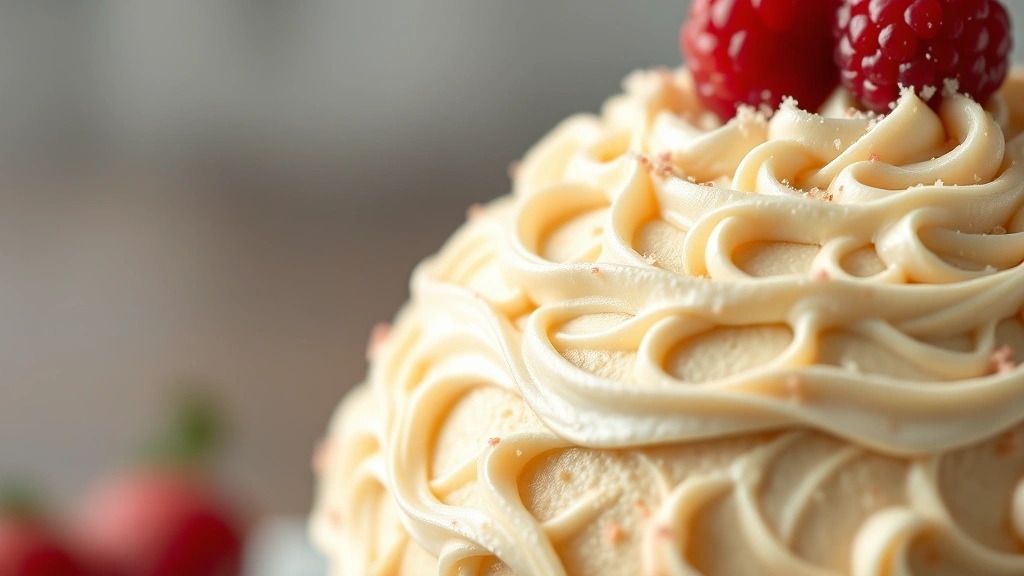
- Apply the final layer of frosting smoothly over the entire ball cake using an offset spatula or bench scraper, working in gentle, sweeping motions.
- Chill the finished ball cake for at least 1 hour before decorating to ensure the frosting is firm and stable.
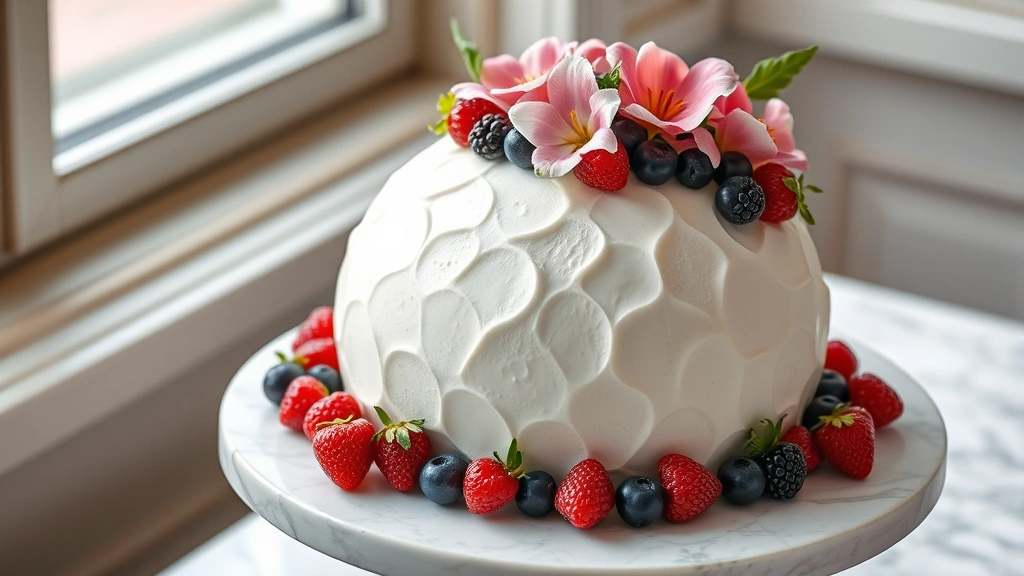
- Decorate the ball cake with your choice of toppings: pipe rosettes, add sprinkles, arrange fresh berries, or place edible flowers for an elegant finish.
- Serve at room temperature for best flavor and texture, slicing with a hot, wet knife for clean cuts.
Pro Tips
- Room temperature ingredients are essential for proper emulsification and a lighter cake crumb. Remove eggs, milk, and butter from the refrigerator 30 minutes before baking.
- The thin batter might seem unusual, but it’s intentional—the hot water creates steam during baking, resulting in an incredibly moist and tender crumb that won’t dry out.
- For a perfectly level cake base, use a cake leveler or mark your knife at the height you want to cut before slicing through horizontally.
- Crumb coating (the thin base layer of frosting) prevents cake crumbs from mixing with your final frosting layer. This step is crucial for a professional appearance.
- When shaping your ball cake, work slowly and carefully. Start with larger cuts and refine as you go. If you make a mistake, you can patch small imperfections with frosting.
- The frosting consistency is critical for ball cakes. It should be spreadable but hold its shape. If too soft, refrigerate for 15 minutes. If too stiff, add cream one tablespoon at a time.
- You can prepare the cake layers up to 2 days in advance—wrap them tightly in plastic wrap and store at room temperature or refrigerate.
- Frosting can be made up to 5 days ahead and stored in an airtight container in the refrigerator. Let it come to room temperature and re-beat before using.
- For chocolate lovers, use chocolate cake layers and fill with chocolate ganache. For fruity versions, try lemon cake with raspberry jam or vanilla cake with strawberry filling.
- If you don’t have specialty pans, you can create a ball cake using any round pans you have, but 8-inch pans work best for proportion and ease.
- Store the finished ball cake in a cool room or refrigerator, covered loosely with a cake dome or plastic wrap, for up to 3 days.