

Sourdough biscuits are the ultimate comfort food—crispy on the outside, tender and fluffy on the inside, with that distinctive tangy flavor that makes them irresistible. If you’ve ever wondered how to capture that perfect bakery-quality result at home, you’re in the right place. These biscuits use active sourdough starter to create incredible depth of flavor while maintaining that light, airy crumb we all crave.
The beauty of sourdough biscuits lies in their simplicity and versatility. Unlike traditional buttermilk biscuits that rely on chemical leaveners, sourdough biscuits get their rise from the natural fermentation of your starter, creating a more complex flavor profile and better digestibility. The slight tang pairs beautifully with savory toppings, making them perfect alongside heavy cream alfredo sauce or as a base for breakfast sandwiches.
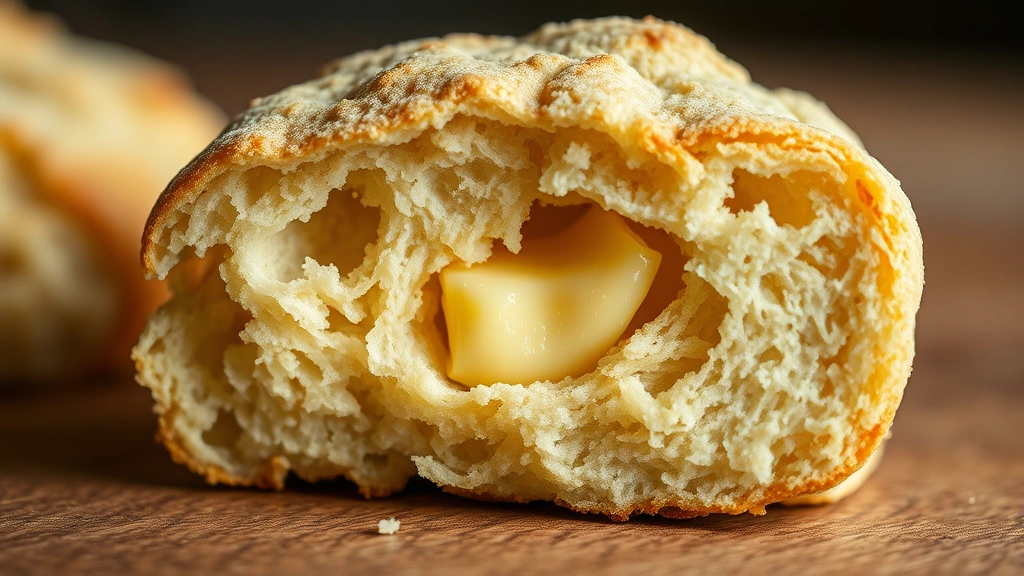
What makes these biscuits truly special is the technique. We’re talking about achieving that coveted laminated texture—those gorgeous, distinct layers that shatter when you break them open. It requires the right balance of cold butter, proper folding, and careful handling. The sourdough starter acts as both leavening agent and flavor builder, so you’ll want to use one that’s been fed and is at peak activity.
Throughout this guide, I’ll walk you through every step, from preparing your starter to achieving those perfect golden-brown biscuits. Whether you’re a seasoned baker or just starting your sourdough journey, these biscuits are absolutely achievable. They’re wonderful served warm with jam and butter, crumbled into creamy soups, or as the foundation for breakfast sandwiches with chicken alfredo flavors. I also love serving them alongside pickled red onions for a bright, tangy contrast.
For those looking to meal prep or wanting to understand the science behind great biscuits, check out these excellent resources from Serious Eats on biscuit technique and Bon Appétit for sourdough inspiration. You can also find wonderful biscuit variations on New York Times Cooking that might inspire your next batch.
The key to success is keeping everything cold, working quickly, and not overworking your dough. The cold butter creates steam pockets during baking, which creates those beautiful layers. Your sourdough starter provides the lift and flavor. Together, they create something truly magical. These biscuits are best enjoyed fresh from the oven, but they also keep beautifully and can be reheated. I promise once you master this recipe, you’ll be making them constantly. Your family will be begging for them at every meal!
Ingredients
- 1 cup active sourdough starter, fed 4-6 hours prior
- 2 cups all-purpose flour
- 1/2 teaspoon salt
- 1/4 teaspoon baking soda
- 1 tablespoon granulated sugar
- 1/2 cup cold unsalted butter, cubed
- 1/4 cup whole milk or buttermilk
- 2 tablespoons melted butter for brushing
- Fleur de sel or coarse sea salt for topping (optional)
Instructions
- Remove your sourdough starter from the refrigerator and feed it with equal parts flour and water (about 1/2 cup each). Let it sit at room temperature for 4-6 hours until it’s doubled in size, is bubbly, and passes the float test—a small spoonful should float in water when it’s at peak activity.
- In a large mixing bowl, whisk together the all-purpose flour, salt, baking soda, and granulated sugar. This distributes the leavening agent evenly throughout and ensures proper rise.
- Add the cold cubed butter to the flour mixture. Using a pastry cutter, two knives, or your fingertips, work the butter into the flour until the mixture resembles coarse breadcrumbs with some pea-sized pieces of butter remaining. This is crucial for creating those flaky layers.
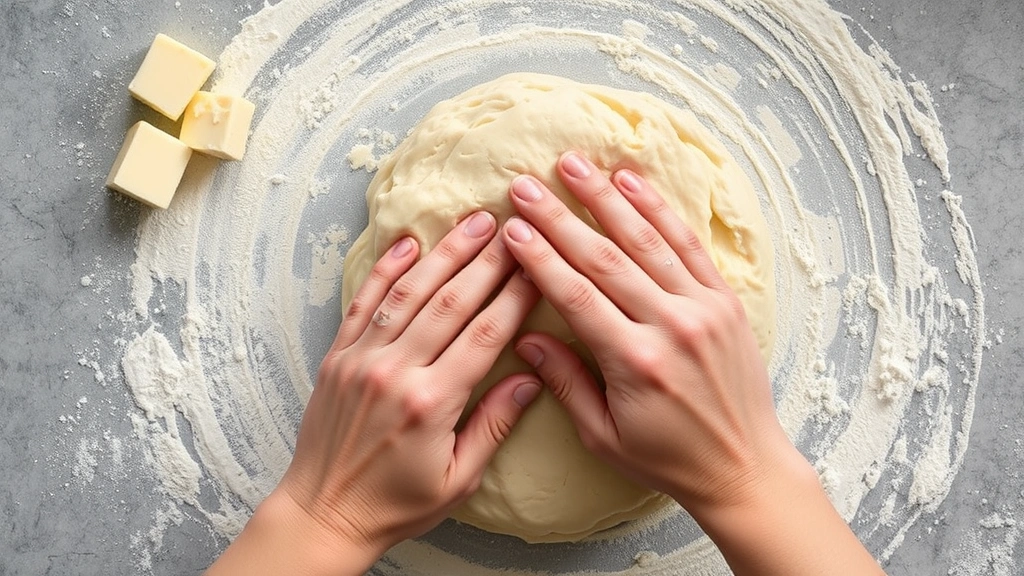
- Make a well in the center of the flour mixture and pour in the active sourdough starter and milk. Using a wooden spoon or your hands, gently fold the wet ingredients into the dry ingredients until just combined. The dough should be shaggy and slightly sticky—do not overmix.
- Turn the dough out onto a lightly floured surface and gently pat it into a rough rectangle about 3/4 inch thick. Fold the dough in half, turn it 90 degrees, and gently pat it out again. Repeat this folding process 2-3 more times. This creates the laminated layers without extensive rolling.
- After your final fold, pat the dough into a rectangle about 1 inch thick. Wrap it in plastic wrap and refrigerate for at least 1 hour, or up to overnight. This resting period allows the gluten to relax and helps the flavors develop.
- Preheat your oven to 400°F (200°C). Line a baking sheet with parchment paper.
- Remove the dough from the refrigerator and place it on a lightly floured surface. Gently pat it to about 3/4 inch thickness.
- Using a sharp 2-inch biscuit cutter or a glass, cut out biscuits by pressing straight down—do not twist, as twisting seals the edges and prevents proper rise. Place the biscuits on the prepared baking sheet, leaving about 2 inches between each one.
- Gather the scraps gently, pat them together without overworking, and cut additional biscuits. You should have 8-10 biscuits total.
- Brush the tops of each biscuit with melted butter and sprinkle with fleur de sel or coarse sea salt if desired.
- Bake for 18-22 minutes, until the biscuits are golden brown on top and have risen beautifully. The bottoms should also be lightly golden.
- Remove from the oven and serve immediately while warm, or transfer to a wire rack to cool slightly before serving.
Pro Tips
- Sourdough starter: Your starter is the heart of this recipe. Make sure it’s active and bubbly before using. If your starter is young or weak, you may want to use 1 1/4 cups and reduce the milk slightly. Always use starter that has been fed 4-6 hours prior and is at peak activity.
- Cold butter is essential: Keep your butter cold throughout the process. If your kitchen is warm, chill your mixing bowl and utensils beforehand. Cold butter creates steam pockets during baking, which creates those gorgeous flaky layers we’re after.
- Don’t overwork the dough: Overworking develops gluten and makes tough biscuits. Fold gently and handle with a light touch. The dough should still have some visible butter pieces when you’re done.
- Cutting technique: When cutting biscuits, use a sharp cutter and press straight down without twisting. Twisting seals the edges and prevents the biscuit from rising properly. If your cutter gets sticky, dip it in flour between cuts.
- Fermentation flexibility: These biscuits are very forgiving. You can refrigerate the cut biscuits for a few hours before baking, or even freeze them and bake from frozen (just add 2-3 minutes to the bake time). This makes them great for batch preparation.
- Flavor variations: Once you master the basic recipe, try adding fresh herbs like rosemary or thyme, sharp cheddar cheese, crispy bacon bits, or even a touch of honey for subtle sweetness.
- Storage: Baked biscuits keep in an airtight container for 2-3 days. Reheat in a 350°F oven for 5 minutes to restore crispness. You can also freeze unbaked biscuits and bake them straight from the freezer.
- Troubleshooting dense biscuits: This usually means your starter wasn’t active enough or your dough was overworked. Make sure your starter is bubbly and use a light hand when mixing.
- Troubleshooting flat biscuits: This can happen if your butter wasn’t cold enough or if you twisted the cutter instead of pressing straight down. Keep everything cold and use proper technique.
- Serving suggestions: These biscuits are wonderful with jam and whipped butter, alongside soups and stews, as breakfast sandwich bases, or simply with honey and sea salt. They pair beautifully with savory accompaniments.