
There’s nothing quite like the feeling of pulling a warm, bubbling cherry crisp out of the oven on a summer afternoon. This cherry crisp recipe is my go-to dessert when I want something that tastes like you spent hours in the kitchen, but actually takes just minutes to prepare. The beauty of a crisp is in its simplicity: fresh cherries tossed with just a touch of sugar and vanilla, topped with a golden, buttery oat topping that becomes wonderfully crispy and crunchy as it bakes.
I’ve been making crisps for years, and I’ve learned that the secret to the best cherry crisp isn’t complicated at all. It’s all about using quality fruit, not overcomplicating your filling, and making sure your topping has enough butter to get gorgeously golden. This recipe serves 6-8 people easily, and it’s perfect for feeding a crowd without any stress. You can have this dessert on the table in under an hour, and your guests will think you’re a baking genius.
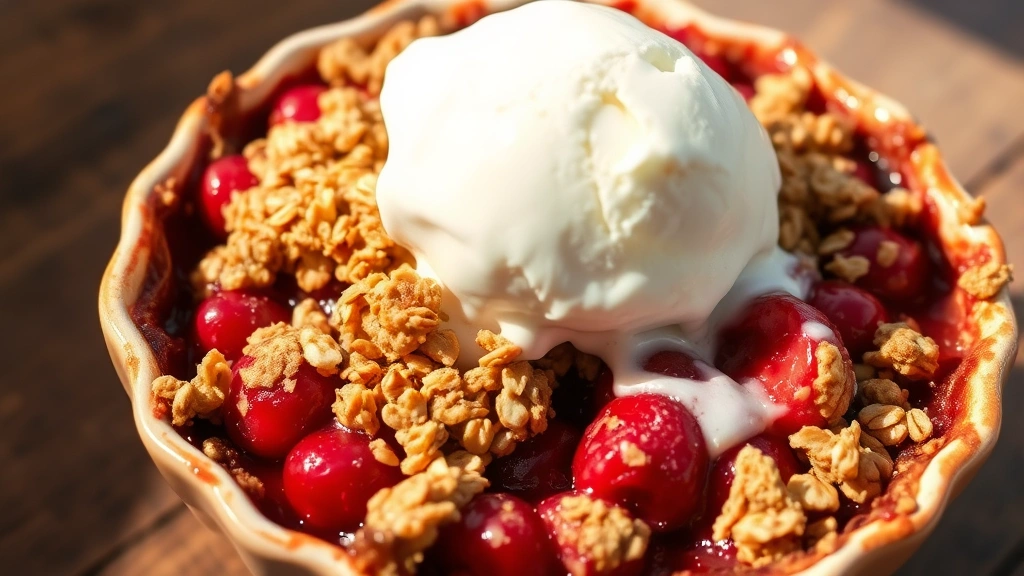
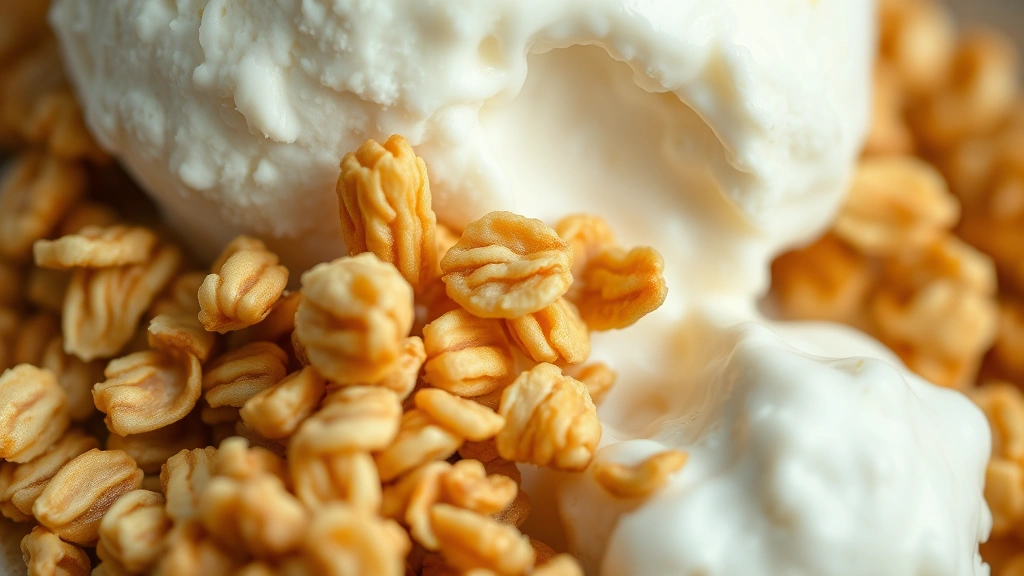
What makes this cherry crisp so special is how versatile it truly is. While cherries are absolutely divine in a crisp, you can easily swap them out for peaches, mixed berries, or even apples if that’s what you have on hand. The topping is also endlessly customizable—add a handful of chopped pecans or almonds, throw in some coconut flakes, or drizzle the whole thing with a touch of honey before baking. I love serving this warm with a generous scoop of vanilla ice cream or a dollop of whipped cream.
One of my favorite things about making crisps is that they’re forgiving. Unlike pies with their temperamental crusts or cakes that need precise measurements, a crisp welcomes improvisation. Too much filling? That’s okay. Your topping a little thicker? Perfect. This is the kind of recipe that rewards confidence and punishes nobody. It’s the ideal dessert for weeknight baking, for impressing guests, and for when you want something that feels indulgent but doesn’t require a culinary degree.
If you’ve never made a crisp before, you’re in for a treat. If you’re a crisp veteran, I think you’ll absolutely love how easy and foolproof this version is. The combination of sweet cherries, warm spices, and a buttery oat topping is simply unbeatable. Let me walk you through making the best cherry crisp you’ve ever tasted.
Ingredients
- 5 cups fresh cherries, pitted (about 2 pounds)
- 1/4 cup granulated sugar
- 2 tablespoons brown sugar
- 1 tablespoon lemon juice
- 1 teaspoon vanilla extract
- 1/4 teaspoon almond extract (optional but recommended)
- 1/8 teaspoon salt
- 1 cup old-fashioned rolled oats
- 1/2 cup all-purpose flour
- 1/2 cup light brown sugar, packed
- 1/4 teaspoon ground cinnamon
- 1/8 teaspoon ground nutmeg
- 1/4 teaspoon sea salt
- 8 tablespoons (1 stick) cold unsalted butter, cubed
- 1/4 cup chopped pecans or almonds (optional)
- Vanilla ice cream or whipped cream for serving
Instructions
- Preheat your oven to 375°F (190°C). Position the rack in the middle of the oven so the crisp bakes evenly.
- Pit your fresh cherries if you haven’t already. The easiest way is to use a cherry pitter, but you can also cut them in half and remove the pit with a small knife. Try to preserve as much of the cherry juice as possible—this will become part of your delicious filling.
- In a large mixing bowl, combine the pitted cherries, granulated sugar, brown sugar, lemon juice, vanilla extract, almond extract if using, and salt. Gently toss everything together until the cherries are evenly coated. Let this mixture sit for about 5 minutes so the cherries begin to release their juices.
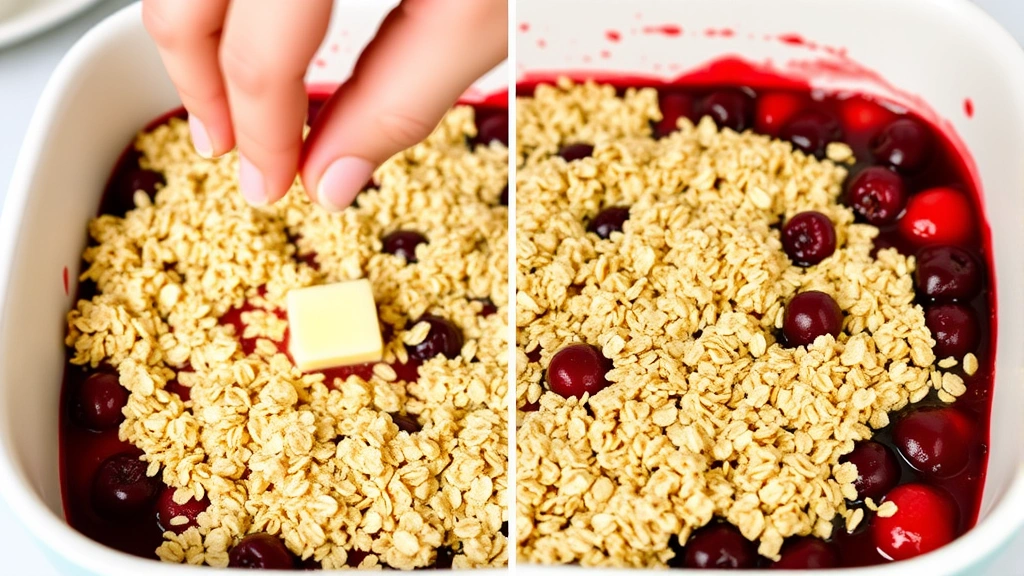
- Pour the cherry mixture into an 8×8 inch or 9×9 inch baking dish, spreading it into an even layer. If using a larger dish, the filling will be thinner but will still bake beautifully.
- In a separate medium bowl, combine the rolled oats, all-purpose flour, packed brown sugar, cinnamon, nutmeg, and sea salt. Whisk these dry ingredients together until well combined and the spices are evenly distributed throughout.
- Add the cold cubed butter to the oat mixture. Using a fork, two knives, or your fingertips, work the butter into the dry ingredients until the mixture resembles coarse breadcrumbs. This step is important—the small pieces of butter will create pockets of steam that make the topping wonderfully crispy.
- If you’re using nuts, fold them into the topping mixture now, stirring gently to distribute them evenly.
- Spread the oat topping evenly over the cherry filling, pressing down gently so it holds together but isn’t compacted too tightly. You want it to stay somewhat loose so it can crisp up beautifully in the oven.
- Place the baking dish on a rimmed baking sheet (this catches any drips that might escape from the filling as it bubbles).
- Bake for 35-40 minutes, until the topping is golden brown and you can see the cherry filling bubbling around the edges of the dish. The exact time will depend on your oven, so start checking around the 35-minute mark.
- Remove the cherry crisp from the oven and let it cool for about 5-10 minutes. This resting time allows the filling to set slightly so it won’t be too runny when you serve it.
- Serve warm with a scoop of vanilla ice cream, a dollop of freshly whipped cream, or simply on its own. The crisp will stay warm for about 30 minutes, making it perfect for serving at your own pace.
Pro Tips
Pitting Cherries: If you don’t have a cherry pitter, invest in one—it’s an inexpensive kitchen tool that makes this task exponentially easier and less messy. Some grocery stores also sell pre-pitted cherries, which is a huge time-saver if you’re willing to spend a bit more.
Butter Temperature: Make sure your butter is truly cold when you make the topping. Cold butter creates the best texture in the crisp. If your kitchen is very warm, refrigerate the topping mixture for 10 minutes before spreading it over the filling.
Customizing the Topping: Feel free to experiment with different nuts, seeds, or even add shredded coconut. You can also drizzle honey or maple syrup over the topping before baking for extra sweetness and depth of flavor.
Spice Adjustments: The cinnamon and nutmeg are subtle in this recipe. If you love warm spices, feel free to increase them to 1/2 teaspoon each. You could also add a pinch of cardamom or ginger for a more complex flavor profile.
Make-Ahead Options: You can assemble this crisp several hours ahead of time and refrigerate it until you’re ready to bake. Just add 5-10 minutes to the baking time if baking from cold. You can also freeze an unbaked crisp for up to 3 months—bake it directly from frozen, adding about 15 minutes to the cooking time.
Leftover Storage: This crisp keeps well in an airtight container in the refrigerator for up to 3 days. Reheat gently in a 300°F oven for about 10 minutes to restore the crispness of the topping.
Serving Suggestions: Serve this with complementary sides, or try pairing it with a cup of coffee or tea for a lovely afternoon treat. It’s also wonderful at brunch served alongside fresh pastries.