
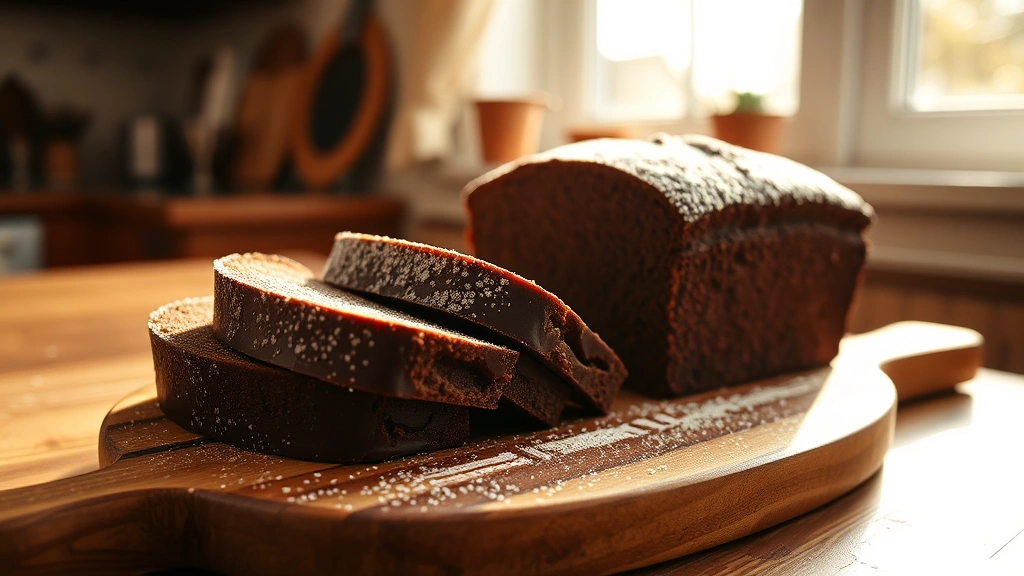
There’s something absolutely magical about a warm slice of chocolate bread fresh from the oven. This isn’t your typical chocolate cake—it’s a tender, moist quick bread that strikes the perfect balance between indulgent and comforting. Whether you’re baking for a special brunch, packing it for lunch boxes, or simply treating yourself on a quiet afternoon, this chocolate bread recipe has become a kitchen staple for good reason.
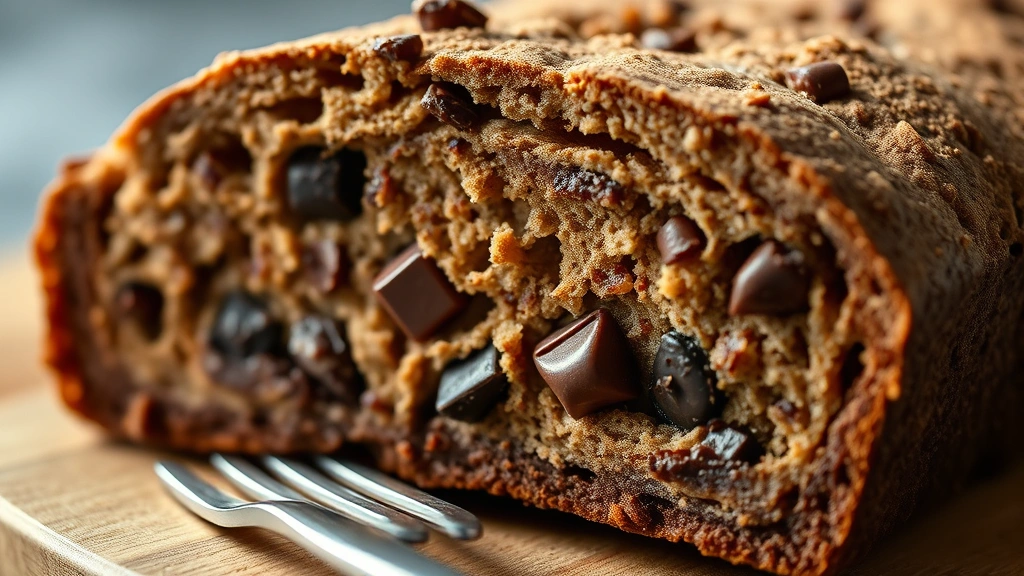
I’ve perfected this recipe over years of testing, adjusting ratios, and experimenting with different cocoa powders and chocolate techniques. The secret lies in using both melted chocolate and quality cocoa powder for deep, complex chocolate flavor that doesn’t taste overly sweet. The crumb is incredibly tender thanks to a combination of sour cream, which adds moisture and tang, and a careful hand when mixing the batter. This isn’t a recipe that requires fancy equipment or advanced baking skills—just a few quality ingredients and a little patience.
What makes this chocolate bread truly special is its versatility. You can enjoy it plain with a simple dusting of powdered sugar, slather it with cream cheese frosting, or serve it alongside your morning coffee for an elevated breakfast. Some days I’ll toast a slice and top it with butter and jam, while other days I’ll crumble it into a parfait with whipped cream and fresh berries.
Baking this chocolate bread also fills your home with an aroma that’s simply unbeatable. The combination of chocolate, vanilla, and warm butter creates an olfactory experience that makes everyone in your house suddenly very interested in what you’re baking. I’ve had friends and family literally follow the smell to the kitchen, hoping for a slice before it’s even cooled completely.
The beauty of quick breads is that they’re forgiving and reliable. Unlike layer cakes that require precise temperatures and timing, this chocolate bread comes together easily and consistently produces results that look bakery-quality. It’s the kind of recipe you can make on a Tuesday without much fuss, yet it impresses like you’ve spent hours in the kitchen.
If you’re looking to elevate your baking repertoire, this chocolate bread recipe deserves a permanent spot in your collection. According to Serious Eats, quick breads are one of the most reliable ways to develop consistent baking skills. The recipe works beautifully at any elevation, scales easily for different pan sizes, and stores beautifully for several days, making it perfect for meal prep or holiday gifting.
I recommend using high-quality chocolate and cocoa powder—this is not the place to skimp. The chocolate flavor is the star here, so it deserves your best ingredients. Pair this with other comforting recipes like creamy pasta dishes for a complete weekend of elevated home cooking.
Once you master this basic technique, you can experiment with mix-ins like espresso powder for deeper chocolate notes, white chocolate chips for sweetness, or even a swirl of pickled red onion reduction for an unexpected twist. The foundation is solid enough to support creativity while remaining approachable for beginners.
According to Bon Appétit, the key to exceptional quick breads is proper ingredient temperature and not overmixing the batter. This recipe honors both principles. Your chocolate bread will emerge from the oven with a tender crumb, glossy top, and chocolate flavor that makes every bite worth savoring. Let me walk you through my foolproof method for creating this beloved treat in your own kitchen.
Ingredients
- 1 3/4 cups all-purpose flour
- 3/4 cup unsweetened cocoa powder
- 1 1/2 teaspoons baking soda
- 1/2 teaspoon salt
- 6 ounces semi-sweet chocolate, chopped
- 1/2 cup unsalted butter
- 3/4 cup granulated sugar
- 3/4 cup packed light brown sugar
- 2 large eggs, room temperature
- 1 teaspoon vanilla extract
- 1 cup sour cream, room temperature
- 1/2 cup hot water or strong brewed coffee
- Powdered sugar for dusting (optional)
Instructions
- Preheat your oven to 350°F. Grease a standard 9×5-inch loaf pan with butter or non-stick spray, then line the bottom with parchment paper for easy removal. This prevents sticking and ensures your bread releases perfectly.
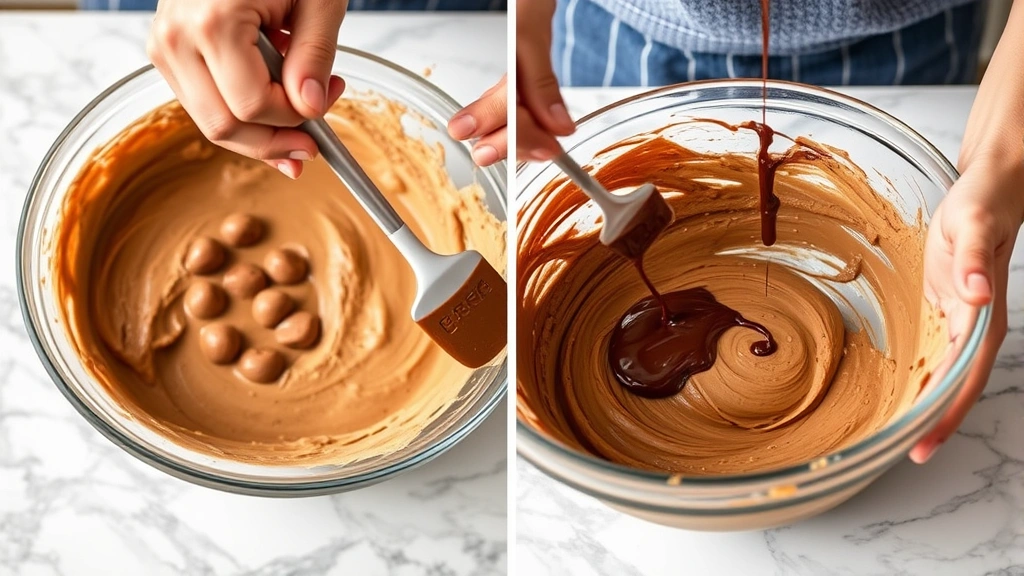
- In a small bowl, combine the chopped semi-sweet chocolate with the hot water or coffee. Let it sit for 2-3 minutes to soften, then whisk until completely smooth and melted. The hot liquid helps melt the chocolate without requiring a double boiler.
- In a separate medium bowl, whisk together the all-purpose flour, unsweetened cocoa powder, baking soda, and salt. Make sure there are no lumps in the cocoa powder by pressing it through a fine-mesh sieve if needed.
- In a large bowl, cream together the softened butter and both sugars using an electric mixer on medium speed. Beat for 2-3 minutes until the mixture is light, fluffy, and pale. This aerates the batter and creates a tender crumb.
- Add the room temperature eggs one at a time, beating well after each addition. Scrape down the sides of the bowl between additions to ensure even incorporation.
- Pour in the vanilla extract and beat until combined. The batter should look smooth and homogeneous at this point.
- Add the cooled chocolate mixture to the butter mixture and stir until fully incorporated. The batter will look thick and glossy.
- Gently fold in the dry ingredients using a spatula or wooden spoon, alternating with the sour cream. Start with one-third of the dry ingredients, fold gently, then add half of the sour cream, fold, then repeat. Finish with the remaining dry ingredients and fold until just combined.
Do not overmix at this stage—overmixing develops gluten and results in a tough, dense bread. Stop folding as soon as you don’t see any white streaks of flour.
- Pour the batter into the prepared loaf pan and smooth the top with an offset spatula or the back of a spoon. Tap the pan gently on the counter 2-3 times to release any air bubbles.
- Place the loaf pan on the center rack of your preheated oven and bake for 50-60 minutes. The bread is done when a toothpick inserted into the center comes out with just a few moist crumbs—not completely clean, as that indicates overbaking.
- Remove the chocolate bread from the oven and let it cool in the pan for 15 minutes. This allows the structure to set enough to handle.
- Turn the bread out onto a wire cooling rack and let it cool completely before slicing. This typically takes 1-2 hours. The bread continues to cook slightly as it cools, so patience here is essential.
- Once completely cooled, dust lightly with powdered sugar if desired. Slice with a serrated knife using a gentle sawing motion to maintain the tender crumb structure.
Pro Tips
Cocoa powder quality matters significantly. Dutch-processed cocoa gives a deeper, more sophisticated chocolate flavor, while natural cocoa powder provides brighter chocolate notes. Choose based on your preference, and avoid instant hot chocolate mixes which contain added sugars and ingredients.
Don’t skip the step of combining chocolate with hot water or coffee. This technique blooms the chocolate flavor and ensures it’s fully melted without requiring heat. Coffee enhances chocolate flavor without making the bread taste like coffee.
The sour cream serves multiple purposes: it adds moisture, creates a tender crumb through acid reaction with baking soda, and adds subtle tang that balances the sweetness. Greek yogurt can substitute in equal amounts for a slightly tangier result.
This chocolate bread stores beautifully. Wrap cooled bread tightly in plastic wrap and store at room temperature for up to 4 days. For longer storage, wrap in plastic wrap then foil and freeze for up to 3 months. Thaw at room temperature for 2-3 hours before serving.
Toasting slightly stale slices revives them beautifully. The warmth reactivates the chocolate flavor and softens the crumb. Try toasting and topping with butter, jam, or a simple chocolate spread.
This recipe doubles easily for making two loaves. Use two prepared pans and bake simultaneously on separate racks, rotating halfway through for even baking. Baking time remains approximately the same.
For gift-giving, wrap cooled bread in decorative parchment paper and tie with twine. Include a note about storage and suggest serving methods. Homemade chocolate bread makes an elegant gift that shows genuine effort and care.
Experiment with mix-ins after mastering the basic recipe. Mini chocolate chips, chopped nuts, espresso powder, or even a hint of cinnamon all work wonderfully. Add mix-ins to the finished batter just before pouring into the pan.
If your bread develops a crack down the center during baking, this is completely normal and actually desirable. It’s a sign the bread is baking evenly and the structure is setting properly.
A toothpick test is essential for determining doneness. Baking times vary based on oven calibration and pan material. Dark pans conduct heat faster than light pans, potentially requiring slightly less baking time. Start checking at 45 minutes to avoid overbaking.