
There’s something absolutely magical about cinnamon rolls, and when you swirl that beloved flavor into a creamy, luxurious cheesecake, you’ve created something truly extraordinary. This Cinnamon Roll Cheesecake Recipe combines the best of both dessert worlds – the warm, comforting spices of a classic cinnamon roll with the rich, velvety texture of New York-style cheesecake. Whether you’re baking for a special occasion or simply treating yourself to something spectacular, this show-stopping dessert will have everyone asking for your secret.
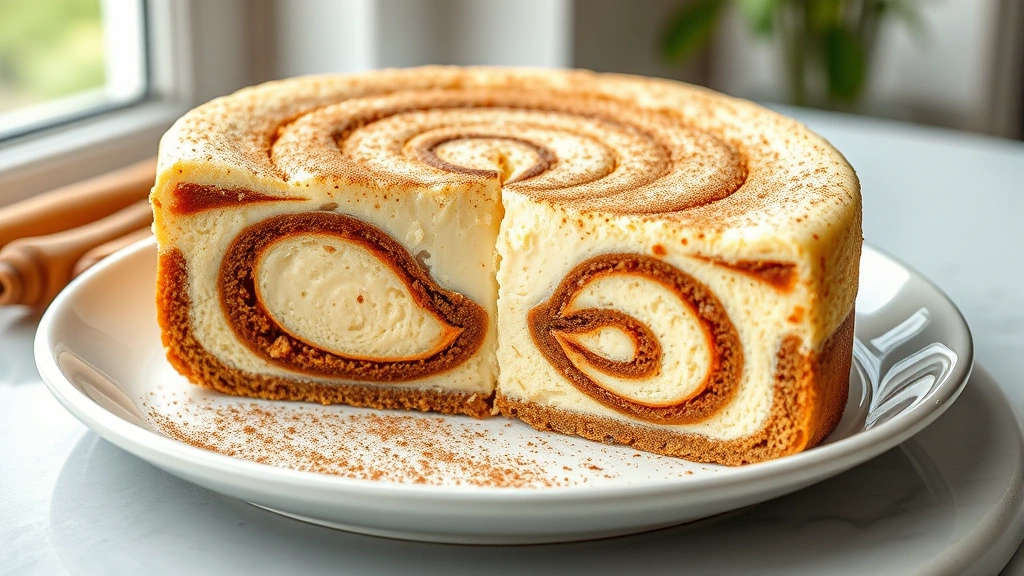
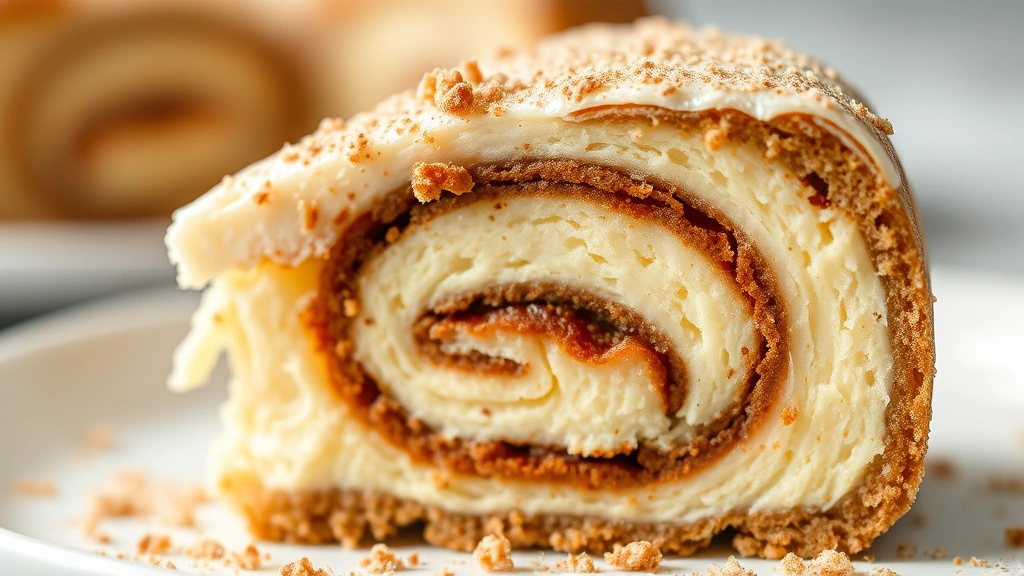
I’ve been making cheesecakes for years, and I can confidently say that this cinnamon roll version is one of my absolute favorites. The combination of a buttery graham cracker crust, a silky smooth cheesecake filling, and beautiful cinnamon-sugar swirls throughout creates layers of flavor and texture that are absolutely irresistible. The best part? It’s easier to make than you might think, and the results look like they came straight from a professional bakery.
What makes this recipe stand out is the balance of flavors and the technique used to create those gorgeous swirls. Unlike some recipes that just sprinkle cinnamon on top, we’re incorporating it throughout the cheesecake with a stunning ribbon effect that makes each slice a work of art. The warm cinnamon pairs beautifully with the tangy cream cheese, creating a dessert that’s sophisticated enough for entertaining yet comforting enough for a cozy night in.
When I first developed this recipe, I spent weeks perfecting the ratio of cinnamon to sugar and determining the best way to incorporate it without compromising the creamy texture of the cheesecake. I tested different baking temperatures, cooling methods, and even experimented with various crust options. What I discovered is that the key to the ultimate cinnamon roll cheesecake lies in three things: using room-temperature ingredients, not overbaking, and being patient during the cooling process.
This recipe serves 12-16 generous slices and makes a 9-inch springform pan. It’s perfect for holiday gatherings, dinner parties, or any time you want to impress your guests. Make it ahead of time – it actually tastes better the next day when the flavors have had time to meld together. You can even freeze it for up to a month, making it an ideal make-ahead dessert for busy entertaining seasons.
The beauty of this cinnamon roll cheesecake is that it’s incredibly versatile. While the classic version is absolutely stunning on its own, you can easily customize it with a drizzle of cream cheese frosting on top for extra indulgence, or add a touch of vanilla extract to the filling for additional depth. Some people love to serve it with a homemade cinnamon cream cheese frosting on the side, similar to what you’d find on classic cream-based dessert recipes. Others prefer it served warm with a scoop of vanilla ice cream melting on top.
One of my favorite ways to serve this is with a simple vanilla whipped cream and a sprinkle of extra cinnamon on top. The presentation is elegant and the flavors are perfectly balanced. If you’re looking to make this even more special, you could create a decadent dessert board featuring this cheesecake alongside other treats.
I recommend investing in a good quality springform pan and a water bath setup for this recipe. These tools ensure even baking and prevent the dreaded cracks that sometimes appear on cheesecakes. The water bath is especially important because it creates a gentle, humid environment that allows the cheesecake to bake slowly and evenly.
For the best results, make sure all your ingredients are at room temperature before you begin. This is crucial for creating a smooth, lump-free batter. Cold cream cheese will result in lumps that won’t blend properly, even with a mixer. Similarly, room-temperature eggs incorporate more smoothly and create a better texture in the final product.
This cinnamon roll cheesecake recipe has become a staple in my dessert rotation, and I’m thrilled to share it with you. Whether you’re a seasoned baker or someone who’s just starting out, you’ll find this recipe straightforward and rewarding. The results are absolutely worth the effort, and the compliments you’ll receive will make every minute spent in the kitchen worthwhile.
For more inspiration on layered desserts, check out this guide to building complex flavors in your baking. You might also enjoy exploring how different ingredients interact to create the perfect dish. And if you’re planning a dessert spread, don’t miss our tips for creating beautiful food presentations.
Ingredients
- 2 cups graham cracker crumbs (about 16 crackers)
- 1/2 cup unsalted butter, melted
- 3 tablespoons granulated sugar
- 1/4 teaspoon sea salt
- 32 oz cream cheese (four 8-oz packages), room temperature
- 1 cup granulated sugar
- 1/4 cup cornstarch
- 4 large eggs, room temperature
- 1/2 cup sour cream, room temperature
- 2 teaspoons vanilla extract
- 1/4 teaspoon sea salt
- 3 tablespoons ground cinnamon
- 1/3 cup light brown sugar, packed
- 2 tablespoons unsalted butter, softened
- Water for water bath
Instructions
- Preheat your oven to 325°F. Wrap the outside of a 9-inch springform pan with heavy-duty aluminum foil, making sure to cover the bottom and sides completely to prevent water from seeping in during the water bath.
- In a medium bowl, combine graham cracker crumbs, melted butter, 3 tablespoons granulated sugar, and 1/4 teaspoon sea salt. Mix until the texture resembles wet sand with all crumbs moistened.
- Press the mixture firmly into the bottom of the prepared springform pan, creating an even layer. Use the bottom of a measuring cup to pack it down. Bake the crust for 8-10 minutes until lightly golden, then remove from the oven and let cool while preparing the filling.
- In a small bowl, whisk together ground cinnamon and light brown sugar until well combined. Set aside this cinnamon-sugar mixture for the swirl.
- In a large bowl, using an electric mixer on low speed, beat the room-temperature cream cheese for about 2 minutes until smooth and creamy, scraping down the sides of the bowl as needed.
- In another small bowl, whisk together 1 cup granulated sugar and cornstarch. Gradually add this mixture to the cream cheese, beating on low speed until just combined, about 2 minutes. Do not overmix.
- Add eggs one at a time to the cream cheese mixture, beating on low speed after each addition and scraping down the bowl. Beat only until each egg is just incorporated to avoid adding excess air.
- Add sour cream, vanilla extract, and 1/4 teaspoon sea salt to the batter. Mix on low speed until just combined, scraping down the sides and bottom of the bowl. The batter should be smooth and creamy without any lumps.
- Pour about half of the cheesecake batter into the cooled crust, spreading it in an even layer.
- Sprinkle half of the cinnamon-sugar mixture evenly over the layer of batter, using about 3-4 tablespoons.
- Pour the remaining cheesecake batter over the cinnamon layer, spreading gently and evenly.
- Sprinkle the remaining cinnamon-sugar mixture over the top of the cheesecake.
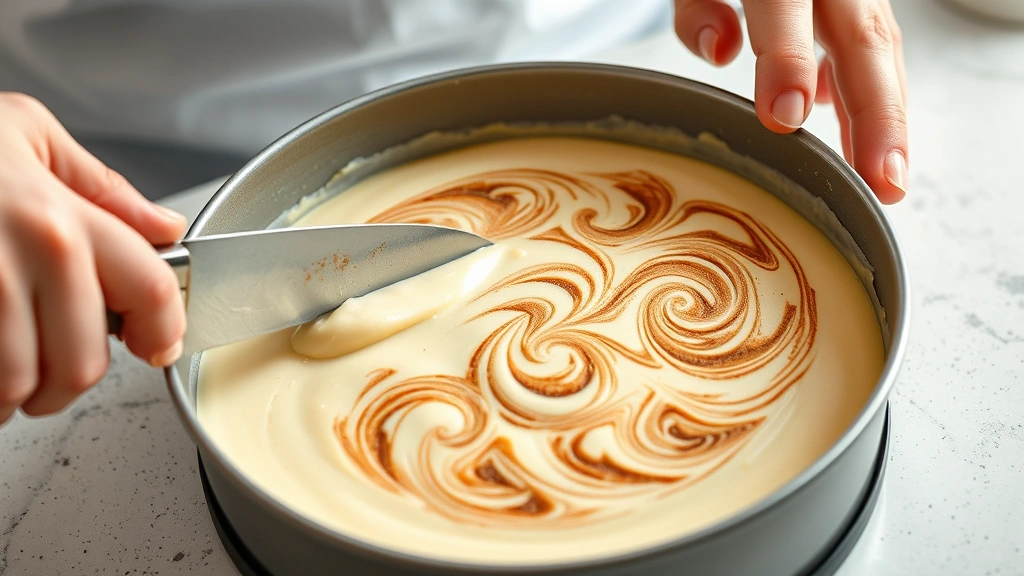
- Using a thin knife or skewer, drag it through the batter in a back-and-forth zigzag pattern to create the classic cinnamon roll swirl effect. Be gentle and don’t overwork it – you want visible swirls, not a completely marbled appearance.
- Place the springform pan inside a larger roasting pan. Pour hot water into the roasting pan until it reaches halfway up the sides of the springform pan, creating a water bath.
- Carefully place the roasting pan with the cheesecake in the preheated 325°F oven. Bake for 55-60 minutes until the cheesecake is set but still slightly jiggly in the very center (about a 2-inch circle in the middle should jiggle slightly when gently shaken).
- Turn off the oven and crack the door open about 4 inches. Let the cheesecake sit in the warm oven for 1 hour. This gradual temperature change prevents cracking.
- Remove the cheesecake from the oven and water bath. Let it cool to room temperature on the counter for 2-3 hours, then refrigerate for at least 6 hours or overnight before serving.
- To serve, run a thin knife around the edges of the cheesecake to loosen it from the pan. Carefully remove the springform pan collar and transfer to a serving plate, or serve directly from the pan base.
- Slice with a sharp knife dipped in hot water and wiped clean between each cut for neat, clean slices. Serve chilled or at room temperature, garnished with a sprinkle of cinnamon if desired.
Pro Tips
Water Bath Method: The water bath is essential for even, gentle baking. It prevents the edges from cooking too quickly while the center remains underdone. Wrap your springform pan completely in foil to prevent water from seeping in.
Don’t Overbake: The cheesecake is done when it’s set around the edges but still has a slight jiggle in the very center. A 2-inch circle in the middle should move slightly when you gently shake the pan. Overbaking results in a dry, crumbly texture.
Cooling Process: Never skip the gradual cooling process. Opening the oven door and letting the cheesecake cool slowly prevents the sudden temperature change that causes cracks. This patience pays off with a beautiful presentation.
Make Ahead: This cheesecake actually tastes better the next day after the flavors have melded. You can make it up to 3 days ahead and store it covered in the refrigerator. It also freezes beautifully for up to 1 month.
Swirl Technique: For the best-looking swirls, use a thin knife or wooden skewer and drag it through the batter gently in one direction, then the opposite direction. Don’t overwork it or the swirls will disappear.
Slicing Tips: Use a sharp knife dipped in hot water and wiped clean between each cut. This creates neat, clean slices without dragging the batter. You can also use unflavored dental floss for perfectly clean cuts.
Frosting Option: For extra indulgence, make a cream cheese frosting by beating 8 oz softened cream cheese with 4 tablespoons butter, 1 teaspoon vanilla, and 1.5 cups powdered sugar. Spread on top of the cooled cheesecake.
Serving Suggestions: Serve chilled or at room temperature with vanilla whipped cream, fresh berries, or a drizzle of caramel sauce. Some people love a dollop of cinnamon-spiced whipped cream on top.
Storage: Store covered in the refrigerator for up to 3 days. Freeze wrapped tightly in plastic wrap and aluminum foil for up to 1 month. Thaw overnight in the refrigerator before serving.