
There’s something absolutely magical about homemade fudge, and this Quick Condensed Milk Fudge Recipe proves that you don’t need hours in the kitchen to create confectionery perfection. If you’ve ever wondered how to make fudge that rivals those fancy chocolate shops, wonder no more! This recipe is so simple, so delicious, and so incredibly satisfying that you’ll find yourself making batch after batch.
Condensed milk is truly the secret weapon for fudge makers everywhere. It creates that smooth, creamy, melt-in-your-mouth texture that everyone loves, without requiring a candy thermometer or constant stirring. The beauty of this recipe lies in its simplicity – just a handful of ingredients and about thirty minutes of your time stands between you and the most decadent homemade fudge you’ve ever tasted.
What makes this fudge so special is how it comes together. The condensed milk provides natural sweetness and creaminess, while butter adds richness and chocolate brings all that wonderful cocoa flavor. When you combine these simple ingredients and let them work their magic, you get fudge that’s perfectly dense, incredibly smooth, and absolutely addictive. It’s the kind of treat that makes you feel like you’ve been in a professional kitchen for hours, even though you’ve barely lifted a finger.
This Quick Condensed Milk Fudge Recipe is perfect for so many occasions. Make it for holiday gift-giving – package it beautifully in boxes tied with ribbons, and everyone will think you spent all day in the kitchen. Bring it to potlucks and watch people’s faces light up when they taste it. Keep a batch in your freezer for when chocolate cravings strike. Or simply make it for yourself and enjoy a few pieces with your afternoon coffee.
The versatility of this recipe is another reason to love it. Once you master the basic chocolate version, you can experiment with different flavor combinations and mix-ins to create your own signature fudge. Think about adding espresso powder for a mocha version, a splash of vanilla extract for extra depth, or even some sea salt flakes on top for that sweet-and-salty contrast that’s so popular right now.
I’ve been making this fudge for years, and it never fails to impress. The ratio of ingredients is perfectly balanced – not too sweet, not too rich, just absolutely perfect. The texture sets up beautifully in just a few hours, and it keeps well in an airtight container for up to two weeks, though it rarely lasts that long in my house!
One of the best things about this recipe is how forgiving it is. Unlike traditional fudge recipes that require precise temperature readings and careful timing, this version is much more relaxed. As long as you follow the basic steps and give it time to set, you’re going to end up with gorgeous fudge that looks and tastes professional. It’s comfort food at its finest, and it proves that sometimes the simplest recipes are the very best ones.
Whether you’re a seasoned candy maker or someone who’s never attempted homemade fudge before, this recipe is absolutely for you. It’s foolproof, it’s fast, and it’s going to become your go-to recipe whenever you need to satisfy a chocolate craving or create an impressive homemade gift. Let’s get into the details and make some absolutely delicious fudge!
Ingredients
- 1 can (14 ounces) sweetened condensed milk
- 1/2 cup unsalted butter
- 2/3 cup unsweetened cocoa powder, sifted
- 2 cups powdered sugar, sifted
- 1 teaspoon vanilla extract
- 1/4 teaspoon sea salt
- Parchment paper for lining
Instructions
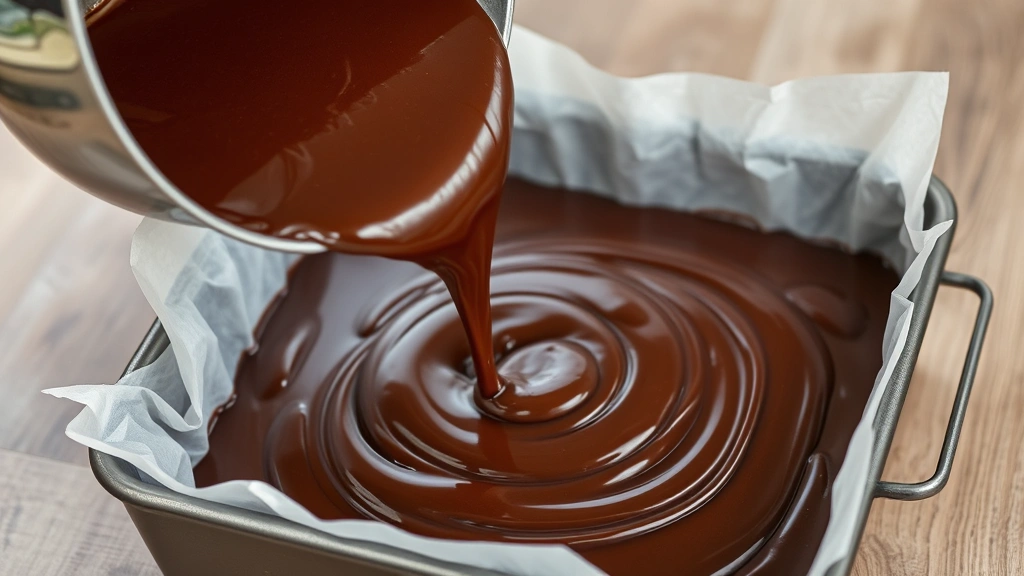
- Line an 8×8-inch square baking pan with parchment paper, allowing the paper to overhang slightly on two sides so you can easily lift out the finished fudge later.
- In a medium saucepan, combine the sweetened condensed milk and unsalted butter over medium-low heat, stirring frequently until the butter is completely melted and the mixture is smooth and well combined.
- Remove the saucepan from heat and add the sifted cocoa powder, stirring constantly and thoroughly to break up any lumps that may form and create a smooth chocolate mixture.
- Add the sifted powdered sugar to the cocoa mixture in two additions, stirring well after each addition to ensure the mixture is completely smooth and no lumps remain.
- Stir in the vanilla extract and sea salt, mixing until everything is perfectly combined and you have a thick, glossy fudge mixture.
- Pour the fudge mixture into your prepared baking pan, using a spatula to spread it evenly and smooth out the top surface as much as possible.
- Tap the bottom of the pan gently a few times on the counter to release any air bubbles that might be trapped in the fudge.
- Place the pan in the refrigerator and allow the fudge to set for at least 3 hours, or until it’s completely firm and no longer sticky when you touch the surface.
- Once the fudge is fully set, use the overhanging parchment paper to lift the entire block out of the pan and place it on a cutting board.
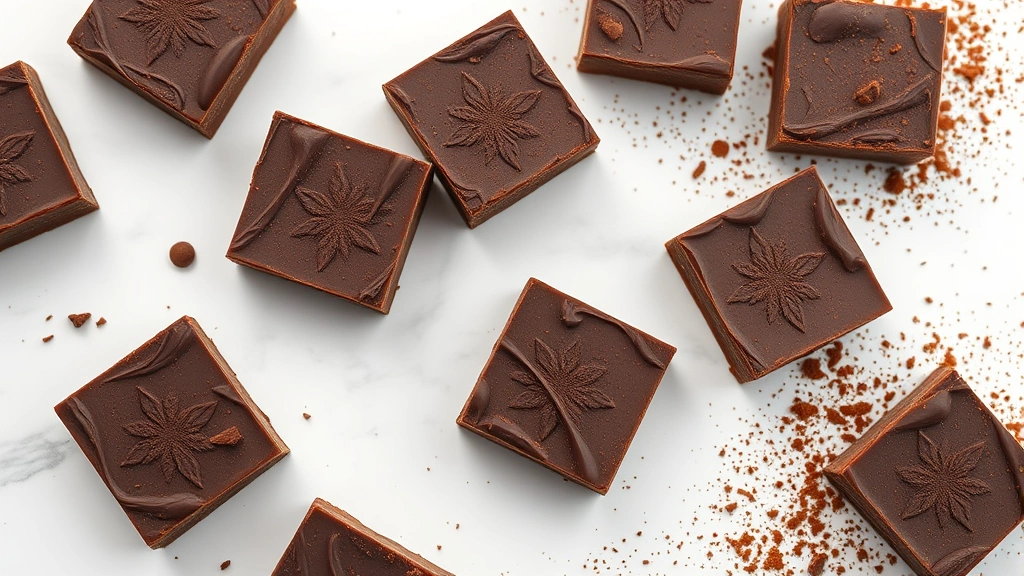
- Using a sharp knife (dipped in hot water and wiped dry between cuts for cleaner edges), cut the fudge into 24 equal pieces, working carefully to make smooth cuts.
- Store the finished fudge in an airtight container in the refrigerator for up to two weeks, or in the freezer for up to two months, placing parchment paper between layers to prevent sticking.

Pro Tips
Cocoa powder selection is important: Use unsweetened cocoa powder, not hot cocoa mix or drinking chocolate. Sifting the cocoa powder before measuring helps eliminate lumps and ensures a silky smooth fudge texture.
Powdered sugar preparation: Always sift your powdered sugar before adding it to the mixture. This prevents lumps from forming and gives you that professional, smooth fudge texture.
Vanilla extract variations: You can experiment with different extracts like almond extract (use 1/2 teaspoon) or peppermint extract (use 1/4 teaspoon) for flavor variations.
Salt enhancement: The sea salt is optional but highly recommended. It brings out the chocolate flavor and creates that popular sweet-and-salty balance. You can add a bit more to the top of each piece if you love salt.
Knife technique: Warming your knife between cuts really does make a difference. Dip it in hot water, wipe it completely dry, then make your cut. This prevents the fudge from sticking to the knife and creates clean edges.
Storage tips: Keep fudge in an airtight container with parchment paper between layers. It can be stored at room temperature for a few days, in the refrigerator for up to two weeks, or frozen for two months.
Gift-giving ideas: Package fudge in pretty boxes with wax paper between layers. You can also add fun variations by sprinkling sea salt, chopped nuts, or drizzling with white chocolate on top before it sets.
Troubleshooting: If your fudge is too soft after setting, it needed more time or your kitchen was too warm. If it’s too hard and crumbly, you may have used too much powdered sugar. Adjust slightly in future batches.
Mix-in suggestions: Before pouring into the pan, you can stir in 1/2 cup of chopped nuts, dried fruit, mini marshmallows, or crushed candy canes for festive variations.