
There’s nothing quite like the moment you bite into a warm, glazed Krispy Kreme donut—that perfect combination of airy, pillowy dough and sweet glaze that melts on your tongue. For years, these iconic donuts have been a beloved treat, but what if you could recreate that magic right in your own kitchen? This homemade Krispy Kreme donut recipe is easier than you might think, and the results are absolutely divine.
Making donuts at home might seem intimidating, but with the right technique and ingredients, you’ll be frying up batch after batch of these glazed beauties. The key to achieving that signature Krispy Kreme texture is understanding the importance of proper dough hydration, temperature control during frying, and the perfect glaze consistency. This recipe has been tested and refined to give you the closest homemade version possible.
The dough itself is a delicate balance of flour, yeast, sugar, and eggs that creates that light, airy crumb structure donuts are famous for. Unlike cake donuts, these are yeast donuts, which means they require a bit of patience as the dough rises. The waiting time is absolutely worth it—you’ll understand why once you taste the fluffy, tender results. The frying process is crucial; maintaining the correct oil temperature ensures your donuts cook evenly without becoming greasy or dense.
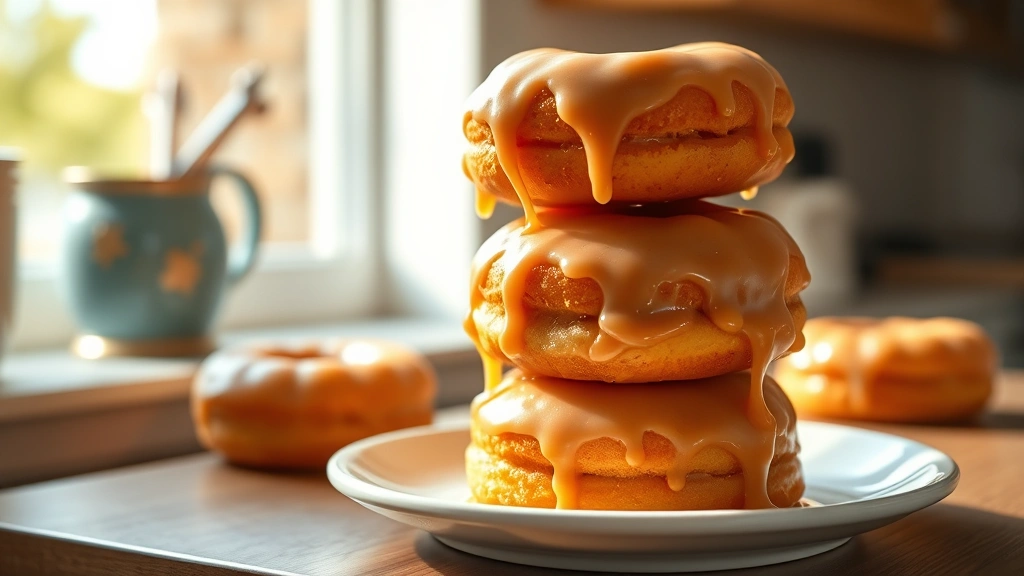
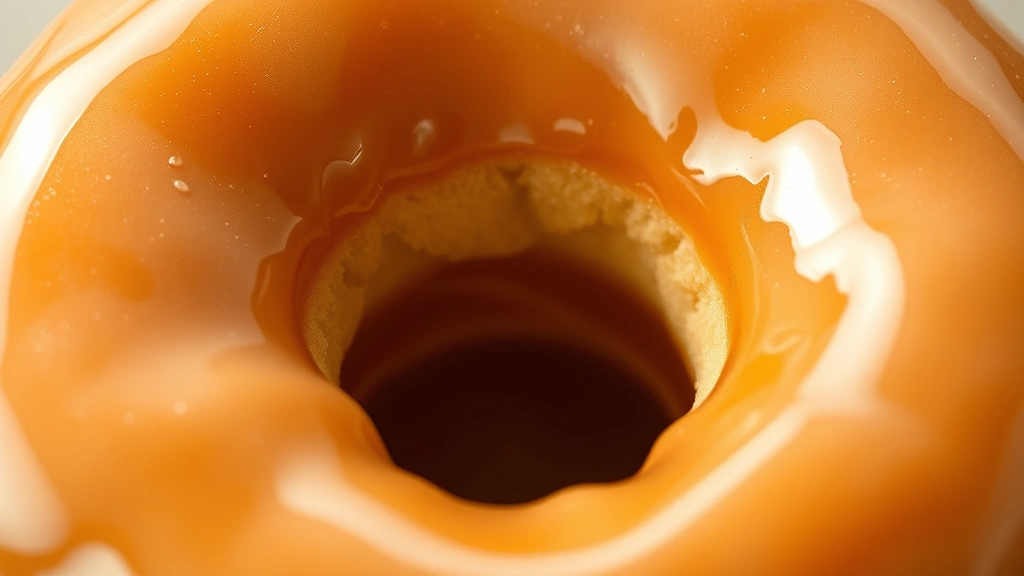
What makes this recipe special is the glaze, which is surprisingly simple yet absolutely crucial. The glaze should be smooth, pourable, and set to a slight gloss that hardens just enough to provide that satisfying exterior while keeping the interior tender and moist. We’ll walk you through every step, from mixing the dough to achieving the perfect glaze coating.
Whether you’re making these for a special breakfast, a weekend treat, or to impress friends and family, this homemade donut recipe delivers authentic Krispy Kreme-style results. You’ll find that homemade donuts are fresher, tastier, and more satisfying than store-bought versions. Plus, there’s something deeply rewarding about creating these treats from scratch.
One of the best parts about making donuts at home is the ability to customize them. Once you master the basic recipe, you can experiment with different glazes, toppings, and fillings. From classic glazed to chocolate-covered, sprinkle-topped to filled varieties, the possibilities are endless. This recipe serves as your foundation for donut-making success.
Many home bakers are intimidated by working with yeast and frying, but this recipe breaks everything down into manageable steps. We’ll cover troubleshooting tips, storage advice, and techniques to ensure your donuts turn out perfectly every single time. Get ready to transform your kitchen into a donut shop and create memories with freshly fried, warm donuts that taste just like the real thing.
The investment in a good candy thermometer and a reliable deep fryer or heavy-bottomed pot is worthwhile if you plan to make donuts regularly. However, you likely already have everything else you need in your pantry. This recipe is more accessible than you might think, and the results will make you wonder why you didn’t start making donuts sooner. Welcome to your new favorite weekend project!
Ingredients
- 2 1/4 teaspoons (7g) active dry yeast
- 3/4 cup (180ml) whole milk, warmed to 110°F
- 1/3 cup (67g) granulated sugar
- 2 large eggs
- 1/4 cup (60ml) vegetable oil or melted butter
- 1 teaspoon vanilla extract
- 1/2 teaspoon salt
- 2 3/4 cups (330g) all-purpose flour
- Oil for frying (vegetable, canola, or peanut oil)
- 2 cups (240g) powdered sugar for glaze
- 3 tablespoons (45ml) whole milk for glaze
- 2 tablespoons (30g) unsalted butter, melted
- 1/2 teaspoon vanilla extract for glaze
- Pinch of salt for glaze
Instructions
- In a large mixing bowl, combine the warm milk and active dry yeast. Let sit for about 5 minutes until foamy, which indicates the yeast is active and ready to use.
- Add the granulated sugar, eggs, vegetable oil, and vanilla extract to the yeast mixture. Stir well to combine all wet ingredients thoroughly.
- In a separate bowl, whisk together the flour and salt. This helps distribute the salt evenly throughout the dough.
- Gradually add the flour mixture to the wet ingredients, stirring with a wooden spoon or using a stand mixer fitted with the dough hook attachment.
- Continue mixing until a soft, slightly sticky dough forms. The dough should be softer than bread dough but not as loose as cake batter.
- Knead the dough for about 8-10 minutes by hand or 5-6 minutes with a stand mixer until it becomes smooth and elastic. Add a tiny bit more flour if it’s too sticky, but resist over-flouring.
- Place the dough in a lightly oiled bowl, turning it to coat all sides. Cover with a damp kitchen towel or plastic wrap.
- Let the dough rise in a warm place for about 1 hour to 1 hour 30 minutes, until it has doubled in size. The exact time depends on room temperature.
- Once risen, turn the dough out onto a well-floured surface. Gently press it down to release excess air, but don’t deflate it completely.
- Roll the dough to about 1/2-inch thickness. Use a donut cutter (or a 2 1/2-inch round cutter for the outer circle and a 1-inch cutter for the hole) to cut out donut shapes.
- Place the cut donuts on parchment paper squares, spacing them about 2 inches apart. Gather the dough scraps, re-roll gently, and cut additional donuts.
- Cover the cut donuts with a damp towel and let them proof for 30-45 minutes at room temperature until they’re puffy and light. They should increase in size noticeably.
- While the donuts proof, prepare the glaze by whisking together the powdered sugar, milk, melted butter, vanilla extract, and salt until smooth and pourable. The consistency should be thick but able to coat the back of a spoon.
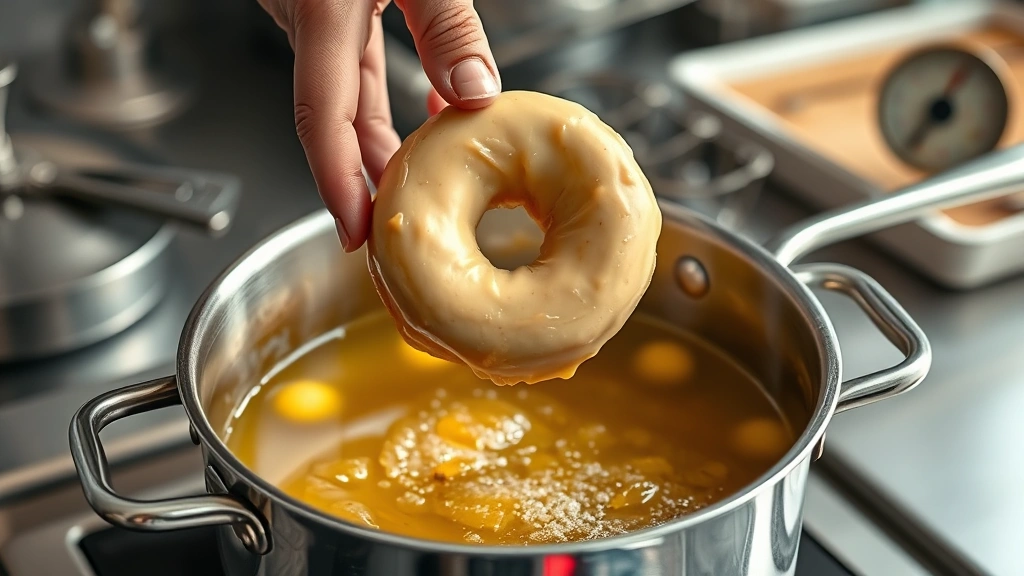
- Heat your oil to exactly 375°F in a heavy-bottomed pot, deep fryer, or Dutch oven. Use a candy thermometer to monitor the temperature accurately—this is crucial for perfect donuts.
- Carefully slide one or two donuts (depending on your pot size) into the hot oil. Fry for about 60-90 seconds until the bottom is golden brown.
- Using a slotted spoon or spider strainer, carefully flip the donuts and fry the other side for another 60-90 seconds until evenly golden brown.
- Remove the fried donuts from the oil using a slotted spoon and place them on a wire rack or paper towels to drain briefly.
- While the donuts are still warm, dip each one into the glaze, turning it to coat all sides evenly. Let excess glaze drip off back into the bowl.
- Place the glazed donuts on a wire rack set over a baking sheet to catch any drips. The glaze will set as the donuts cool.
- Repeat the frying and glazing process with the remaining donuts, maintaining the oil temperature at 375°F throughout.
- Allow the glazed donuts to cool for at least 15-20 minutes before serving. They’re best enjoyed while still slightly warm, but they’ll stay fresh for up to 2 days in an airtight container.
Pro Tips
Dough Consistency Matters: The dough should be soft and slightly sticky—this creates the light, airy texture donuts are known for. Resist the urge to add too much flour, as this will result in dense donuts.
Proofing Time Varies: Room temperature significantly affects proofing time. In a warm kitchen, donuts may proof faster than in a cool one. They’re ready when they’re puffy and light, not based on time alone.
Glaze Consistency: The glaze should flow smoothly but not be watery. If it’s too thick, add milk a teaspoon at a time. If too thin, add more powdered sugar gradually.
Frying Safety: Never leave hot oil unattended. Keep a fire extinguisher nearby, and never use water to extinguish an oil fire. If oil splatters, wear long sleeves and be cautious.
Dough Holes: Don’t discard the donut holes—fry them separately for about 30-45 seconds per side. They’re perfect bite-sized treats and cook much faster than full donuts.
Storage Instructions: Store cooled donuts in an airtight container at room temperature for up to 2 days. For longer storage, freeze unfrosted donuts for up to 3 months. Reheat gently in a 300°F oven.
Custom Flavors: Once you master the basic recipe, try adding 1/4 teaspoon almond extract to the dough or cinnamon-sugar coating instead of glaze.
Reusing Oil: Strain the oil through a fine mesh strainer after frying. Properly stored oil can be reused 2-3 times before needing replacement.
Make-Ahead Option: You can prepare the dough the night before, refrigerate it, and let it come to room temperature before cutting and proofing in the morning.