
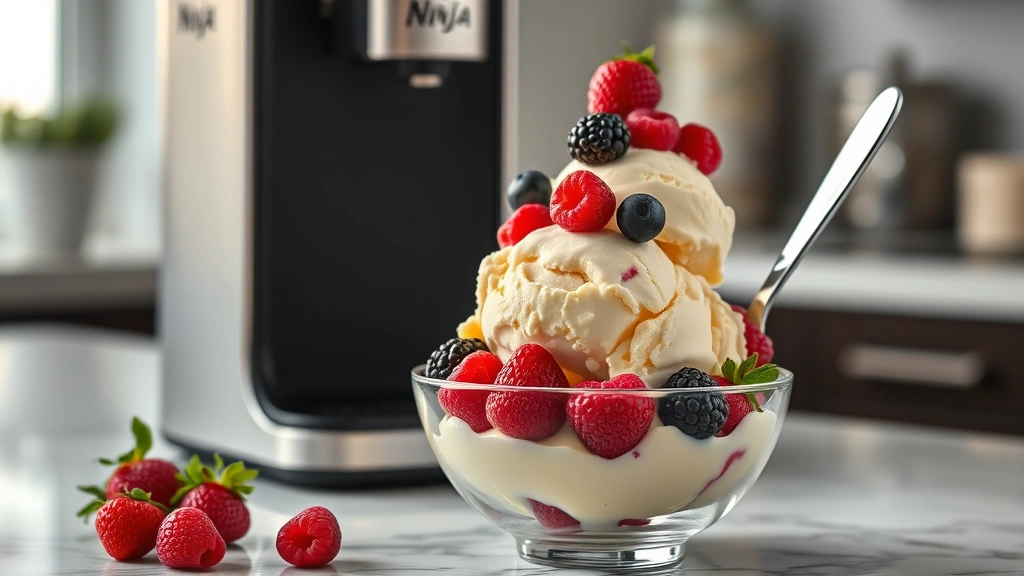
Making homemade ice cream has never been easier than with the Ninja Creami! This magical machine transforms frozen liquid into silky, scoopable ice cream in seconds, and I’m here to show you exactly how to do it. Whether you’re a seasoned ice cream maker or a complete beginner, this easy Ninja Creami ice cream recipe will become your new favorite summer staple.
The beauty of the Ninja Creami is that it eliminates all the fuss of traditional ice cream making. No churning, no constant stirring, no special equipment needed beyond the machine itself. You simply pour your mixture into the Creami’s special containers, freeze overnight, and let the machine do all the work. The result? Restaurant-quality ice cream that tastes like you spent hours in the kitchen when really, you only spent minutes.
I absolutely love this recipe because it’s endlessly customizable. The base is a simple, foolproof vanilla that works beautifully on its own, but you can easily transform it into any flavor you desire. Want strawberry? Add fresh berries. Craving cookies and cream? Crush up some Oreos. The possibilities are truly endless, and that’s what makes the Ninja Creami such a game-changer for home cooks.
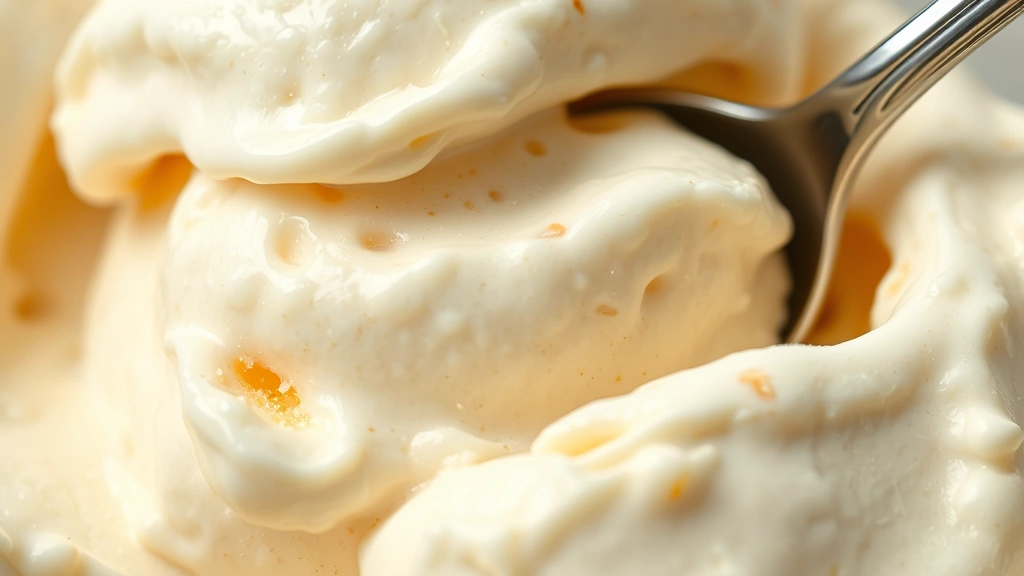
One of my favorite things about using a quality heavy cream base is how rich and creamy the final product becomes. The fat content in heavy cream is what gives you that luxurious mouthfeel that makes store-bought ice cream jealous. Combined with sweetened condensed milk, you’ve got a foolproof base that practically guarantees success every single time.
The Ninja Creami works by rapidly freezing and shaving your mixture into perfect ice cream texture. Unlike traditional ice cream makers that churn constantly, the Creami uses a different technology that creates incredibly smooth results without ice crystals. It’s truly revolutionary, and once you own one, you’ll wonder how you ever lived without it.
I recommend making a few batches and keeping them in your freezer at all times during summer. Your family will absolutely love having homemade ice cream available on demand. Plus, there’s something so special about serving ice cream you made yourself. It’s the kind of simple luxury that makes everyday moments feel a little more special.
For more inspiration on creamy desserts, check out my guide to working with heavy cream and this amazing recipe that uses similar techniques. You might also love exploring more creamy recipe options and my collection of creamy sauce recipes.
For even more detailed ice cream techniques, I recommend checking out Serious Eats’ ice cream guide, Bon Appétit’s ice cream recipes, and New York Times Cooking’s ice cream collection. These resources have taught me so much about perfecting frozen desserts.
Ingredients
- 1 can (14 ounces) sweetened condensed milk
- 1 cup heavy whipping cream, cold
- 1/2 cup whole milk
- 2 teaspoons vanilla extract
- 1/4 teaspoon salt
- 2 tablespoons sugar (optional, for extra sweetness)
- Optional flavor additions: fresh berries, cookie crumbles, chocolate chips, or food coloring

Instructions
- Gather all your ingredients and make sure your heavy cream is as cold as possible. Cold cream whips better and creates a fluffier base mixture.
- In a large mixing bowl, combine the sweetened condensed milk, cold heavy cream, whole milk, vanilla extract, salt, and sugar if using.
- Whisk the mixture together until well combined and slightly thickened, about 2-3 minutes of whisking. The mixture should be smooth and homogeneous with no lumps.
- If you’re adding flavorings like fresh berries, food coloring, or extracts, fold them in gently now. For mix-ins like cookies or chocolate chips, wait until after the first freeze cycle to add them.
- Carefully pour the mixture into your Ninja Creami containers, leaving about 1/2 inch of space at the top for expansion during freezing.
- Seal the containers tightly with their lids, ensuring they’re completely airtight to prevent ice crystals from forming.
- Place the containers in your freezer in an upright position. Freeze for at least 8 hours, but ideally overnight. The longer it freezes, the better the texture will be.
- Once fully frozen, remove a container from the freezer and let it sit at room temperature for about 2-3 minutes to soften slightly.
- Insert the frozen container into your Ninja Creami machine according to the manufacturer’s instructions, making sure it’s seated properly.
- Select your desired texture setting on the Creami. For this recipe, the regular ice cream setting works best. Start with a lower setting if it’s your first time.
- Press the button and let the machine work its magic. It will rapidly freeze and shave the mixture into perfect ice cream texture, usually in about 30-60 seconds.
- Watch as your mixture transforms into beautiful, creamy ice cream. You’ll see it come out as a smooth, scoopable consistency.
- Quickly scoop the finished ice cream into serving bowls or cones while it’s still at the perfect texture.
- If you’re not serving immediately, transfer any remaining ice cream to an airtight container and return it to the freezer for up to 2 weeks.
- For the best texture and flavor, serve immediately while the ice cream is still perfectly soft and creamy from the Creami.
Pro Tips
- The key to success with the Ninja Creami is using quality ingredients. Don’t skip on the heavy cream, as it’s what creates that luxurious texture you’re after.
- Sweetened condensed milk is non-negotiable in this recipe. It keeps the ice cream from freezing solid like a popsicle and maintains a creamy texture. This ingredient is the secret weapon that makes Creami ice cream so special.
- Always make sure your containers are completely sealed before freezing. Any air leaks will result in ice crystals forming throughout your ice cream, which affects the texture negatively.
- The vanilla extract amount can be adjusted to your taste. Some people prefer a stronger vanilla flavor and add up to 3 teaspoons, while others like it more subtle.
- For chocolate ice cream, replace 1/4 cup of the heavy cream with 1/4 cup of unsweetened cocoa powder mixed with a little warm milk first to create a smooth paste.
- Strawberry lovers should add about 1 cup of fresh pureed strawberries or strawberry puree to the base mixture. You may want to reduce the whole milk by 1/4 cup to compensate for the added liquid.
- Cookie and cream is an absolute crowd-pleaser. Add about 15-20 crushed Oreo cookies to the mixture, or fold them in gently right before serving to keep them crunchy.
- Mint chocolate chip fans should add 1/2 teaspoon of mint extract and a few drops of green food coloring, then fold in mini chocolate chips before serving.
- The Ninja Creami works best when the mixture is completely frozen solid. If you’re in a hurry, use the sorbet or smoothie bowls setting, but pure ice cream requires the full 8-hour freeze.
- You can make multiple batches ahead of time and keep them in your freezer. This is perfect for parties or for having ice cream on hand all summer long.
- If your ice cream comes out too icy, your mixture may not have had enough fat or sugar content. The sweetened condensed milk and heavy cream ratio is crucial.
- Storage is simple: keep finished ice cream in an airtight container in your freezer for up to 2 weeks. The longer it sits, the icier it may become, so it’s best enjoyed within the first week.
- For dairy-free versions, substitute heavy cream with full-fat coconut cream and use sweetened condensed coconut milk instead of regular sweetened condensed milk.
- Always read your specific Ninja Creami machine’s instructions, as different models may have slightly different operating procedures or settings.