
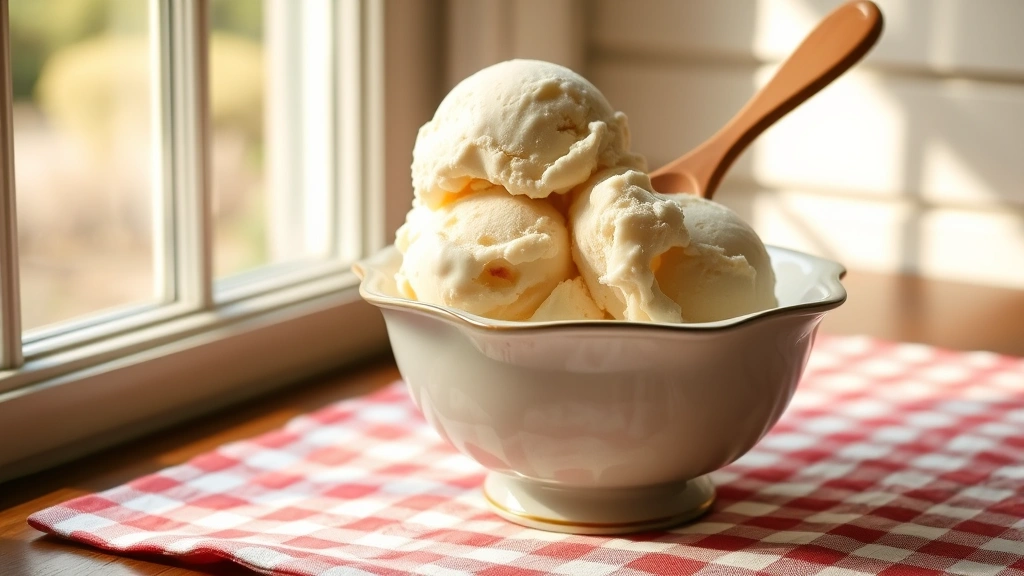
There’s something absolutely magical about homemade ice cream—that creamy, dreamy texture that simply cannot be replicated by store-bought versions. But what makes it even more special? Making it the old-fashioned way with a nostalgic ice cream maker! This recipe takes me back to lazy summer afternoons at my grandmother’s house, where we’d gather around the kitchen while she churned out batch after batch of vanilla bean ice cream. The sound of the machine, the anticipation, the joy of homemade frozen treats—it’s pure nostalgia in every spoonful.
Today, I’m sharing my absolute best nostalgia ice cream maker recipe with you. This isn’t just any vanilla ice cream; it’s a carefully crafted blend of heavy cream, whole milk, and real vanilla beans that creates an incredibly smooth, rich, and deeply flavorful ice cream that tastes like summer memories. Whether you’re using a hand-crank machine or an electric churner, this recipe works beautifully and delivers results that will have everyone asking for seconds.
The beauty of making ice cream at home is that you control every single ingredient. No artificial flavors, no mysterious additives—just pure, simple ingredients that come together to create something extraordinary. Plus, the process itself is part of the charm. There’s something wonderfully nostalgic about watching the mixture transform from a thin custard into creamy, scoopable ice cream right before your eyes.
I’ve been making this recipe for years, and it never fails to impress. The secret lies in creating a proper custard base, chilling it thoroughly, and then churning it until it reaches that perfect consistency. The result is an ice cream that’s smooth as silk with an incredible vanilla flavor that makes you close your eyes with pure joy. This is the kind of ice cream that brings people together, that creates memories, and that reminds us why homemade is always better.
If you’re new to making ice cream at home, don’t worry—this recipe is incredibly forgiving and foolproof. Just follow the steps carefully, be patient with the chilling time (trust me, it’s worth it), and you’ll have restaurant-quality ice cream in your own kitchen. Serve it in a cone, in a bowl, or alongside a slice of pie—however you choose to enjoy it, you’re in for a treat. This is the ice cream recipe I always come back to, and I’m thrilled to share it with you today.
heavy cream recipes and cream-based dishes share similar techniques to what we use here. For more dessert inspiration, check out our recipe collection. You might also enjoy exploring complementary flavors to serve alongside your ice cream.
For more ice cream inspiration and technique tips, check out Serious Eats, Bon Appétit, and New York Times Cooking for additional dessert resources.
Ingredients
- 2 cups heavy cream, cold
- 1 cup whole milk, cold
- 3/4 cup granulated sugar
- 1 vanilla bean, split lengthwise, or 1 tablespoon pure vanilla extract
- 5 large egg yolks, room temperature
- 1/4 teaspoon fine sea salt
- Ice for the ice cream maker (about 4-5 cups crushed ice)
- 1/2 cup kosher salt for the ice bath
Instructions
- If using a vanilla bean, use the tip of a sharp knife to scrape out the tiny black seeds from inside the bean pod. Reserve both the seeds and the pod for later use.
- In a medium saucepan, combine the heavy cream, whole milk, and vanilla pod (if using whole bean). Heat over medium heat, stirring occasionally, until the mixture is steaming and tiny bubbles form around the edges—do not boil. This should take about 5-7 minutes.
- Remove the pan from heat and let it sit for 10 minutes to infuse the vanilla flavor. This resting time is crucial for developing that deep, authentic vanilla taste.
- While the cream mixture is infusing, place your egg yolks in a medium bowl. Add the sugar and salt to the yolks, then whisk vigorously for about 2-3 minutes until the mixture becomes pale, thick, and ribbon-like. This step is important for incorporating air and emulsifying the mixture.
- Slowly pour the warm cream mixture into the egg yolk mixture while whisking constantly. This tempering process prevents the eggs from scrambling. Pour slowly and steadily, whisking the entire time.
- Once fully combined, pour the entire mixture back into the saucepan through a fine-mesh strainer to remove any cooked egg bits and the vanilla pod.
- Return the pan to medium-low heat and cook, stirring constantly with a wooden spoon or heat-resistant spatula, for about 5-8 minutes until the mixture coats the back of the spoon and reaches 160°F on an instant-read thermometer (this pasteurizes the eggs).
- Remove from heat and stir in the vanilla extract if you’re not using a fresh vanilla bean. The extract adds a final burst of vanilla flavor.
- Pour the custard through a fine-mesh strainer into a clean bowl to ensure a silky-smooth texture. Let it cool to room temperature, about 15-20 minutes, stirring occasionally.
- Cover the bowl with plastic wrap and refrigerate for at least 4 hours, preferably overnight. This chilling time is essential—cold custard churns into better ice cream with superior texture.
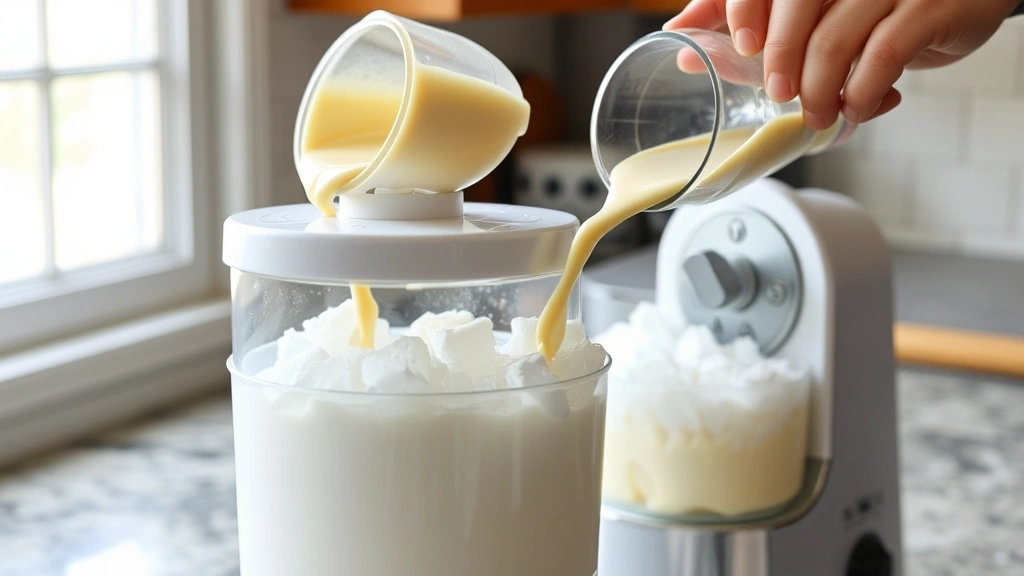
- About 30 minutes before churning, prepare your ice cream maker according to the manufacturer’s instructions. Most machines require the bowl to be frozen solid.
- Remove the chilled custard from the refrigerator. If it’s been refrigerated overnight, give it a gentle stir to recombine any settled ingredients.
- Pour the custard into your prepared ice cream maker and churn according to the manufacturer’s instructions, typically 20-30 minutes. The ice cream should reach a soft-serve consistency when done.
- Transfer the churned ice cream to a freezer-safe container, smoothing the top with a spatula. Cover with plastic wrap pressed directly onto the surface to prevent ice crystals from forming.
- Freeze for at least 4 hours, preferably overnight, until the ice cream is firm and scoopable. This final freezing allows the texture to set properly.
- When ready to serve, let the ice cream sit at room temperature for 2-3 minutes for easier scooping. Enjoy immediately in cones, bowls, or alongside your favorite desserts!

Pro Tips
- Chef’s Tips and Tricks for Perfect Homemade Ice Cream:
- Temperature Control is Key: The success of this recipe depends on keeping ingredients cold. Pre-chill your mixing bowl, whisk, and even your measuring cups in the freezer for 10 minutes before starting. This prevents any curdling and ensures proper emulsification.
- Understanding Vanilla Beans vs. Extract: Fresh vanilla beans provide a more complex, floral flavor with those beautiful black specks, while vanilla extract offers convenience and a cleaner vanilla taste. Both are wonderful—choose based on preference and occasion. If using beans, don’t discard the pod; you can rinse and save it for making vanilla sugar.
- The Importance of Chilling: Rushing this step will result in ice cream that doesn’t churn properly and may have a grainy texture. The cold custard freezes more evenly in the machine, creating that silky consistency we all crave. Overnight chilling is truly worth the wait.
- Ice Bath Ratio: Use roughly equal parts ice and salt. The salt lowers the freezing point of the ice, creating a colder bath that’s essential for the churning process. Rock salt is traditional, but kosher salt works perfectly well.
- Customization Ideas: This base recipe is incredibly versatile. Add 1 teaspoon of almond extract for a subtle nod to a classic flavor, swirl in homemade fruit preserves, or fold in crushed cookies or candy pieces during the last minute of churning. Get creative!
- Storing Your Ice Cream: Homemade ice cream keeps beautifully in the freezer for up to 2 weeks when stored in an airtight container. However, it’s best enjoyed within the first week for optimal flavor and texture. To prevent crystallization, always press plastic wrap directly onto the surface before covering.
- Equipment Notes: If you don’t have an ice cream maker, you can make this using the freezer method by pouring the chilled custard into a shallow pan, freezing for 30 minutes, then stirring vigorously with a fork every 30 minutes for 2-3 hours. It requires more effort but still produces lovely results.
- Egg Safety: This recipe pasteurizes the eggs by heating to 160°F, making it safe for all populations including pregnant women and young children. An instant-read thermometer is your best friend here.