
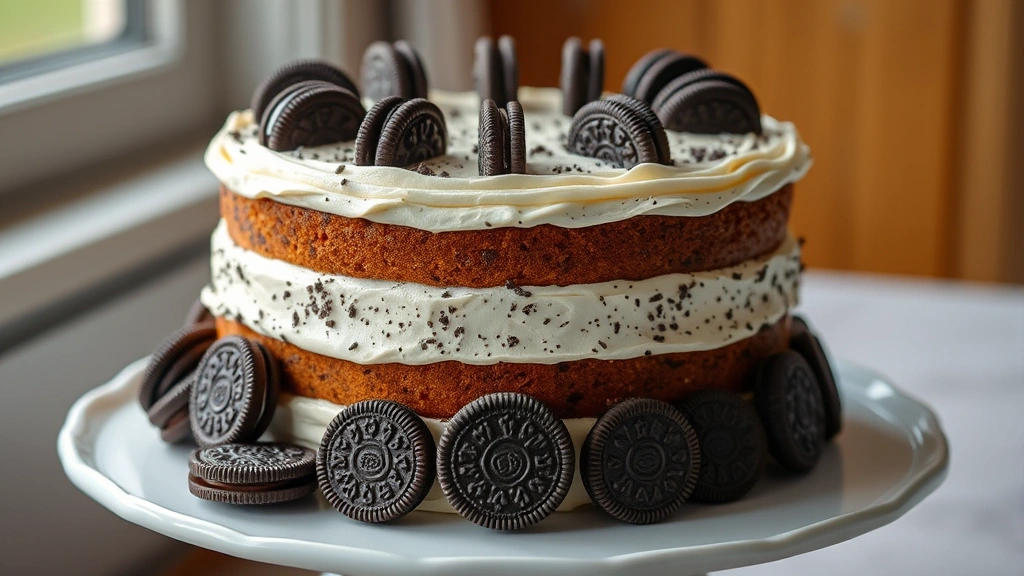
There’s something absolutely magical about a homemade Oreo cake that just can’t be replicated with a box mix. This stunning dessert features layers of rich, moist chocolate cake studded with crushed Oreos, all held together with a luscious Oreo buttercream frosting. The result is pure chocolate cookie bliss in every single bite!
This isn’t just any chocolate cake—it’s an elevated celebration of everyone’s favorite cookie. The key to making this the BEST Oreo cake lies in using quality ingredients and taking your time with each layer. Start with a from-scratch chocolate cake base that’s tender and moist, then incorporate crushed Oreos throughout for that signature cookie flavor. The frosting is where the magic really happens, combining creamy butter with crushed Oreos to create a frosting that tastes like pure cookie heaven.
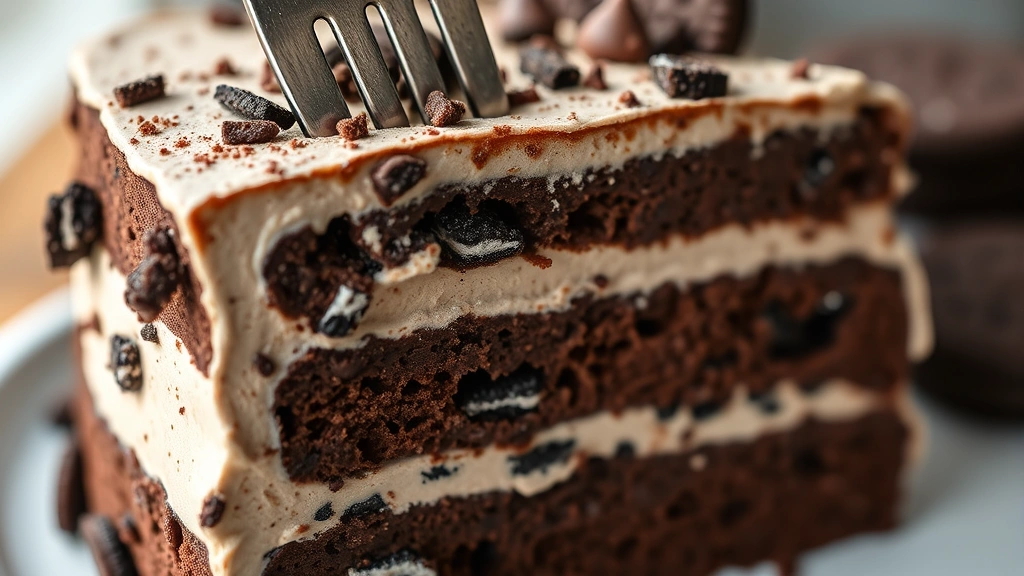
What makes this recipe special is the balance of flavors and textures. You get the rich chocolate cake, the sweet and slightly salty cookie pieces, and a frosting that’s incredibly smooth and spreadable. Whether you’re baking this for a birthday celebration, a special occasion, or just because you deserve something delicious, this Oreo cake will absolutely impress.
The beauty of this recipe is that while it looks fancy and complicated, it’s actually quite manageable for bakers of all skill levels. I’ll walk you through each step, from mixing the batter to creating picture-perfect frosting swirls. You can even prepare the cake layers ahead of time and assemble everything the day of serving. For more indulgent dessert inspiration, check out our Heavy Cream Alfredo Sauce Recipe for decadent dinner pairings, or explore Creamy Pasta Recipe options for your next gathering.
One of my favorite aspects of baking is how forgiving this particular cake is. If your frosting seems too soft, just pop it in the fridge for fifteen minutes. If your cake layers aren’t perfectly level, don’t worry—the frosting will hide any imperfections. This is the kind of cake that brings joy to everyone who takes a bite, and honestly, that’s what baking is all about.
If you’re looking to elevate your dessert game even further, consider pairing this with complementary flavors. Some bakers like to add a hint of espresso powder to deepen the chocolate flavor, while others prefer to keep things simple and let the Oreos shine. You can also experiment with different Oreo varieties—the classic ones work beautifully, but golden Oreos or double-stuf Oreos can create interesting variations. For other creative recipe ideas, check out Pickled Red Onion Recipe for unexpected flavor combinations.
The frosting technique is crucial for achieving that bakery-quality finish. Make sure your butter is at room temperature before you start—this ensures a smooth, creamy consistency that’s easy to work with. As you add the crushed Oreos, the frosting will become flecked with cookie pieces, creating a gorgeous speckled appearance that’s both beautiful and delicious.
When it comes to assembling your cake, patience is your best friend. Take your time leveling each layer, applying an even crumb coat, and then adding your final frosting layer. The crumb coat is essential—it seals in any loose crumbs and creates a smooth surface for your final frosting layer. Let me share some additional baking insights: Shishito Peppers Recipe shows how proper technique elevates any dish, and Heavy Cream Pasta Recipe demonstrates layering techniques that translate beautifully to cake building.
For professional-level decorating, consider using an offset spatula dipped in hot water to smooth out your frosting, or create beautiful swirls with a cake decorating spatula. You can also pipe frosting rosettes around the top edge of the cake for an extra special touch. Some decorators like to add crushed Oreos on top as a garnish, creating a beautiful contrast against the smooth frosting.
Storage and serving are important considerations when baking this cake. The unfrosted layers can be wrapped in plastic wrap and refrigerated for up to three days, or frozen for up to one month. The frosting can also be made ahead and stored in an airtight container in the refrigerator for up to five days. Before frosting, simply bring it to room temperature and re-whip it to restore its fluffy texture.
This cake serves beautifully at room temperature, but many people find it even more delicious when slightly chilled. This firms up the frosting and makes slicing cleaner. For special occasions, consider serving with a glass of cold milk or a scoop of vanilla ice cream for an indulgent treat.
For more culinary inspiration and technique tips, visit Bon Appétit for advanced baking techniques, Serious Eats for detailed baking science, and New York Times Cooking for classic cake recipes. You might also enjoy Chicken Alfredo Recipe for your next dinner party.
Baking this Oreo cake is more than just following a recipe—it’s about creating memories and sharing something special with the people you love. The aroma alone as it bakes will fill your kitchen with anticipation, and that first slice will deliver pure joy. So preheat that oven, gather your ingredients, and get ready to bake the best Oreo cake you’ve ever tasted!
Ingredients
- 2 cups all-purpose flour
- ¾ cup unsweetened cocoa powder
- 2 teaspoons baking soda
- ½ teaspoon baking powder
- ½ teaspoon salt
- 2 cups granulated sugar
- ¾ cup vegetable oil
- 3 large eggs, room temperature
- ¾ cup whole milk
- ¾ cup hot water
- 2 teaspoons vanilla extract
- 1 cup Oreo cookies, coarsely crushed (about 15-16 cookies)
- 1 cup unsalted butter, room temperature
- 1½ cups powdered sugar
- ½ cup unsweetened cocoa powder
- ¼ cup whole milk
- 2 teaspoons vanilla extract
- 1⅓ cups Oreo cookies, finely crushed (about 20-22 cookies)
- Whole Oreo cookies for decoration, optional
Instructions
- Preheat your oven to 350°F (175°C). Grease and flour two 9-inch round cake pans, or line the bottoms with parchment paper for easier removal. This extra step ensures your cakes won’t stick and will turn out perfectly shaped.
- In a medium bowl, whisk together the all-purpose flour, ¾ cup cocoa powder, baking soda, baking powder, and salt. Set this dry mixture aside and make sure there are no lumps in the cocoa powder.
- In a large mixing bowl, combine the granulated sugar and vegetable oil. Stir together until well combined, then add the room temperature eggs one at a time, beating well after each addition.
- Add the vanilla extract to the wet ingredients and mix until fully incorporated. The mixture should be smooth and well combined.
- Alternately add the dry flour mixture and whole milk to the wet ingredients, beginning and ending with the dry mixture. Start with about a third of the dry ingredients, then half the milk, then another third of dry ingredients, then the remaining milk, and finish with the final third of dry ingredients. Stir gently after each addition until just combined.
- Carefully stir in the hot water until the batter is smooth and combined. The batter will be thin, which is exactly what you want—this creates an incredibly moist cake.
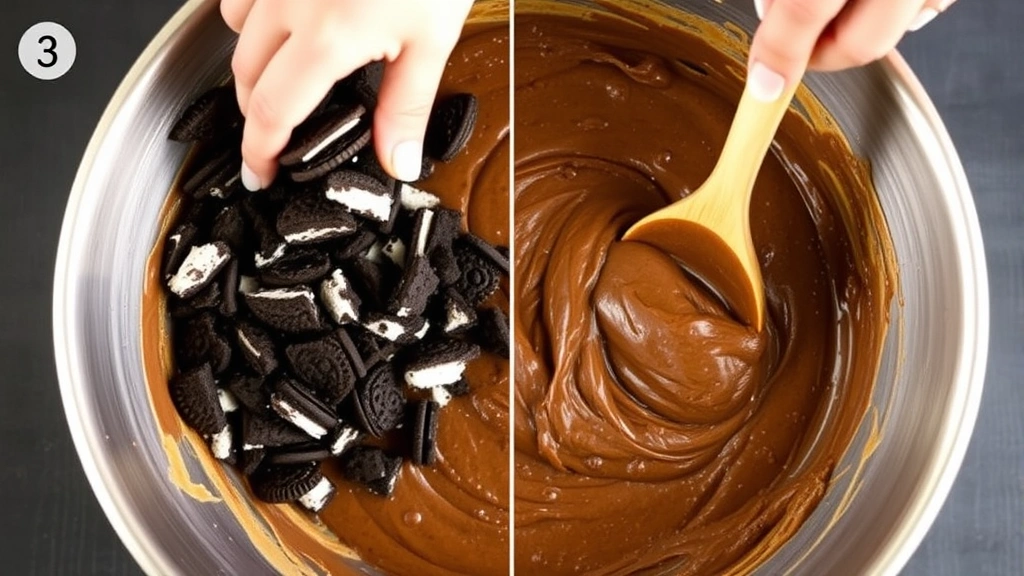
- Gently fold in the coarsely crushed Oreo cookies with a spatula or wooden spoon, being careful not to overmix. You want the cookie pieces distributed throughout but not broken down further.
- Divide the batter evenly between the two prepared cake pans, filling each about two-thirds full. Tap the pans gently on the counter to release any air bubbles.
- Bake for 28-32 minutes, until a toothpick inserted in the center comes out clean or with just a few moist crumbs. The tops should spring back when lightly touched.
- Remove the cakes from the oven and let them cool in the pans for 15 minutes, then turn them out onto wire cooling racks. Allow the cakes to cool completely to room temperature, about 1-2 hours. Do not proceed with frosting until the cakes are completely cool.
- While the cakes cool, prepare the Oreo buttercream frosting by adding room temperature unsalted butter to a large mixing bowl.
- Beat the butter on medium speed for about 2-3 minutes until it’s light and creamy and pale in color. This aerates the butter and creates a fluffy base for your frosting.
- In a separate small bowl, whisk together the powdered sugar and ½ cup cocoa powder to remove any lumps.
- Add the powdered sugar mixture to the butter in three additions, beating on low speed after each addition to prevent the powdered sugar from flying everywhere.
- Add the milk and vanilla extract and beat on medium speed until the frosting is light, fluffy, and spreadable, about 2-3 minutes. The consistency should be thick but easy to work with.
- Gently fold in the finely crushed Oreo cookies until they’re evenly distributed throughout the frosting. The frosting should now have a speckled appearance from the cookie pieces.
- Place the first cake layer on a cake plate or cake board. If the layers have rounded tops, you can level them with a serrated knife for easier stacking, but it’s not essential.
- Spread about ¾ cup of the Oreo frosting evenly over the top of the first cake layer using an offset spatula. Try to create an even layer without getting frosting on the sides yet.
- Carefully place the second cake layer on top, making sure it’s centered and level.
- Apply a thin crumb coat of frosting over the entire cake—this seals in any loose crumbs and creates a smooth surface for the final frosting layer. Use about ⅓ cup of frosting and try to make it as thin as possible.
- Refrigerate the cake with the crumb coat for 15-20 minutes until the frosting is set and firm.
- Apply the final layer of frosting, using the remaining frosting to create a smooth finish or decorative swirls. For a smooth finish, use a hot offset spatula; for swirls, use a cake decorating spatula or the back of a spoon.
- Decorate the top and sides with whole Oreo cookies or additional crushed Oreos if desired. You can arrange whole cookies around the top edge or scatter them over the frosting for a beautiful presentation.
- Chill the finished cake for at least 30 minutes before slicing to help the frosting set and make cutting easier. Use a sharp knife dipped in hot water and wiped clean between slices for the cleanest cuts.
Pro Tips
- Room temperature ingredients are absolutely crucial for this recipe, especially the eggs, milk, and butter. Cold ingredients don’t blend together smoothly and can result in a lumpy batter or grainy frosting. Take the ingredients out of the refrigerator 30 minutes before you start baking.
- When crushing the Oreos, the size of the pieces matters. For the cake batter, you want coarse chunks so they stay visible and flavorful. For the frosting, crush them much finer so they blend smoothly into the buttercream. Use a food processor for the fine crushing and your hands or a rolling pin for the coarser pieces.
- The hot water in the chocolate cake batter might seem unusual, but it’s the secret to an incredibly moist cake. It activates the cocoa powder and creates a batter that bakes up tender and delicious. Do not skip this step or substitute it with cold water.
- If your frosting seems too soft after adding the crushed cookies, refrigerate it for 10-15 minutes before frosting the cake. If it seems too stiff, let it come to room temperature or add a teaspoon of milk at a time until you reach the right consistency.
- This cake can be made a day ahead of serving. Wrap the unfrosted layers individually in plastic wrap and store at room temperature (or refrigerate if your kitchen is very warm). The frosted cake can be covered loosely and stored in the refrigerator for up to 3 days.
- For a more decadent version, add 1 teaspoon of espresso powder to the dry ingredients to deepen the chocolate flavor. The espresso won’t make the cake taste like coffee—it will simply enhance the chocolate flavor.
- If you prefer a less sweet frosting, reduce the powdered sugar to 1¼ cups. You can also substitute some of the milk with heavy cream for a richer, more luxurious frosting.
- When leveling the cake layers, use a serrated knife or cake leveler and take your time. Remove just enough of the dome to create a flat surface. Save the trimmed cake pieces for snacking or crumbling into ice cream.
- For a show-stopping presentation, pipe frosting rosettes around the top edge of the cake using a piping bag fitted with a rose tip. This professional touch impresses guests but requires a bit of practice.
- If you want to make this cake in advance for freezing, wrap the unfrosted layers tightly in plastic wrap and then aluminum foil. They’ll keep for up to one month. Thaw at room temperature before frosting and serving.
Pingback: How to Make the Best Pork Lo Mein Recipe (Quick & Tasty!) – Simple Recipe Finder