There’s something absolutely magical about homemade pecan pralines – those buttery, caramelized confections that melt on your tongue and make you feel like you’re in a charming Southern candy shop. This easy pecan praline recipe is the perfect balance of sweet and sophisticated, requiring just a handful of simple ingredients and a few minutes of your time. Whether you’re planning a dinner party, looking for an elegant homemade gift, or simply craving a little indulgence, these pralines are sure to impress.
What I absolutely love about this recipe is how forgiving it is. Even if you’ve never made candy before, the straightforward process and clear guidelines make it nearly impossible to mess up. The beauty of pecan pralines lies in their simplicity – butter, brown sugar, cream, and pecans come together to create something that tastes far more complicated than it actually is. You don’t need any special equipment or culinary training; just a reliable candy thermometer and a bit of patience will have you creating restaurant-quality pralines in your own kitchen.
I’ve been making these for years, and they’ve become a staple in my dessert rotation. My friends and family absolutely adore them, and I often package them up as gifts during the holidays. The beauty of this recipe is that it’s incredibly versatile – you can customize it by using different nuts like almonds or walnuts, or even experiment with flavor variations. I’ve included my favorite tips and tricks below to ensure your pralines turn out perfectly every single time.
The key to successful pralines is understanding the importance of temperature. A candy thermometer is absolutely essential for this recipe, as it ensures your mixture reaches the soft-ball stage – that perfect sweet spot where your pralines will have the ideal texture: creamy centers with a slight firmness on the outside. Once you master this basic recipe, you’ll find yourself making batch after batch.
These pralines also pair beautifully with coffee, and they make an elegant addition to any dessert platter. You can serve them after dinner, package them in pretty boxes for gifts, or simply enjoy them as a special treat throughout the week. They keep well in an airtight container for up to two weeks, though I guarantee they won’t last that long! I often double or triple this recipe to have plenty on hand, and they freeze beautifully for up to three months.
For those looking to expand their candy-making repertoire, Bon Appétit offers additional praline variations that might inspire you. If you’re interested in pairing these with other desserts or want to create a complete menu, our collection of complementary recipes might spark some inspiration. The versatility of homemade pralines means you can incorporate them into ice cream, use them as toppings for cakes, or simply enjoy them as standalone treats.
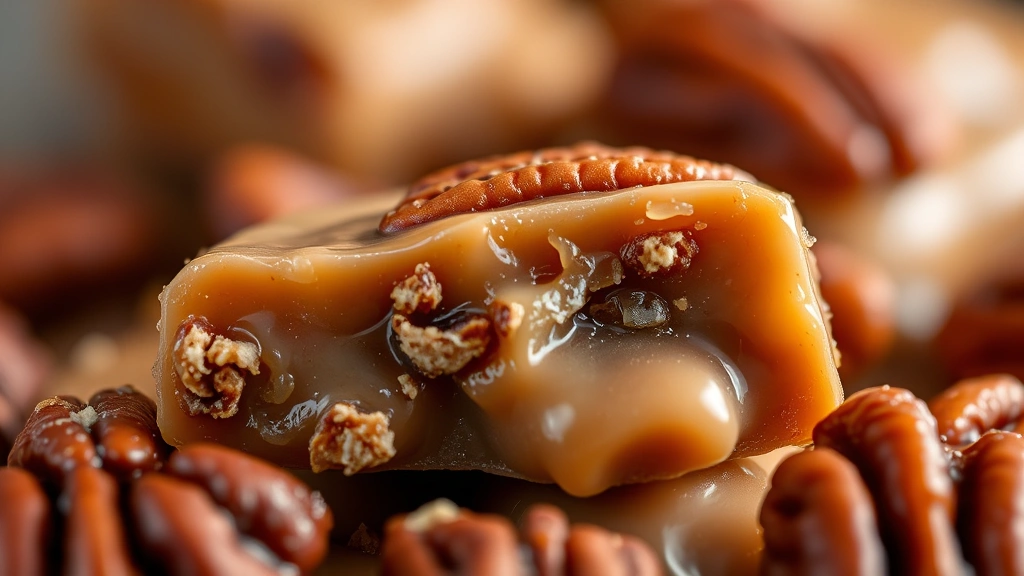
What makes this recipe truly special is the creamy texture that develops when you add the cream and butter to your caramelized sugar mixture. This step is crucial – it’s what transforms a simple sugar mixture into those irresistible, melt-in-your-mouth pralines that keep people coming back for more. The combination of buttery richness and pecans’ natural nuttiness creates a flavor profile that’s both familiar and luxurious.
I recommend reading through all the instructions before you begin, as candy-making requires focus and attention to detail. Have all your ingredients measured and ready, your baking sheet lined with parchment paper, and your candy thermometer within arm’s reach. This mise en place approach ensures you won’t be scrambling when things move quickly, which they do once your sugar mixture reaches the proper temperature.
For more inspiration on creating special treats at home, check out our other easy recipes that are perfect for entertaining. You might also enjoy exploring Serious Eats’ comprehensive guide to candy making, which offers additional insights into perfecting your technique. Whether you’re a seasoned home baker or a complete novice, this pecan praline recipe will have you creating confections that rival those from fancy candy shops.
Ingredients
- 2 cups pecan halves
- 1 cup granulated sugar
- 1 cup packed brown sugar
- 1 cup heavy cream
- 6 tablespoons butter
- 1 teaspoon vanilla extract
- 1/4 teaspoon sea salt
- 1/4 teaspoon baking soda

Instructions
- Line two baking sheets with parchment paper and set aside. Toast the pecan halves in a preheated 350°F oven for 8-10 minutes, stirring halfway through, until fragrant and lightly golden. This step enhances their flavor and ensures they’re not soggy in the final pralines.
- In a heavy-bottomed saucepan, combine the granulated sugar, brown sugar, and heavy cream. Stir over medium heat until the sugars are completely dissolved and the mixture is smooth, about 3-4 minutes. Be patient with this step – dissolving the sugar completely prevents crystallization later.
- Add the butter to the mixture and stir until fully melted and incorporated. Continue cooking without stirring, allowing the mixture to come to a boil. This is where a candy thermometer becomes absolutely essential.
- Clip your candy thermometer to the side of the saucepan, making sure the bulb is submerged in the mixture but not touching the bottom of the pan. Continue cooking over medium heat, monitoring the temperature carefully. You’re aiming for the soft-ball stage, which is 235-240°F on your thermometer.
- Once the mixture reaches 235-240°F, immediately remove the saucepan from the heat. This is crucial – going even a few degrees higher will result in pralines that are too firm and difficult to eat.
- Working quickly but carefully, stir in the vanilla extract, sea salt, and baking soda. The mixture will bubble up slightly when you add the baking soda – this is perfectly normal and creates those lovely little air pockets that give pralines their characteristic texture.
- Add the toasted pecans to the mixture and stir vigorously until the mixture becomes thick and slightly opaque, about 2-3 minutes. You’re looking for the mixture to lose some of its glossiness and begin to thicken significantly. This is when you know it’s ready to be scooped.
- Working quickly, drop spoonfuls of the mixture onto the prepared parchment paper, spacing them about 2 inches apart. Use two spoons – one to scoop the mixture and one to push it off onto the paper. If the mixture becomes too thick to scoop, you can reheat it gently over low heat for just a few seconds.
- Allow the pralines to cool completely at room temperature, which typically takes 1-2 hours depending on your kitchen temperature. Resist the urge to refrigerate them during cooling, as this can cause the texture to become grainy.
- Once completely cooled and set, store your pralines in an airtight container at room temperature. Layer them with parchment paper between each layer to prevent sticking. They’ll keep beautifully for up to two weeks, though they’re best enjoyed within the first few days when they’re at peak freshness and creaminess.