
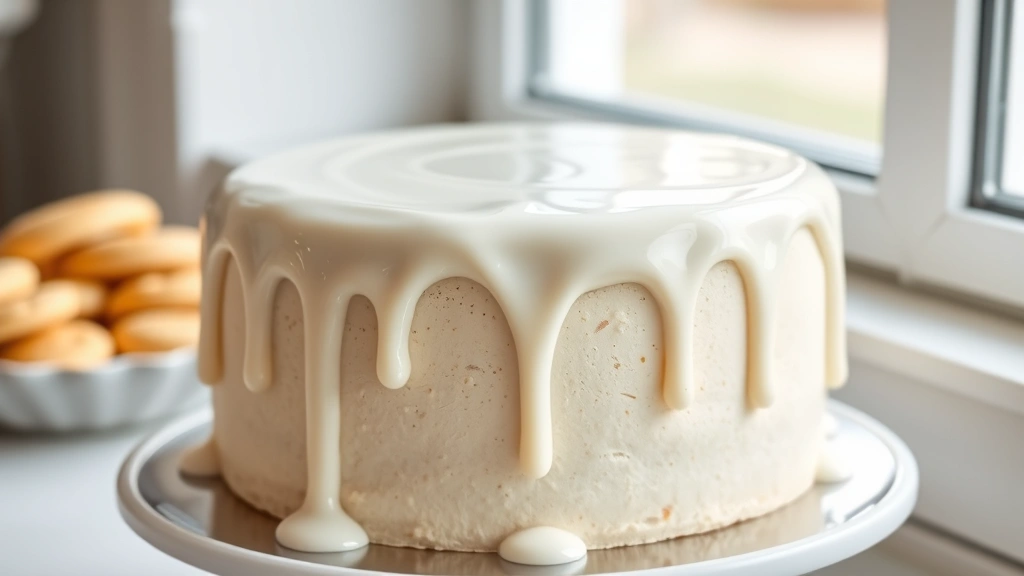
A beautiful cake deserves an equally stunning glaze, and this simple recipe proves that elegance doesn’t require complicated techniques. This classic cake glaze is the answer to all your frosting prayers—it’s silky smooth, sets to a gorgeous finish, and comes together in just minutes with pantry staples you likely already have on hand.
Whether you’re topping a lemon pound cake, drizzling over a bundt cake, or finishing off your favorite vanilla or chocolate creation, this versatile glaze works beautifully on virtually any cake variety. The secret to the best cake glaze lies in achieving the perfect balance between powdered sugar and liquid—too thick and it won’t flow elegantly, too thin and it won’t coat properly. We’ll walk you through exactly how to get that Goldilocks consistency that’s just right.
What makes this recipe so special is its incredible versatility. Start with the classic vanilla version, then customize it with your favorite extracts, citrus zests, or even a touch of espresso powder for depth. You can also tint it with gel food coloring for a pop of color that photographs beautifully. This glaze hardens to a lovely matte or semi-glossy finish depending on your preference, creating that bakery-quality look that makes people think you spent hours in the kitchen.
The beauty of a good glaze is that it complements rather than overpowers your cake. Unlike heavier frostings, this elegant coating lets the cake itself shine while adding a touch of sophistication and sweetness. Perfect for casual weeknight desserts or special occasions, this recipe has been a trusted favorite in preppy kitchens everywhere. Pair it with our silky sauce techniques to master the art of smooth, glossy finishes on all your culinary creations.
Make this glaze ahead and store it in an airtight container—it keeps beautifully for several days, making it perfect for meal prep or last-minute dessert emergencies. Whether you’re a beginner baker or a seasoned pro, this foolproof recipe will become your go-to for all your glazing needs.
Ingredients
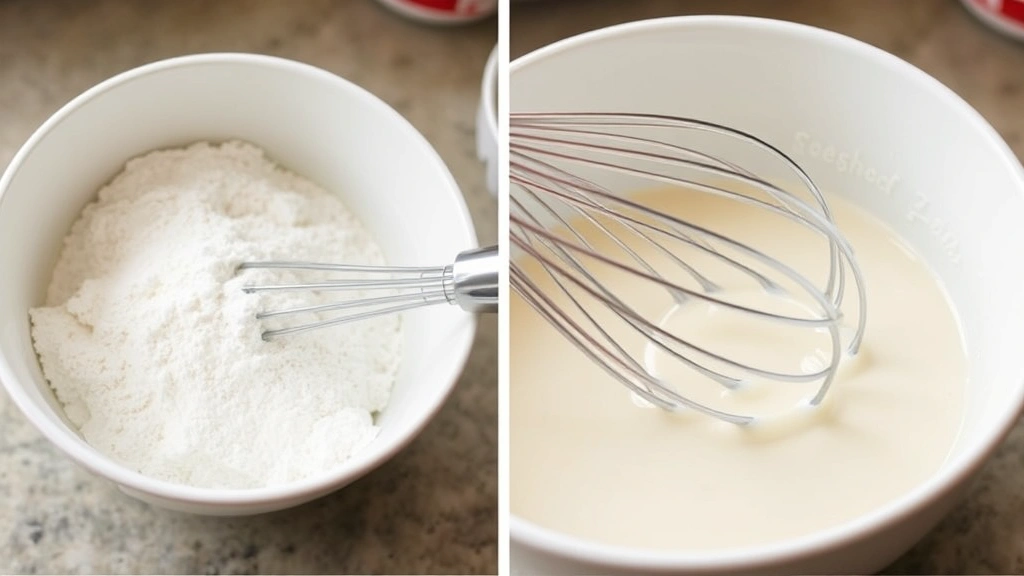
- 2 cups powdered sugar, sifted
- 3 tablespoons whole milk or heavy cream
- 1 tablespoon unsalted butter, melted
- 1 teaspoon vanilla extract
- Pinch of sea salt
- Optional: 1/4 teaspoon almond extract or lemon extract for variation
- Optional: 1 tablespoon fresh lemon or orange juice for citrus version
Instructions
- Sift your powdered sugar into a medium mixing bowl to remove any lumps and ensure a smooth glaze. This step is crucial for achieving that silky texture we’re after.
- Pour the melted butter and milk into the bowl with the powdered sugar. Start with 3 tablespoons of milk, as you can always add more if needed.
- Add the vanilla extract and a small pinch of sea salt to enhance the overall flavor profile.
- Whisk all ingredients together vigorously for about 1-2 minutes until completely smooth and combined. Make sure there are no powdered sugar lumps remaining.
- Check your consistency by lifting your whisk—the glaze should flow off slowly and smoothly. If it’s too thick, add milk one teaspoon at a time and whisk well. If it’s too thin, add a bit more sifted powdered sugar.
- For a citrus version, replace the milk with fresh lemon or orange juice and omit the vanilla, adding a pinch of zest instead.
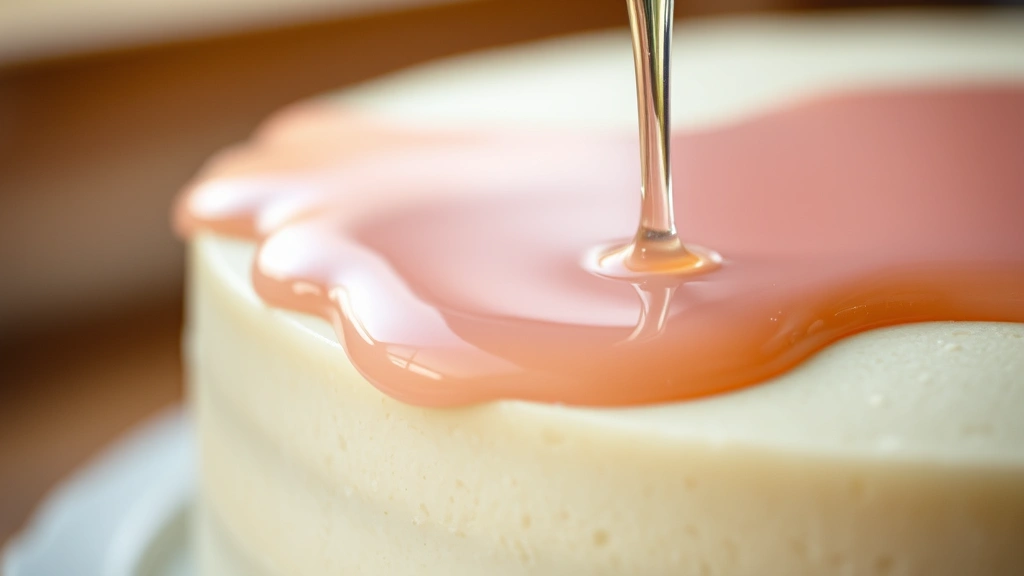
- Once you’ve achieved the perfect consistency, pour or spoon the glaze over your cooled cake immediately for the most beautiful finish.
- Allow the glaze to set at room temperature for 15-30 minutes, depending on how thick your coating is and your preferred finish.
- For a thicker, more decorative glaze that holds its shape better, use less milk. For a thinner, more pourable version that creates a smooth sheet, add an extra tablespoon of milk.
- Store any leftover glaze in an airtight container in the refrigerator for up to one week. Gently reheat it in the microwave in 10-second intervals before using again.
Pro Tips
- This glaze works best when applied to completely cooled cakes—warm cakes will cause the glaze to melt and run off before setting properly. Allow at least 30 minutes of cooling time after removing from the oven.
- Sifting your powdered sugar is truly essential for a silky glaze without any grittiness. Don’t skip this step if you want bakery-quality results.
- The consistency is everything in glaze-making. It should be thick enough to coat your cake but thin enough to flow. Think of it as heavy cream consistency—thick but pourable.
- For a shiny, glazed finish, use whole milk or heavy cream. For a more matte appearance, use water instead, though the flavor won’t be quite as rich.
- Customize this glaze endlessly: add espresso powder for a mocha version, almond extract for elegance, or a tablespoon of bourbon or rum for an adult version. You can also incorporate melted chocolate for a chocolate glaze.
- Fresh citrus juice creates wonderful flavor variations—lemon is classic, but orange, lime, or grapefruit can be stunning depending on your cake flavor.
- If your glaze becomes too thick while sitting, simply whisk in a tiny amount of milk. If it becomes too thin, add a bit more powdered sugar and whisk well.
- This glaze pairs beautifully with pound cakes, bundt cakes, coffee cakes, and simple vanilla or lemon cakes. It’s particularly stunning on angel food cakes.
- For the best presentation, apply glaze when it’s at room temperature. If it’s been refrigerated, bring it back to room temperature and whisk to restore its smooth consistency.
- Make this glaze several hours ahead of time—it’s actually easier to work with when it’s had time to set slightly. Cover with plastic wrap until ready to use.
- If you want an opaque white finish, use less milk and apply a thicker coat. For a more translucent finish that shows the cake underneath, use more milk.