

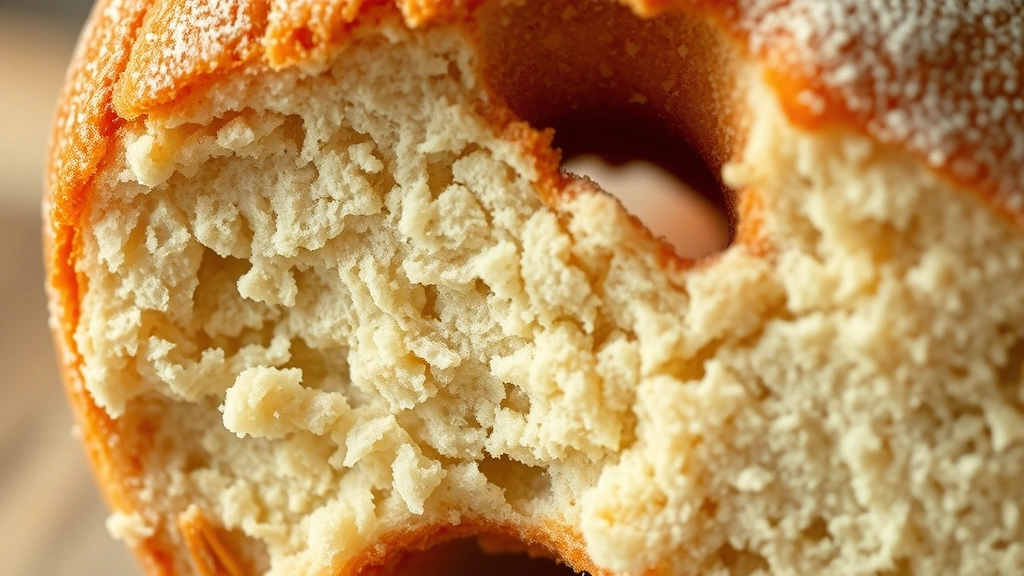
There’s something absolutely magical about biting into a warm sourdough donut with its crispy exterior and pillowy-soft interior. These beauties combine the tangy complexity of sourdough with the indulgent sweetness of a glazed donut, and honestly, they’re easier to make than you might think!
I’ve been making sourdough donuts for years now, and I can tell you that using your sourdough starter is one of the best ways to use up excess discard. The fermentation process gives these donuts incredible flavor and texture that you simply can’t achieve with commercial yeast. Plus, there’s something deeply satisfying about transforming simple ingredients into these little pillows of joy.
The beauty of this recipe is that it works with either active sourdough starter or discard—so whether you’re maintaining your starter religiously or just looking to use up what’s been sitting in your fridge, you’re covered. The dough is forgiving, the frying is straightforward, and the glazes are endlessly customizable. I like to make a big batch on Sunday mornings and have them ready for breakfast throughout the week.
What I love most about sourdough donuts is how they stay fresh longer than traditional donuts, thanks to the natural acids in the sourdough. They’re also a wonderful way to impress your friends and family—there’s an undeniable charm in homemade donuts that store-bought versions simply can’t match.
Let me walk you through my foolproof method for creating these showstopper donuts. Whether you’re a sourdough enthusiast or a donut devotee, you’re going to absolutely love this recipe. For more baking inspiration, check out my Delicious Heavy Cream Pasta Recipe and my Shishito Peppers Recipe for complete meal ideas.
When it comes to frying, temperature control is absolutely key—this is where a reliable thermometer becomes your best friend. I also recommend checking out Serious Eats for their excellent deep-frying guides, and Bon Appétit has wonderful tips on sourdough techniques. You might also enjoy learning about Chickpea Salad Recipe for a lighter side dish option.
The fermentation time can be adjusted based on your kitchen temperature—warmer kitchens will ferment faster, while cooler ones need extra time. Don’t rush this step; proper fermentation is what gives these donuts their signature tang and tender crumb. I’ve found that an overnight cold fermentation in the refrigerator often produces the best results, giving you the flexibility to fry them fresh in the morning.
Ingredients
- 1 cup active sourdough starter (fed and bubbly) or sourdough discard
- 1/2 cup whole milk, warmed
- 1/4 cup granulated sugar
- 1 large egg
- 2 tablespoons unsalted butter, melted
- 2 1/4 cups all-purpose flour
- 1 1/2 teaspoons fine sea salt
- 1/2 teaspoon vanilla extract
- Oil for frying (vegetable or canola oil)
- For the glaze: 1 1/2 cups powdered sugar, 2-3 tablespoons milk, 1/2 teaspoon vanilla extract, pinch of salt
- Optional toppings: sprinkles, cinnamon sugar, crushed cookies, or chopped nuts
Instructions
- In a large mixing bowl, combine your active sourdough starter, warmed milk, sugar, egg, and melted butter. Whisk these together until well combined and smooth, about 1 minute.
- In a separate bowl, whisk together the flour, salt, and vanilla extract to distribute the salt evenly throughout.
- Add the dry ingredients to the wet ingredients and stir with a wooden spoon or sturdy spatula until a shaggy dough forms, making sure all flour is incorporated and no dry bits remain.
- Knead the dough by hand on a lightly floured surface for about 5-7 minutes until it becomes smooth and slightly tacky, adding minimal additional flour if needed.
- Place the kneaded dough in a lightly oiled bowl, cover it with a damp kitchen towel or plastic wrap, and let it rise at room temperature for 4-6 hours until it has nearly doubled in size.
- After the bulk fermentation, transfer the dough to a floured surface and gently press it out to a thickness of about 1/2 inch, being careful not to deflate it too much.
- Using a 2.5-inch donut cutter or a combination of a large round cutter and a small circle cutter for the hole, cut out your donuts and place them on parchment paper.
- Gather the scraps of dough and gently re-roll, cutting additional donuts until all dough is used.
- Cover the cut donuts loosely with plastic wrap and either let them proof at room temperature for 2-3 hours, or place them in the refrigerator overnight for a cold fermentation.
- When ready to fry, heat your oil to 375°F in a heavy-bottomed pot or deep skillet—use a thermometer to ensure accurate temperature.
- Carefully transfer a donut to the hot oil, frying 2-3 at a time to avoid overcrowding the pan, and fry for about 1 minute on the first side until golden brown.
- Flip each donut carefully using tongs or two forks and fry for another 30-45 seconds on the second side until evenly golden.
- Remove the fried donuts with tongs or a slotted spoon and place them on a wire rack set over paper towels to drain and cool slightly.
- Fry the donut holes in the same manner for about 30 seconds per side until they’re puffed and golden brown, then drain on the rack.
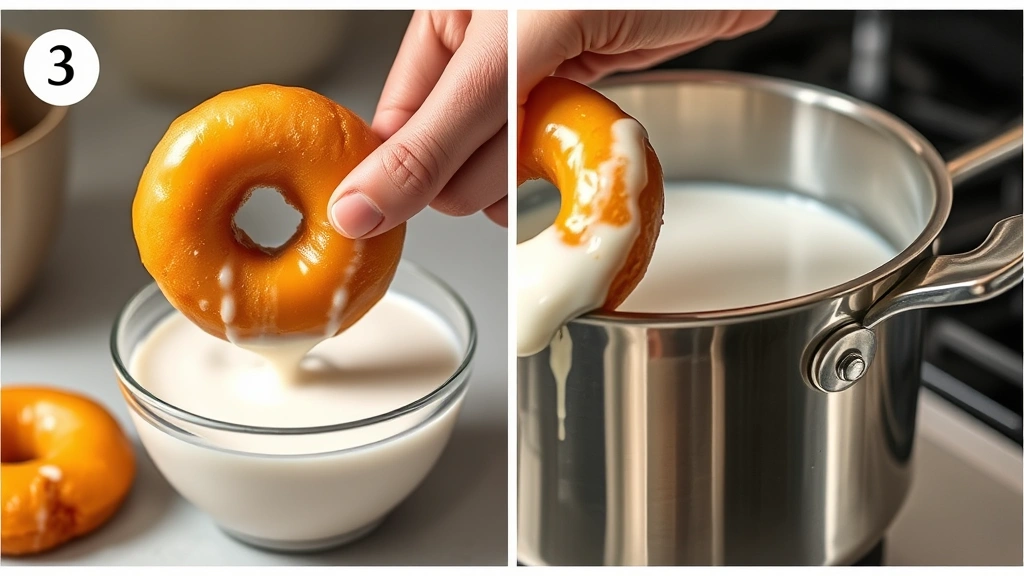
- While the donuts are still warm, prepare your glaze by whisking together powdered sugar, milk, vanilla extract, and salt until smooth and pourable.
- Dip the warm donuts into the glaze, coating both sides thoroughly, then return them to the wire rack to set.
- Add any desired toppings while the glaze is still wet, whether that’s sprinkles, cinnamon sugar, or crushed cookies.
- Allow the glaze to set completely before serving, about 15-20 minutes, then enjoy your homemade sourdough donuts!
Pro Tips
- Starter activity is crucial: Make sure your sourdough starter is at peak activity when you use it. It should be bubbly, doubled, and have a pleasant sour smell. If using discard, it doesn’t need to be active, but active starter will give you better rise and flavor.
- Temperature control: The oil temperature is absolutely essential for perfect donuts. If it’s too cold, they’ll be greasy; too hot, and they’ll burn outside while staying raw inside. Invest in a reliable thermometer.
- Fermentation flexibility: You can do a 4-6 hour room temperature fermentation, an overnight cold fermentation in the fridge, or even a combination of both. Cold fermentation often yields the best flavor and easier handling.
- Don’t skip the cooling step: Let your fried donuts cool slightly before glazing. This allows them to set up just enough while still being warm enough for the glaze to adhere beautifully.
- Storage recommendations: Keep finished donuts in an airtight container at room temperature for up to 3 days. The sourdough fermentation helps them stay fresher longer than conventional donuts. You can also freeze unglazed donuts for up to 2 months.
- Glaze variations: Try adding a tablespoon of honey, maple syrup, or lemon juice to your glaze for different flavors. You can also make a chocolate glaze by adding cocoa powder and adjusting the milk accordingly.
- Filling options: Once cooled, you can inject these donuts with pastry cream, jam, or Nutella using a piping bag and long tip. Poke a small hole in the side and gently inject your filling.
- Troubleshooting dense donuts: If your donuts come out dense, your starter may not have been active enough, or your dough didn’t ferment long enough. Ensure proper bulk fermentation and that your starter is genuinely at peak activity.
- Oil reuse: You can strain and reuse your frying oil 2-3 times if stored properly in a covered container in a cool place. Discard it if it starts to smoke at lower temperatures or smells off.
- Make-ahead tip: You can prepare the dough through the cutting stage, then refrigerate the cut donuts overnight. This actually improves flavor and makes them easier to fry the next morning.