
There’s nothing quite like homemade strawberry pie filling—it’s the perfect balance of sweet, tart, and absolutely bursting with fresh berry flavor. This recipe has been my go-to for years, and I’m thrilled to share it with you today!
Making strawberry pie filling from scratch is easier than you might think, and the results are so much better than anything store-bought. The key is using fresh, ripe strawberries at peak season and understanding the right balance of sugar, lemon juice, and thickener to create that perfect consistency.
I love this filling because it celebrates the strawberry itself—no artificial flavors or overpowering spices to mask the beautiful fruit. The slight tartness from the lemon juice brightens everything up, while a touch of vanilla adds sophistication. Whether you’re making a classic pie, a tart, or even using it as a topping for cake or ice cream, this filling delivers every single time.
The beauty of this recipe is its versatility. You can make it ahead and store it in the refrigerator, which makes entertaining so much easier. I often prepare the filling the morning of my dinner party, then simply pour it into a pre-baked crust just before serving. It’s the kind of recipe that makes you look like you’ve spent all day in the kitchen, when really, it only takes about 20 minutes of hands-on time.
For the best results, I recommend using fresh strawberries rather than frozen. Fresh berries have superior flavor and texture, and they’ll make your pie absolutely stunning. Look for berries that are bright red all the way through, with no white or pale spots. The berries should smell fragrant and sweet—that’s your indicator of peak ripeness and flavor.
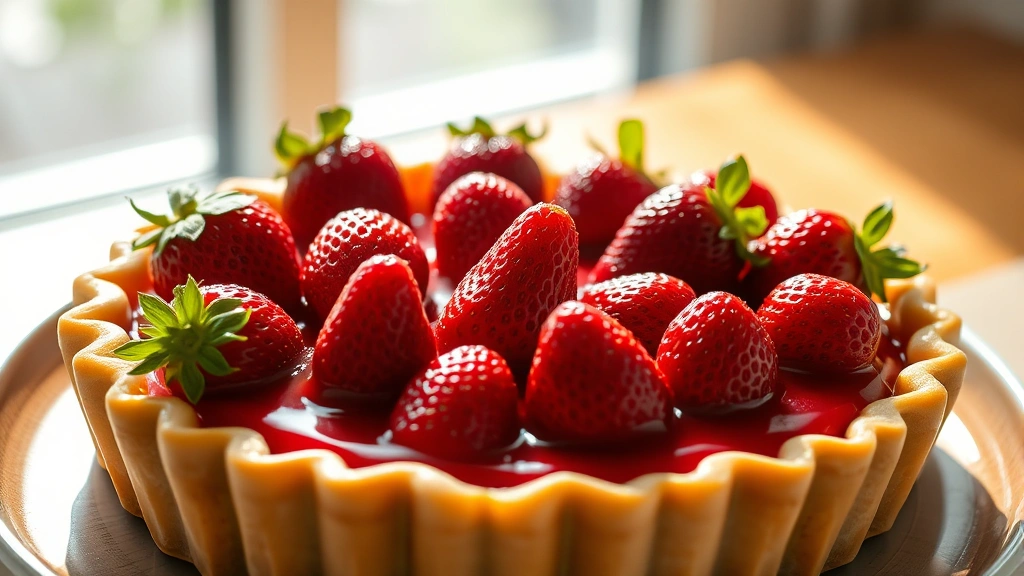
One of my favorite tricks is reserving some of the beautiful whole strawberries to arrange on top of the filling after it’s set. This not only makes your pie look magazine-worthy but also gives you that perfect combination of whole fruit texture and silky filling in every bite. Check out my Best Heavy Cream Alfredo Sauce Recipe if you’re looking for other delicious homemade recipes.
This strawberry pie filling also works beautifully in a variety of desserts, not just traditional pie. I’ve used it as a filling for crepes, layered it into trifles, and even used it to top cheesecake. The possibilities are truly endless, which is why I always make extra.
For more inspiration on creating stunning desserts, you might enjoy my collection of classic recipes. I also recommend checking out Bon Appétit’s berry dessert collection for additional ideas on how to showcase fresh fruit.
The thickening agent you choose matters more than you might think. I prefer cornstarch for its clean flavor and beautiful glossy finish, but some bakers prefer tapioca starch or flour. Each creates a slightly different texture, so feel free to experiment and see what you prefer. If you use flour, you may need slightly more to achieve the same consistency.
Temperature control is important when making this filling. You want the mixture to come to a gentle boil to activate the thickener, but you don’t want to cook it so long that the strawberry flavor diminishes. I typically cook it for just 2-3 minutes after it reaches a boil, which is enough time to thicken the mixture without cooking away those delicate fruit flavors.
For a stunning presentation, try adding a layer of this filling to a homemade dessert base, or combine it with complementary flavors like vanilla custard or whipped cream. You can also explore Serious Eats’ dessert guides for inspiration on pairing this filling with other components.
One final tip: let your pie filling cool completely before pouring it into your crust or using it in any dessert. This prevents it from melting through a delicate crust or creating a soggy bottom. I like to spread a thin layer of filling on the crust first, let it set for a few minutes, then add the rest. This creates a barrier that keeps the crust perfectly crispy.
For additional dessert ideas and techniques, check out New York Times Cooking for professional guidance. I’m confident this strawberry pie filling recipe will become a favorite in your kitchen, just as it has in mine. Enjoy!
Ingredients
- 2 pounds fresh strawberries, hulled
- 3/4 cup granulated sugar
- 1/4 cup cornstarch
- 1/4 teaspoon salt
- 3 tablespoons fresh lemon juice
- 1 tablespoon lemon zest
- 1/2 teaspoon vanilla extract
- 1/4 teaspoon almond extract (optional but recommended)
- 2 tablespoons unsalted butter
- 1 pre-baked 9-inch pie crust
Instructions
- Wash and hull your fresh strawberries, then cut approximately three-quarters of them into quarters. Reserve the remaining whole or halved strawberries for garnish on top of the finished pie.
- In a large saucepan, combine the granulated sugar, cornstarch, and salt. Whisk these dry ingredients together until well combined and there are no lumps of cornstarch.
- Add the quartered strawberries to the sugar mixture and gently stir to coat all the fruit. Let the mixture sit for 5 minutes to allow the strawberries to release their juices.
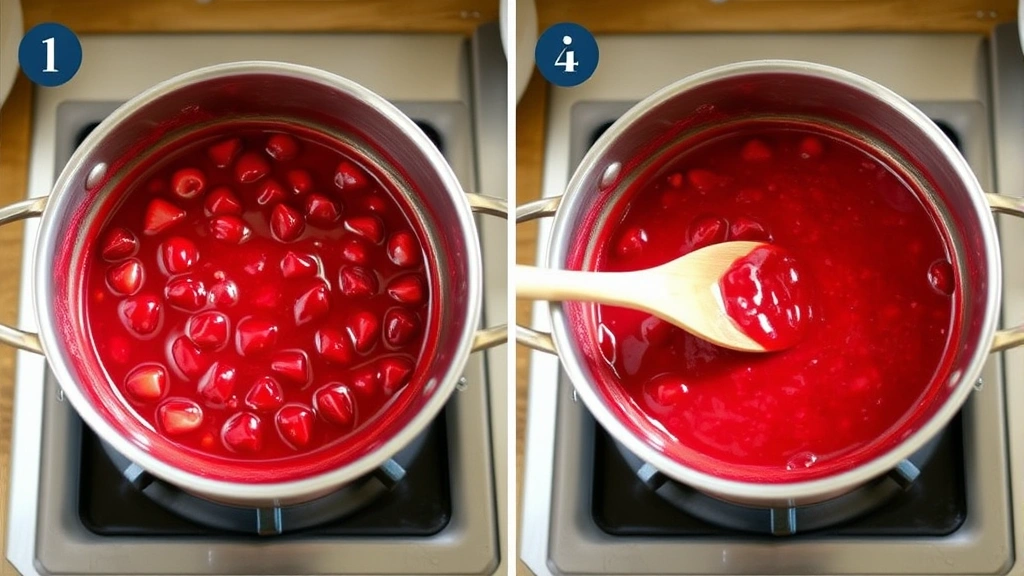
- Place the saucepan over medium heat and bring the mixture to a gentle simmer, stirring occasionally. The strawberries will begin to break down and release more liquid.
- Once the mixture reaches a gentle boil, continue cooking for 2-3 minutes, stirring frequently. The filling should begin to thicken and turn glossy.
- Remove the saucepan from heat and immediately stir in the fresh lemon juice, lemon zest, vanilla extract, and almond extract if using.
- Add the butter and stir until it’s completely melted and incorporated into the filling.
- Let the filling cool to room temperature, about 30 minutes, stirring occasionally to help it cool evenly and achieve the perfect consistency.
- Once cooled, pour the strawberry filling into your pre-baked pie crust, spreading it evenly with a spatula.
- Arrange the reserved whole or halved strawberries on top of the filling in a decorative pattern, pressing them in slightly so they stay in place.
- Refrigerate the finished pie for at least 2 hours before serving to allow the filling to set completely.
- Slice and serve with whipped cream or vanilla ice cream if desired.
Pro Tips
- Fresh strawberries are essential for this recipe. Choose berries that are bright red all the way through with no white or pale spots for the best flavor.
- If your strawberries are very large, you may want to cut them into smaller pieces to ensure even cooking and a more uniform filling consistency.
- Cornstarch is my preferred thickening agent, but you can substitute with tapioca starch for a clearer filling or all-purpose flour for a more traditional texture. If using flour, you may need an additional tablespoon.
- The lemon juice is crucial—it brightens the strawberry flavor and prevents the filling from tasting one-dimensionally sweet. Don’t skip it.
- Almond extract is optional but highly recommended. It adds a subtle sophistication that makes people ask what your secret ingredient is.
- You can make this filling up to two days ahead and store it in an airtight container in the refrigerator. Reheat gently over low heat if it becomes too firm.
- If you prefer a thicker filling, add an extra tablespoon of cornstarch mixed with a tablespoon of cold water. If you prefer it thinner, add a tablespoon of strawberry juice or water.
- This filling works beautifully in tarts, as a cake filling, or even as a topping for cheesecake. It’s also delicious served over vanilla ice cream or whipped cream.
- For a no-bake option, you can use this filling in a pre-made graham cracker crust.
- The filling will continue to thicken slightly as it cools, so don’t be concerned if it seems a bit loose when you first remove it from heat.
- Fresh lemon juice is far superior to bottled lemon juice for this recipe. The flavor difference is noticeable.
- Make sure your pie crust is completely cooled before adding the filling to prevent it from becoming soggy.