
There’s something absolutely magical about serving a slice of creamy, decadent cheesecake without a hint of guilt—and this sugar-free version proves that you don’t need refined sugar to create something truly spectacular. This Easy Sugar Free Cheesecake Recipe is a game-changer for anyone watching their sugar intake or simply looking to enjoy dessert with a lighter touch.
I’ve been making cheesecake for years, and I can honestly say that this version rivals any traditional recipe. The secret lies in using the right sweetener and not skimping on quality cream cheese. The result is a dessert that’s silky, rich, and absolutely indulgent. Whether you’re preparing this for a special occasion or just a regular Tuesday night treat, this recipe delivers restaurant-quality results every single time.
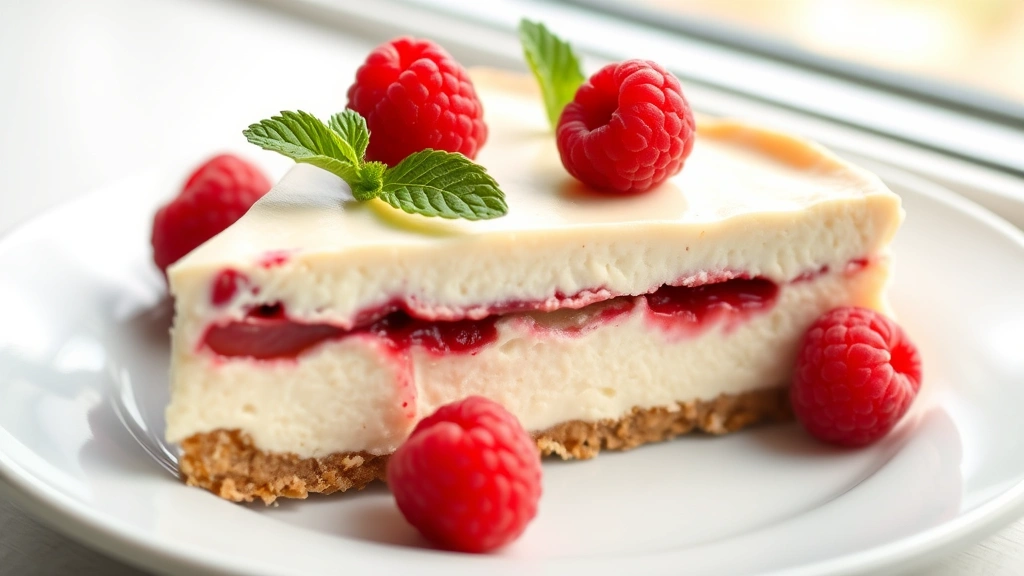
What makes this cheesecake so special is its versatility. You can serve it plain, topped with fresh berries, a sugar-free chocolate ganache, or even a homemade compote. It pairs beautifully with creamy sauce variations and works wonderfully as part of a keto or low-carb meal plan.
The no-bake version is perfect for beginners, while the baked option offers a slightly denser, more traditional texture. Both methods are foolproof when you follow these simple steps. I recommend reading through the entire recipe before starting, gathering all your ingredients, and taking your cream cheese out of the refrigerator about an hour before you begin—this makes the mixing process so much easier.
One of my favorite things about this recipe is how forgiving it is. The filling comes together quickly with just a few quality ingredients, and the crust provides the perfect textural contrast. If you’re new to making cheesecake, this is the perfect place to start. For those more experienced in the kitchen, you’ll appreciate how this recipe respects your time and delivers consistent, delicious results.
Looking at the nutritional breakdown, this cheesecake is a smart choice for anyone managing blood sugar levels. Most slices contain less than 3 grams of net carbs, making it perfect for various dietary approaches. The high fat and protein content from the cream cheese keeps you satisfied longer, so a small slice really does feel indulgent.
Many people worry that sugar-free desserts will have an artificial aftertaste, but I’ve carefully chosen sweeteners that won’t disappoint. The combination of allulose and erythritol creates a remarkably natural sweetness without any cooling effect that sometimes accompanies sugar substitutes. If you prefer, you can use your favorite keto sweetener, though you may need to adjust quantities slightly.
This recipe also works beautifully for meal prep. You can make it several days ahead, wrap it well, and store it in the refrigerator. In fact, cheesecake often tastes even better after a day or two, as the flavors have time to meld together. It also freezes exceptionally well for up to three months, making it a fantastic option for advance entertaining.
For more inspiration on creating impressive desserts and sauces, check out our guide to heavy cream preparations and explore complementary recipes that showcase the versatility of quality ingredients.
The technique for making this cheesecake is straightforward, but precision matters. Room temperature ingredients mix more smoothly, the crust needs to be pressed firmly into the pan, and the filling should be mixed just until combined—overmixing can incorporate too much air, which sometimes leads to cracks. If cracks do appear, don’t worry; they’re easily hidden under a topping.
According to Serious Eats, the key to perfect cheesecake is understanding the science of how cream cheese sets. This recipe respects that science while making the process accessible to home bakers of all skill levels. Whether you’re following a keto lifestyle or simply exploring new ways to enjoy classic desserts, this sugar-free cheesecake will become a treasured recipe in your collection.
Ingredients
- 2 cups almond flour
- 1/2 cup butter, melted
- 1/4 cup erythritol
- 1/4 teaspoon sea salt
- 32 oz cream cheese, room temperature
- 1 cup sour cream, room temperature
- 3/4 cup allulose or erythritol
- 1/4 cup heavy cream
- 3 large eggs, room temperature
- 2 teaspoons vanilla extract
- 1 tablespoon lemon juice
- 1/2 teaspoon xanthan gum (optional, for extra creaminess)
Instructions
- Preheat your oven to 325°F. Line the bottom of a 9-inch springform pan with parchment paper, then wrap the outside of the pan with heavy-duty aluminum foil, ensuring it goes up the sides—this prevents water from seeping in during the water bath.
- Make the crust by combining almond flour, melted butter, erythritol, and sea salt in a medium bowl. Stir until the mixture resembles wet sand and holds together when pressed.
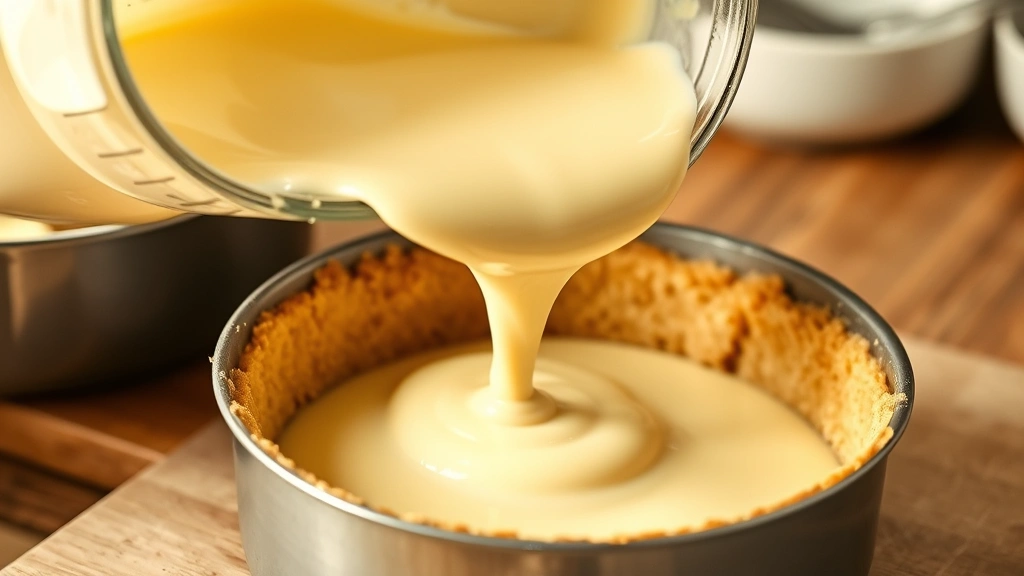
- Press the crust firmly and evenly into the bottom of your prepared springform pan, creating an even layer. Use the bottom of a measuring cup to help compress it. Bake for 8-10 minutes until lightly golden, then remove and let cool while preparing the filling.
- In a large mixing bowl, beat the room temperature cream cheese on medium-low speed for about 2 minutes until smooth and creamy. Scrape down the bowl frequently to ensure even mixing.
- Add the sour cream to the cream cheese and beat on medium speed for 1-2 minutes until well combined and smooth.
- Gradually add the allulose or erythritol while mixing on medium speed. Beat for 2-3 minutes until the sweetener is fully incorporated and the mixture is light and fluffy.
- Add the heavy cream and vanilla extract, beating on medium speed for about 1 minute until everything is well combined.
- With the mixer on low speed, add the lemon juice and xanthan gum if using. Mix just until incorporated—don’t overmix at this stage.
- Add the eggs one at a time on low speed, beating for about 30 seconds after each addition. Mix just until each egg is incorporated before adding the next one. Do not overmix, as this can cause cracks in the finished cheesecake.
- Pour the filling into your cooled crust, smoothing the top with a spatula.
- Place the springform pan into a larger roasting pan. Pour hot water into the roasting pan until it reaches halfway up the sides of the springform pan—this creates a water bath that ensures even, gentle cooking.
- Carefully place the roasting pan in the preheated 325°F oven. Bake for 35-40 minutes. The cheesecake is done when the edges are set but the center still jiggles slightly when gently shaken—about a 2-inch circle in the very center should wobble.
- Turn off the oven and crack the door open about 2 inches. Let the cheesecake sit in the warm oven for 1 hour. This gradual cooling prevents sudden temperature changes that can cause cracking.
- Remove the cheesecake from the oven and water bath. Let it cool completely on the counter for about 1 hour.
- Cover the cheesecake with plastic wrap and refrigerate for at least 3 hours, preferably overnight. This allows the flavors to set and the texture to become perfectly creamy.
- To serve, run a thin knife around the edge of the cheesecake before removing the springform collar. For clean slices, wipe your knife with a warm, damp cloth between each cut.
- Store covered in the refrigerator for up to 7 days or freeze for up to 3 months. If freezing, wrap individual slices in plastic wrap and place in a freezer bag for best results.
Pro Tips
The Water Bath is Non-Negotiable: This gentle cooking method ensures even heat distribution and prevents the top from cracking. Don’t skip this step—it’s the secret to silky, creamy cheesecake.
Don’t Overmix: Overmixing incorporates too much air into the batter, which can cause cracks and a less creamy texture. Mix just until ingredients are combined.
Choosing Your Sweetener: Allulose provides the most sugar-like taste and texture, while erythritol is often less expensive. A blend of both works beautifully and reduces any cooling aftertaste. Adjust sweetness to your preference.
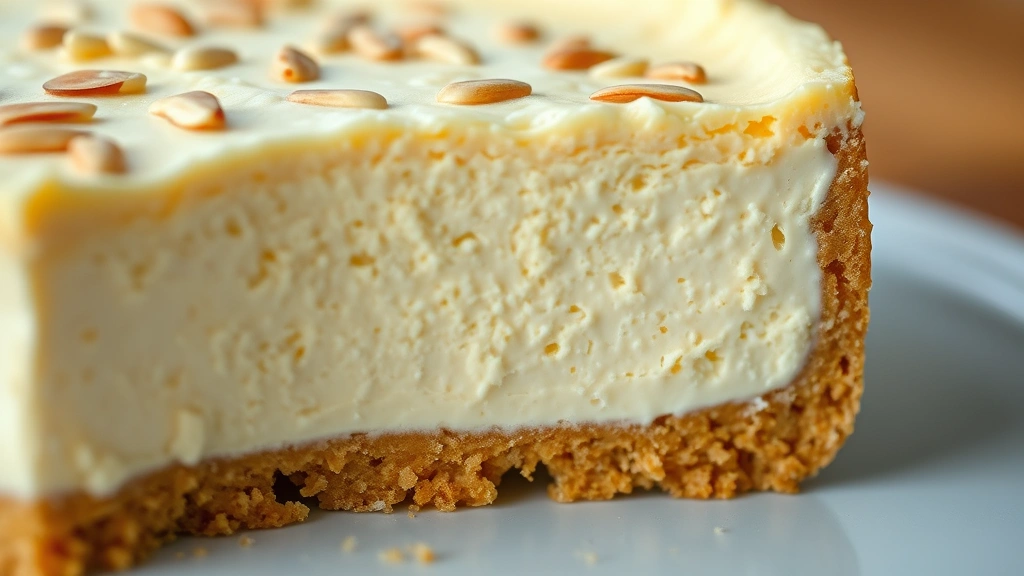
Crust Alternatives: If you prefer a traditional graham cracker crust, use 1.5 cups crushed sugar-free graham crackers, 1/2 cup melted butter, and 2 tablespoons erythritol. Or try a pecan crust for extra richness.
Flavor Variations: Add 1 teaspoon of lemon zest for brightness, 1/4 teaspoon of almond extract for depth, or 2 tablespoons of unsweetened cocoa powder for chocolate cheesecake.
Topping Ideas: Fresh berries work beautifully and add natural sweetness. A sugar-free chocolate ganache, homemade berry compote, or simple whipped cream elevates the presentation. You can also drizzle with sugar-free caramel or chocolate sauce.
Make-Ahead Tip: This cheesecake actually tastes better the next day, making it perfect for entertaining. Prepare it up to three days ahead, wrap it well, and store in the refrigerator.
Freezing Instructions: Wrap cooled cheesecake slices individually in plastic wrap, then place in an airtight container or freezer bag. Thaw in the refrigerator for several hours before serving. Frozen cheesecake keeps for up to three months.
Crack Prevention: If your cheesecake does develop cracks, don’t panic. They’re easily hidden under a topping. To minimize cracking, ensure the oven door is fully closed while baking and avoid opening it during the first 30 minutes.
Nutrition Note: Each slice contains approximately 320 calories, 28g fat, 8g protein, and 2g net carbs, making it suitable for keto and low-carb diets. Exact values depend on your specific ingredients and sweetener choice.