
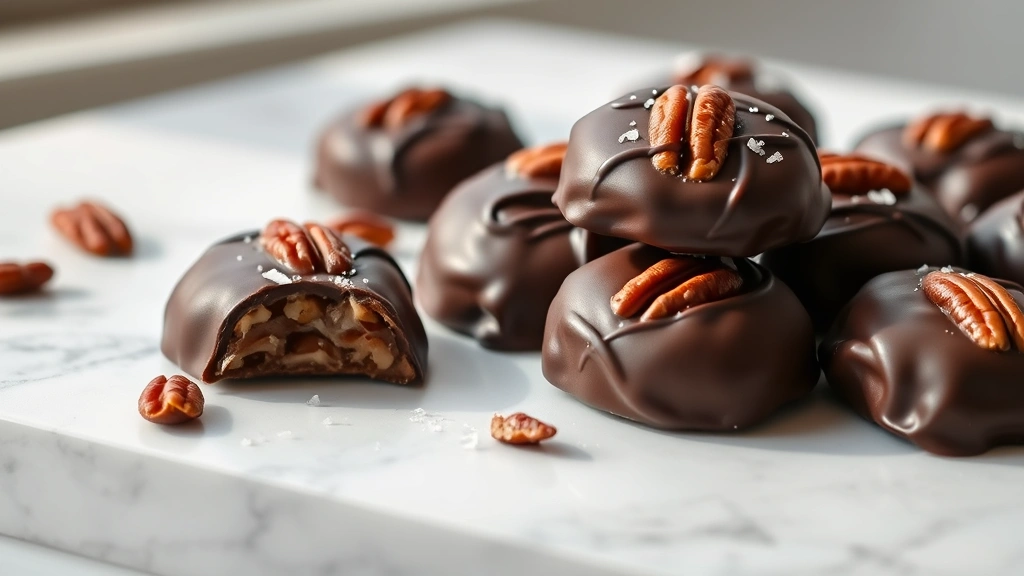
Turtle candies are an absolute classic that belongs in every candy lover’s repertoire! These little bites of heaven combine the perfect trifecta of flavors: rich chocolate, buttery caramel, and crunchy pecans. The beauty of this turtle candy recipe is that it looks incredibly fancy and impressive, yet it’s surprisingly simple to make at home. Whether you’re preparing them for the holidays, a special occasion, or just because you deserve a homemade treat, these candies will absolutely steal the show.
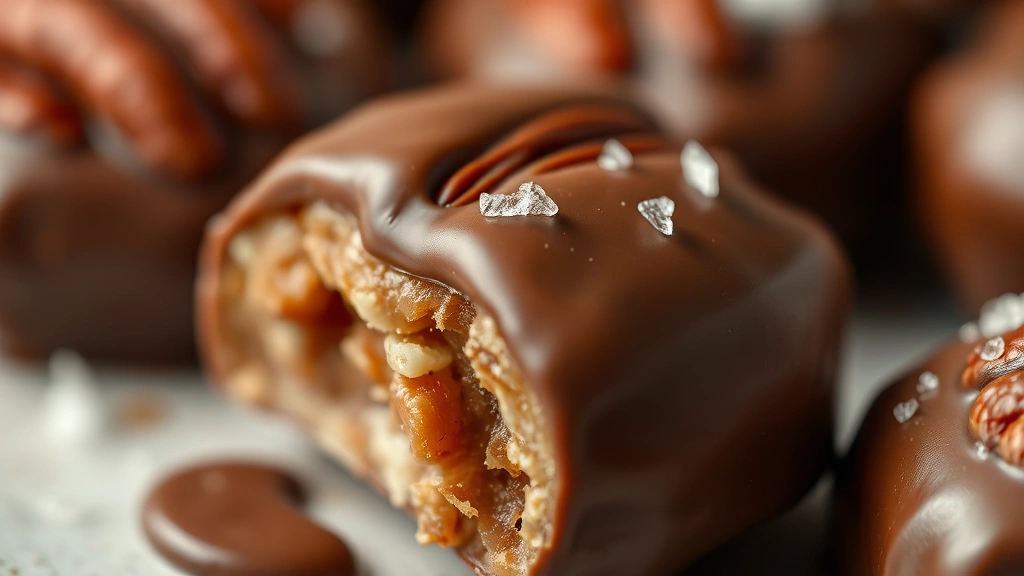
I’ve been making turtle candies for years, and I have to tell you—there’s something so satisfying about creating these little masterpieces in your own kitchen. The aroma alone is worth it! What makes these turtles so special is the combination of textures: the snap of the dark chocolate shell, the chewiness of the caramel, and the satisfying crunch of the toasted pecans. Plus, homemade turtle candies taste infinitely better than anything you can buy at the store, and they make wonderful gifts for friends and family.
The secret to making the BEST turtle candies lies in using quality ingredients and not rushing the process. You’ll want to start with whole pecan halves that are fresh and flavorful. The caramel should be made with real butter and shouldn’t be overcooked—you want it to be chewy, not hard and brittle. And the chocolate? Well, that’s where you can really make a difference. I recommend using high-quality chocolate because it truly elevates the final product. This recipe is foolproof, and I promise you’ll be making these again and again.
When working with caramel, timing is everything, much like when you’re perfecting rich cream-based recipes. The precision required in candy making is similar to mastering complex sauce techniques, so don’t be intimidated! For more detailed guidance on working with temperature-sensitive ingredients, check out our other confection guides, and if you want to pair these with something savory later, explore complementary flavor profiles.
For more detailed information on chocolate tempering and candy-making techniques, Bon Appétit has excellent resources on caramel making. You can also check out Serious Eats’ comprehensive candy guide for additional tips. The New York Times also offers a fantastic caramel recipe that complements this project perfectly. If you’re looking for chocolate-specific techniques, Bon Appétit has a dedicated turtle candy article, and The New York Times features variations on this classic treat.
Ingredients
- 2 cups whole pecan halves (about 8 ounces)
- 1 cup (2 sticks) unsalted butter
- 1 cup packed light brown sugar
- 1/2 teaspoon sea salt
- 1 teaspoon vanilla extract
- 12 ounces semi-sweet or dark chocolate, chopped (or chocolate chips)
- 1 tablespoon coconut oil or vegetable oil (for thinning chocolate if needed)
- Pinch of fleur de sel or additional sea salt for topping (optional but recommended)
Instructions
- Preheat your oven to 325°F (160°C). Line two large baking sheets with parchment paper and set aside. These will be used for arranging the pecan clusters before adding the caramel.
- Spread the pecan halves evenly on another baking sheet and toast them in the preheated oven for about 8-10 minutes, stirring halfway through, until they’re fragrant and lightly golden. Remove from the oven and let cool slightly. This step awakens their flavor and ensures they’re perfectly crispy.
- While the pecans are toasting, prepare your caramel. In a heavy-bottomed saucepan, melt the butter over medium heat. Once melted and foaming, add the brown sugar and sea salt, stirring constantly with a wooden spoon or silicone spatula.
- Continue cooking the caramel mixture, stirring frequently to prevent burning, for about 5-7 minutes. You’re looking for it to reach a light amber color and for the mixture to bubble gently. It should smell rich and caramelized but not burnt.
- Remove the caramel from the heat and immediately stir in the vanilla extract. Be careful as it may bubble up slightly. Set the pan aside to cool for about 2-3 minutes—you want it warm enough to be workable but not so hot that it will melt the chocolate on contact.
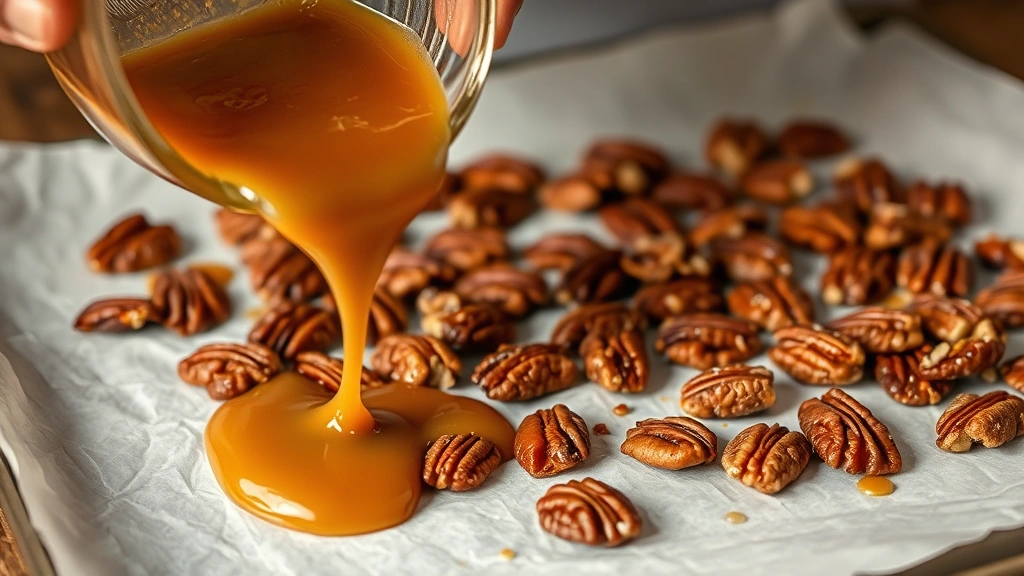
- On your prepared parchment-lined baking sheets, arrange the toasted pecans in small clusters of 3-4 pecan halves each, spacing them about 2 inches apart. You should have approximately 24 clusters.
- Using a small spoon or candy scoop, place about 1 teaspoon of the warm caramel on top of each pecan cluster, allowing it to settle between and around the pecans. Work quickly but carefully, as the caramel will begin to set.
- Once all the clusters are topped with caramel, place the baking sheets in the refrigerator for about 15-20 minutes, or until the caramel is firm to the touch but not rock-hard.
- While the caramel is setting, prepare your chocolate for dipping. Place the chopped chocolate in a microwave-safe bowl and microwave in 30-second intervals, stirring between each interval, until about 75% of the chocolate is melted. Remove from the microwave and stir until completely smooth—residual heat will melt the remaining pieces.
- If your melted chocolate is too thick, add the coconut oil or vegetable oil one teaspoon at a time and stir until you reach a smooth, pourable consistency. This ensures a thin, elegant coating.
- Remove the pecan-caramel clusters from the refrigerator. Using a fork or dipping tool, carefully pick up each cluster and dip it into the melted chocolate, ensuring all sides are coated. Allow excess chocolate to drip off back into the bowl.
- Place each chocolate-coated turtle on a clean parchment-lined baking sheet. If desired, immediately sprinkle a tiny pinch of fleur de sel or sea salt on top of each candy while the chocolate is still wet.
- Once all the turtles are dipped and topped, place the baking sheet in the refrigerator for at least 45 minutes to 1 hour, until the chocolate is completely set and hardened.
- Store your finished turtle candies in an airtight container at room temperature for up to 2 weeks, or in the refrigerator for up to 3 weeks. They can also be frozen for up to 2 months if you want to make them ahead for special occasions.
Pro Tips
Choosing the right chocolate makes a tremendous difference in the final product. I prefer a combination of semi-sweet and dark chocolate for a balanced flavor, but you can use whichever you prefer. Avoid chocolate chips if possible—they contain stabilizers that can make the coating grainy. Instead, use high-quality chopped chocolate or chocolate wafers.
The pecan toasting step shouldn’t be skipped. Even though it takes a few extra minutes, toasting brings out the natural oils and flavors in the nuts, making them exponentially more delicious. Plus, warm pecans help the caramel adhere better.
If you find your caramel is too thick after cooking, you can gently reheat it over low heat, stirring constantly. Be very careful not to let it cook any further or it will become bitter. Adding a teaspoon of cream can also help loosen it up.
For perfect dipping, make sure your chocolate is at the right temperature and consistency. If it’s too thick, the coating will be clumpy. If it’s too thin, the coating will be too heavy. The coconut oil is essential here—it thins the chocolate without affecting the flavor or quality.
These candies make wonderful gifts when packaged in pretty boxes or jars tied with ribbon. They’re impressive enough for fancy occasions but simple enough to make on a regular Tuesday afternoon. Your friends and family will be absolutely amazed that you made them from scratch.
If you’re making these for someone with nut allergies, you can substitute the pecans with whole almonds, walnuts, or even macadamia nuts. The technique remains exactly the same.
Leftover melted chocolate can be saved and remelted for future candy-making projects. Simply pour it onto parchment paper, let it cool completely, then store in an airtight container.