
There’s something absolutely magical about a perfectly cooked arm roast – it’s the kind of dish that fills your kitchen with the most incredible aroma and brings everyone to the dinner table with eager anticipation. This cut of beef, often overlooked in favor of its fancier cousins, is truly a hidden gem that deserves so much more recognition. When prepared properly, an arm roast becomes incredibly tender, juicy, and absolutely bursting with rich, beefy flavor that’ll have your family asking for seconds.
What I absolutely love about this arm roast recipe is how forgiving and simple it is to execute. You don’t need to be a professional chef or have fancy equipment – just a good quality cut of meat, some basic pantry staples, and a bit of patience. The arm roast is perfect for weekend dinners, special occasions, or whenever you’re craving that ultimate comfort food experience. It’s also wonderfully economical, making it an excellent choice for feeding a crowd without breaking the bank.
The key to achieving that restaurant-quality result is understanding that arm roast benefits tremendously from low and slow cooking methods. This allows the connective tissue to break down gradually, transforming what could be a tough cut into something incredibly succulent. I’m going to walk you through my foolproof method that delivers consistent, stunning results every single time. You’ll learn exactly how to season it properly, achieve that gorgeous golden crust, and create a sauce that’s absolutely divine. This recipe pairs beautifully with creamy sauces or can stand alone as the star of your plate. Whether you’re serving it alongside rich pasta dishes or classic roasted vegetables, this arm roast will be the highlight of your meal.
I’ve been making this recipe for years, and I’ve perfected it through countless Sunday dinners and special gatherings. My family absolutely adores it, and I’m thrilled to finally share all my secrets with you. Let me show you how to create a masterpiece that’ll make you feel like a professional chef.
Ingredients
- 1 beef arm roast (4-5 pounds)
- 3 tablespoons kosher salt
- 2 tablespoons freshly ground black pepper
- 2 tablespoons garlic powder
- 1 tablespoon onion powder
- 1 tablespoon paprika
- 1 teaspoon dried thyme
- 1 teaspoon dried rosemary
- 3 tablespoons olive oil
- 4 medium carrots, cut into 2-inch pieces
- 4 medium potatoes, cut into chunks
- 1 large yellow onion, quartered
- 6 cloves garlic, minced
- 2 cups beef broth
- 1 cup red wine (optional but recommended)
- 2 tablespoons tomato paste
- 2 bay leaves
- 1 tablespoon butter
- 2 tablespoons cornstarch
- 3 tablespoons fresh parsley, chopped
- Fleur de sel for finishing
Instructions
- Remove your arm roast from the refrigerator and allow it to sit at room temperature for approximately 30-45 minutes before cooking. This ensures even cooking throughout the entire roast.
- Preheat your oven to 325°F. This lower temperature is absolutely essential for achieving that tender, fall-apart texture we’re aiming for.
- In a small bowl, combine the kosher salt, black pepper, garlic powder, onion powder, paprika, dried thyme, and dried rosemary. Mix these seasonings thoroughly until well combined.
- Pat the arm roast completely dry using paper towels. This is crucial for developing that beautiful golden crust we want.
- Generously rub the entire surface of the roast with your seasoning mixture, making sure to coat all sides evenly and really work it into the meat.
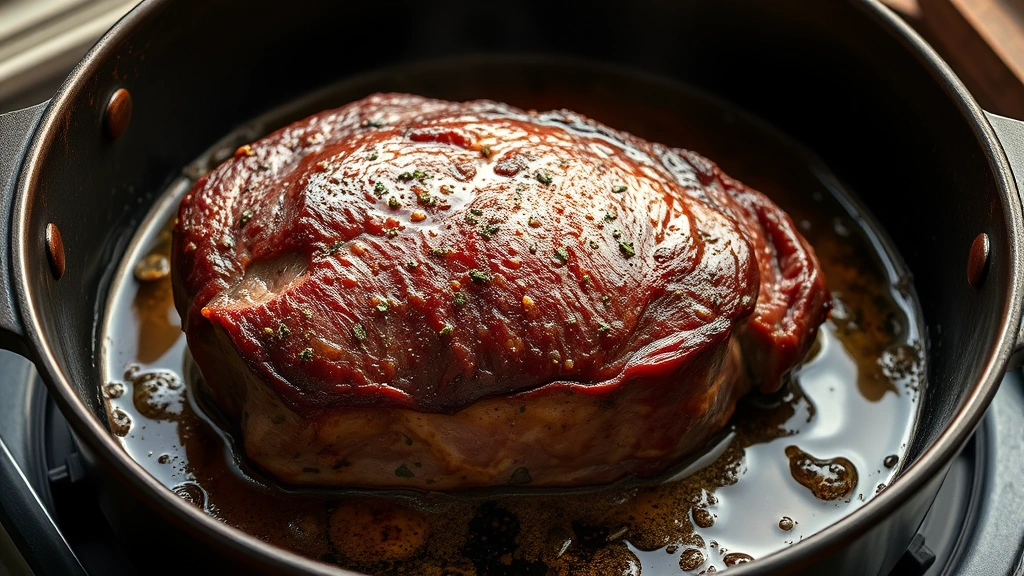
- Heat the olive oil in a large heavy-bottomed Dutch oven or roasting pan over medium-high heat until it shimmers.
- Carefully place the seasoned arm roast into the hot oil, being mindful of any splattering. Sear the roast for 4-5 minutes on each side until a gorgeous golden-brown crust forms on all surfaces.
- Remove the roast from the pan and set it aside on a clean plate.
- In the same pan, add the minced garlic and cook for about 30 seconds until fragrant, stirring constantly to prevent burning.
- Add the tomato paste to the garlic and stir continuously for about 1 minute to develop its flavor.
- Pour in the red wine (if using) and use a wooden spoon to deglaze the pan, scraping up all those flavorful browned bits from the bottom.
- Add the beef broth and stir everything together until well combined.
- Return the seared arm roast to the pan and add the bay leaves. The liquid should come up about halfway on the roast.
- Arrange the carrots, potatoes, and onion quarters around the roast in the pan.
- Cover the Dutch oven with a tight-fitting lid and transfer it to your preheated 325°F oven.
- Roast for 3 to 3.5 hours, depending on the exact size and thickness of your roast. The meat should be fork-tender and practically falling apart when done.
- Carefully remove the pan from the oven and transfer the roast to a cutting board. Tent it loosely with foil and let it rest for 10 minutes.
- While the roast is resting, strain the pan juices through a fine-mesh sieve into a saucepan, discarding the bay leaves.
- In a small bowl, whisk together the cornstarch with 3 tablespoons of cold water until smooth and lump-free.
- Bring the pan juices to a gentle simmer over medium heat and slowly whisk in the cornstarch slurry, stirring constantly until the sauce thickens to your desired consistency, about 2-3 minutes.
- Remove from heat and stir in the butter until melted and incorporated.
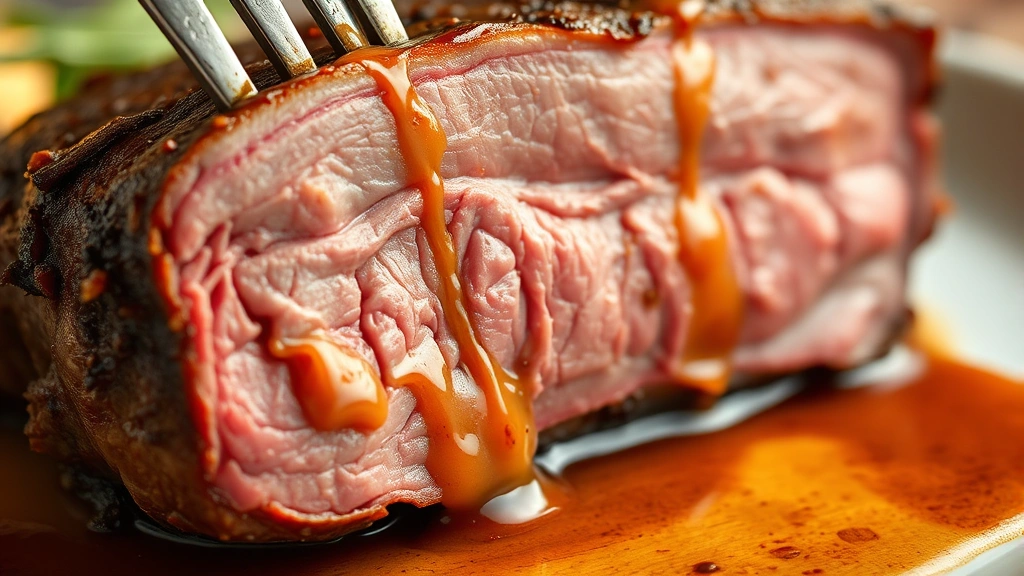
- Slice or shred the arm roast depending on your preference – it should be so tender it practically falls apart with a fork.
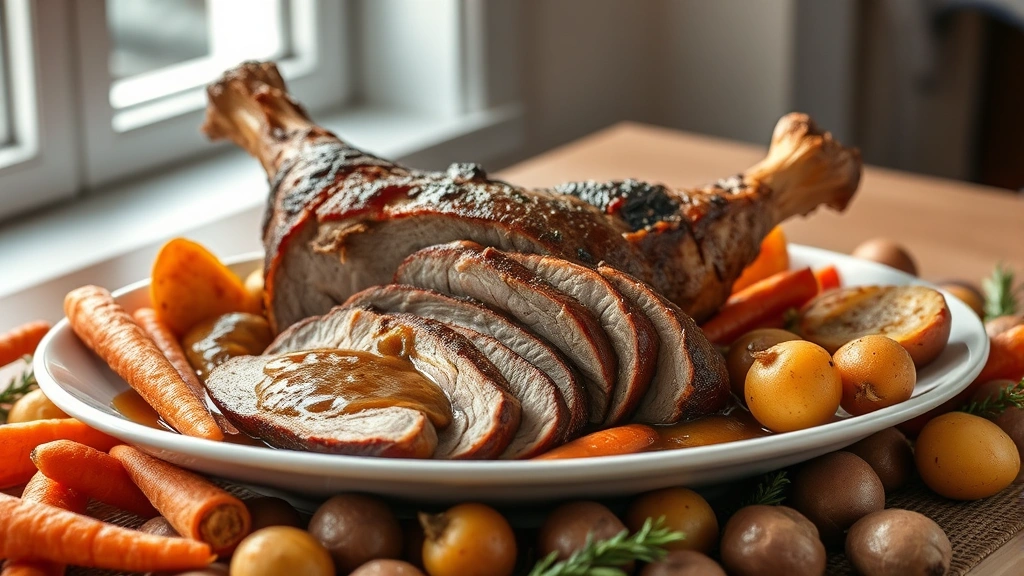
- Arrange the roast on a serving platter with the roasted vegetables, drizzle generously with the rich pan sauce, and garnish with fresh chopped parsley and fleur de sel.
Pro Tips
Temperature matters: Using a meat thermometer is your best friend here. The arm roast is done when it reaches an internal temperature of 190-195°F, which is higher than typical beef because we want maximum tenderness. At this temperature, the collagen has fully converted to gelatin.
Make it ahead: This dish actually tastes better the next day as the flavors have time to meld and develop. You can prepare it completely, cool it down, refrigerate it overnight, and then gently reheat it before serving. Simply reheat covered in a 325°F oven for about 30-40 minutes.
Wine selection: If you choose to use wine, a medium-bodied red like Pinot Noir or Merlot works beautifully. You can also substitute additional beef broth if you prefer to skip the wine entirely – the roast will still be absolutely delicious.
Vegetable additions: Feel free to customize your vegetables based on what you have on hand or what you prefer. Root vegetables like parsnips, turnips, or Brussels sprouts all work wonderfully. Just add them proportionally to the cooking time.
Leftover magic: Shred any leftover roast and use it for sandwiches, tacos, or even pasta dishes like creamy pasta. The meat is so tender it’s perfect for so many applications.
Sauce perfection: If your sauce seems too thin, you can thicken it further with additional cornstarch slurry. If it’s too thick, simply whisk in a bit more beef broth until you reach your preferred consistency.
Best sides: This arm roast pairs beautifully with crusty bread for soaking up that incredible sauce, simple green salads, or steamed vegetables. You could even serve it alongside hearty salads for a lighter option.
Seasoning adjustments: Taste your sauce before serving and adjust the salt and pepper to your preference. Remember that you’ve already seasoned the roast, so taste first before adding more salt.
For extra richness: Some cooks like to add a splash of Worcestershire sauce or balsamic vinegar to the pan liquid for added depth of flavor. Try adding 1-2 tablespoons and see if you enjoy it.
Cooking time variations: Oven temperatures can vary, so start checking your roast around the 3-hour mark. You want it fork-tender but not falling apart to the point where it shreds too easily.
Pingback: How to Make the Best Weight Watchers Chicken Recipe! – Simple Recipe Finder