
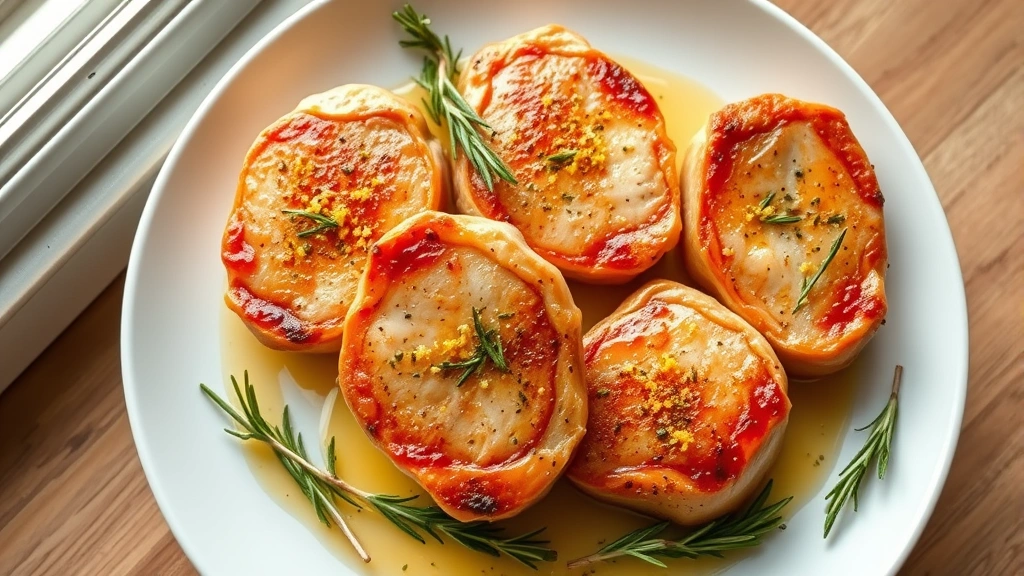
There’s something absolutely magical about a perfectly cooked boneless pork loin chop – it’s elegant enough for a dinner party, yet simple enough for a weeknight meal. This recipe has become my go-to when I want to impress without spending hours in the kitchen. The key to achieving that beautiful golden crust while keeping the inside juicy and tender lies in understanding a few crucial techniques that I’m thrilled to share with you today.
Boneless pork loin chops are often overlooked in favor of their bone-in cousins, but honestly, they’re a game-changer. They cook more evenly, are easier to portion, and absorb flavors beautifully. I’ve tested this recipe countless times, adjusting temperatures and cooking times to perfection, and I’m confident you’ll fall in love with the results.
What makes this recipe truly special is the combination of a simple seasoning blend, a proper searing technique, and finishing in the oven for even cooking. I also love serving this with heavy cream Alfredo sauce or pairing it with pickled red onions for brightness and contrast.
The beauty of boneless pork loin chops is their versatility. Whether you’re looking for something classic and comforting or wanting to explore new flavor combinations, this foundational recipe is your blank canvas. I’ve included variations and serving suggestions below, but the basic technique remains the same – and it’s foolproof.
One thing I always emphasize is the importance of bringing your pork to room temperature before cooking. This ensures even cooking throughout and prevents the outside from overcooking before the inside reaches the proper temperature. It’s a small step that makes a tremendous difference in the final result. You’ll also want to invest in a good meat thermometer – it’s truly the secret weapon for perfectly cooked pork every single time.
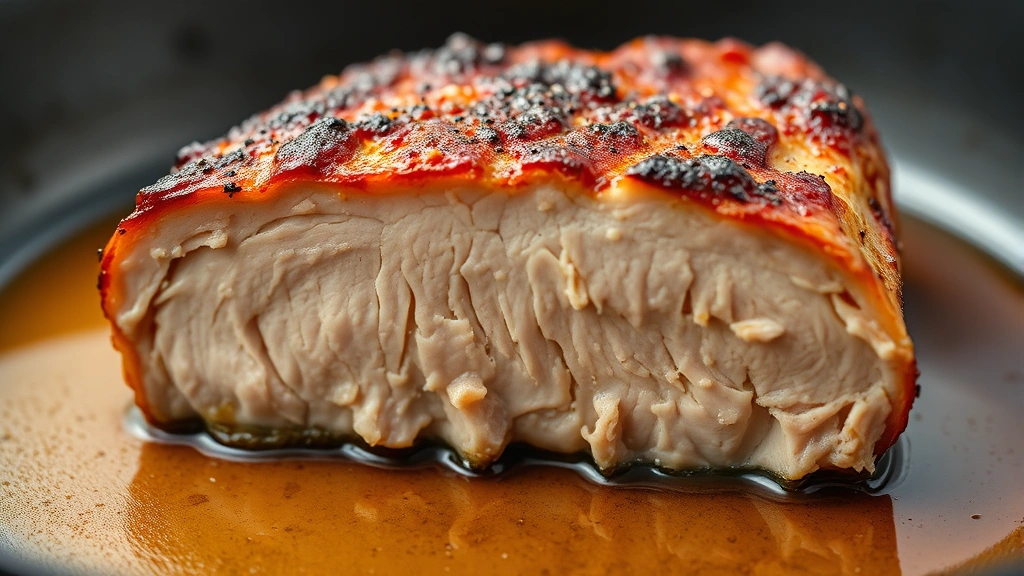
I’m so excited for you to try this recipe. The combination of crispy exterior and tender, juicy interior is absolutely unbeatable, and I promise you’ll be making this repeatedly. Your family will be asking for seconds, and your guests will be begging for the recipe. Let me walk you through every single step to ensure your success.
Ingredients
- 4 boneless pork loin chops, about 1.5 inches thick (1.5-2 pounds total)
- 2 teaspoons kosher salt
- 1 teaspoon freshly ground black pepper
- 1 teaspoon garlic powder
- 1 teaspoon onion powder
- 1/2 teaspoon smoked paprika
- 1/4 teaspoon cayenne pepper (optional)
- 2 tablespoons extra virgin olive oil
- 3 tablespoons unsalted butter
- 4 cloves fresh garlic, minced
- 3-4 sprigs fresh rosemary
- 2-3 sprigs fresh thyme
- 1/2 cup chicken or vegetable broth
- Zest of 1 lemon (optional garnish)
Instructions
- Remove boneless pork loin chops from the refrigerator 20-30 minutes before cooking to bring them to room temperature. This ensures even cooking throughout the meat.
- Pat the pork chops dry with paper towels. Moisture on the surface prevents proper browning and crust formation.
- In a small bowl, combine kosher salt, freshly ground black pepper, garlic powder, onion powder, smoked paprika, and cayenne pepper.
- Generously season both sides of each pork chop with the spice mixture, pressing gently so it adheres to the meat.
- Heat a large cast iron skillet or heavy-bottomed stainless steel pan over medium-high heat for 2-3 minutes until it’s very hot.
- Add olive oil to the hot pan and swirl to coat evenly. The oil should shimmer and begin to smoke slightly.
- Carefully place the seasoned pork chops into the hot pan, being cautious of splattering oil. Do not move them for 3-4 minutes to develop a golden crust.
- Flip each chop and sear the other side for another 3-4 minutes until golden brown and caramelized.
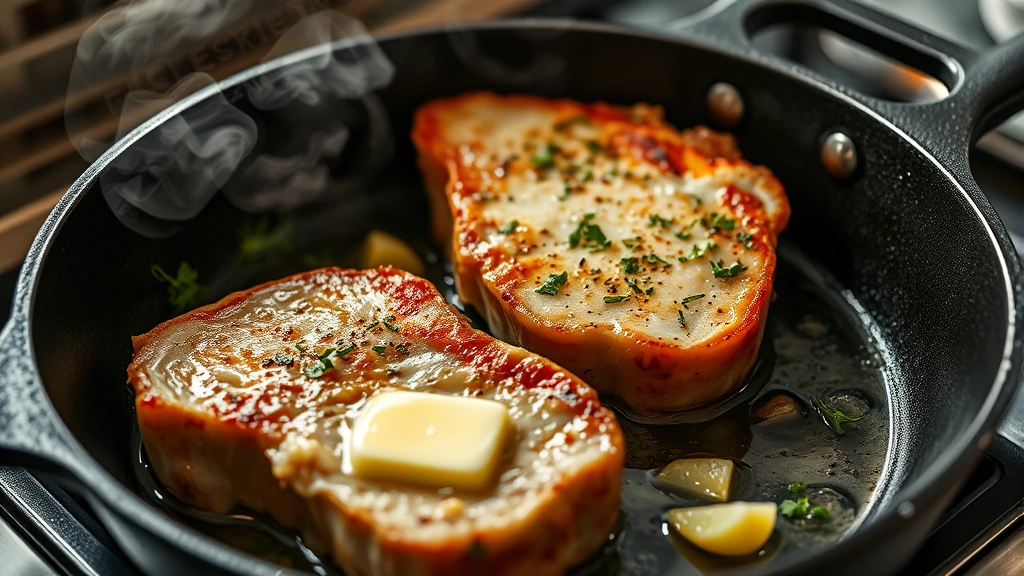
- Reduce heat to medium. Add butter, minced garlic, rosemary sprigs, and thyme sprigs to the pan around the pork chops.
- Tilt the pan slightly and use a spoon to continuously baste the pork chops with the melted butter and pan drippings for 2-3 minutes. This creates incredible flavor and keeps the meat moist.
- Pour chicken broth into the pan around the pork chops (not directly on them to preserve the crust).
- Transfer the skillet to a preheated 400°F oven and bake for 5-8 minutes until the internal temperature reaches 145°F when measured with a meat thermometer inserted into the thickest part of a chop.
- Remove the skillet from the oven using oven mitts. Let the pork chops rest in the pan for 3-5 minutes before serving. This allows the juices to redistribute throughout the meat.
- Transfer pork chops to serving plates and spoon pan sauce over the top. Garnish with fresh lemon zest and fresh herbs if desired.
Pro Tips
o Pat your pork chops dry before seasoning and cooking. Any surface moisture will steam rather than sear, preventing that beautiful golden crust that makes this dish so special.
o Room temperature meat cooks more evenly than cold meat straight from the refrigerator. Give your chops 20-30 minutes to come to room temperature for the most consistent results.
o Don’t skip the basting step. The combination of butter, garlic, and fresh herbs creates an incredible sauce that infuses the pork with amazing flavor while keeping it moist and tender.
o If your pork chops are thicker than 1.5 inches, you may need to extend the oven time by a few minutes. Check the internal temperature frequently to avoid overcooking.
o The resting period after cooking is non-negotiable. It allows carryover cooking to finish the process gently and lets juices redistribute throughout the meat. Cutting into it immediately will result in dry pork.
o This recipe pairs beautifully with heavy cream pasta, roasted asparagus, garlic mashed potatoes, or a simple green salad.
o Leftovers can be stored in an airtight container in the refrigerator for up to three days. Reheat gently in a 325°F oven until warmed through.
o For extra richness, finish with a splash of dry white wine in the pan before adding the broth. The wine adds complexity and depth to the sauce.
o Fresh herbs are important for the best flavor, but dried herbs can work in a pinch. Use about one-third the amount of dried herbs as fresh.
o Cast iron skillets are ideal for this recipe because they retain heat so well and create an excellent crust, but any heavy-bottomed oven-safe skillet will work beautifully.