
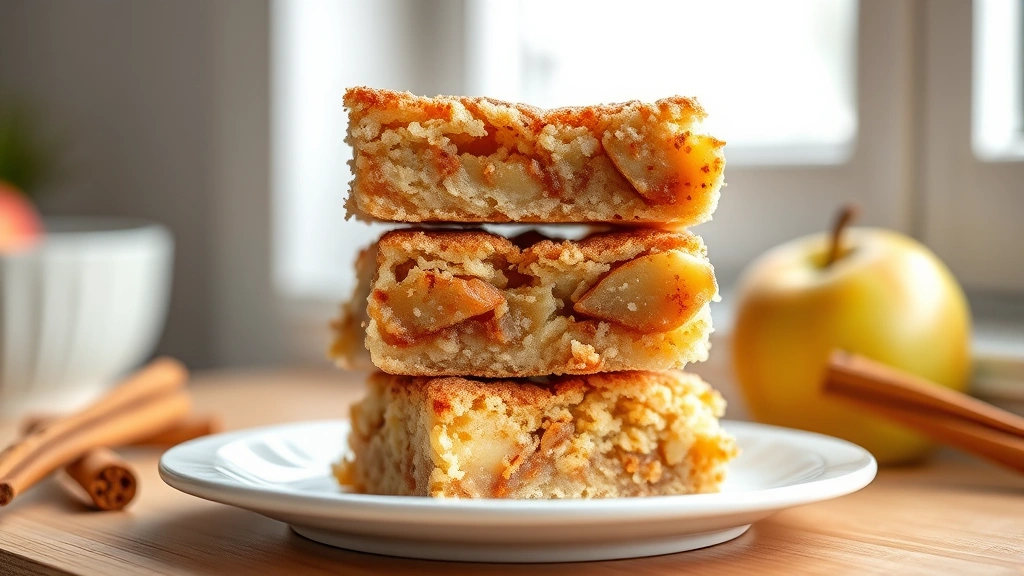
This apple bars recipe is the kind of treat that makes your kitchen smell absolutely incredible and has everyone asking for seconds. Soft, moist, and packed with cinnamon-spiced apples, these bars are so easy to make that you’ll find yourself baking them constantly.
I first fell in love with apple bars at a farmer’s market, where a local baker was selling them for an outrageous price. After tasting that first bite—the tender crumb, the juicy apple filling, the perfect balance of spice—I knew I had to recreate them at home. What I discovered is that making apple bars is actually simpler than most cookies, and the results are far more impressive.
Jump To Section
The beauty of this recipe lies in its simplicity. You’re essentially making a basic cake batter, layering it with spiced apples, and baking it all together into one glorious pan of goodness. No piping, no rolling, no complicated techniques—just honest, delicious baking.
Why This Recipe Works
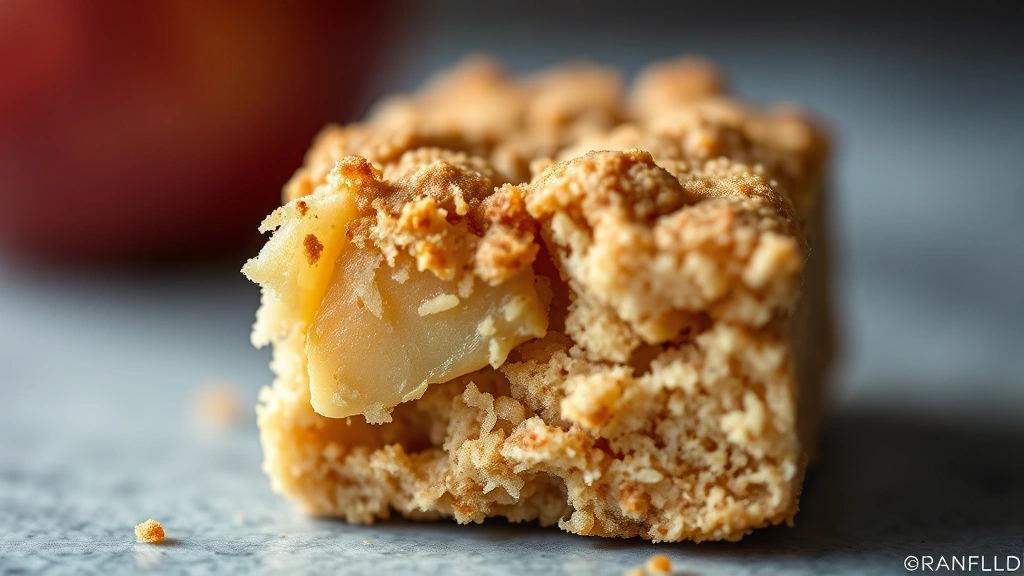
These bars stay incredibly moist thanks to the apples releasing their natural juices while baking, which keeps the crumb tender and prevents that dry, disappointing texture you sometimes get with baked goods. The combination of brown sugar and white sugar in the batter creates depth of flavor and helps with moisture retention.
Additionally, the cinnamon and nutmeg aren’t just flavor add-ons—they actually enhance the apple flavor and make the whole bar taste more complex and bakery-quality. Meanwhile, the two-layer approach (batter on bottom, apples in middle, batter on top) creates a beautiful texture contrast that keeps things interesting in every bite.
What makes this different from many other apple desserts is the method. Rather than trying to make a perfectly laminated filling, we’re simply spreading apples onto the base layer and letting the top batter meld with them during baking. It’s forgiving, flexible, and absolutely foolproof.
Ingredient Tips & Substitutions
For the apples, you’ll want a mix of tart and sweet varieties. Granny Smith apples provide acidity and structure, while Honeycrisp or Gala apples add natural sweetness. If you only have one type available, that’s perfectly fine—just use what you have, and adjust the sugar in the apple layer if needed.
The butter should be softened to room temperature, which means it should be soft enough to leave a slight indent when you press it, but not melting or greasy. This ensures your batter incorporates properly and creates an even, tender crumb throughout.
However, if you’re out of buttermilk, you can easily make a substitute by adding one tablespoon of lemon juice or white vinegar to regular milk and letting it sit for five minutes. For a gluten-free version, swap the all-purpose flour for a quality gluten-free flour blend—it works beautifully in this recipe.
Brown sugar versus white sugar matters here. The molasses in brown sugar adds moisture and a subtle caramel note that elevates the whole bar. Don’t skip it or substitute it entirely with white sugar, as you’ll lose some of that tender texture and depth.
How to Make Them Perfectly
Start by preheating your oven and preparing your pan—a 9×13-inch baking pan is ideal, lined with parchment paper for easy removal. The parchment isn’t just convenient; it ensures even browning and makes cutting clean bars so much easier.
Cream your butter and sugars together until the mixture is light and fluffy, which takes about three minutes with an electric mixer. This step incorporates air into the batter, making the final bars tender and cake-like rather than dense.
In a separate bowl, whisk together your dry ingredients before adding them to the wet ingredients. This prevents lumps and ensures even distribution of the leavening agents. Add the buttermilk and vanilla, and mix until just combined—don’t overmix, as this can toughen the batter.
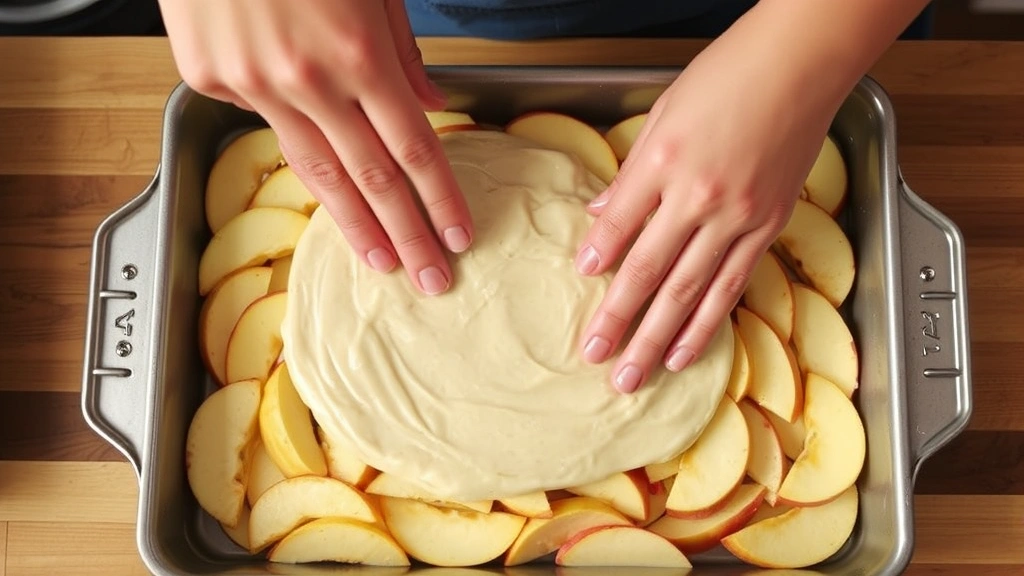
Spread half the batter into your prepared pan, then layer your apples on top. The apples should be sliced thin (about 1/8-inch) so they soften properly during baking. Toss them with cinnamon, nutmeg, and a touch of sugar to bring out their flavor.
The final step is spreading the remaining batter over the apples, which can be a bit tricky since the batter is thick. Use an offset spatula or the back of a spoon, dipped in water, to spread it gently without pressing down too hard. The batter doesn’t need to be perfectly even—it will puff and merge with the apples during baking.
Serving Suggestions
These bars are wonderful on their own, but they’re absolutely magical with a simple glaze or streusel topping. A basic powdered sugar glaze drizzled over the cooled bars adds elegance and sweetness, while a cinnamon-sugar streusel sprinkled on top before baking creates a delightful crunch.
For breakfast or brunch, serve these bars with strong coffee or tea. They pair beautifully with a dollop of whipped cream or a scoop of vanilla ice cream for dessert, making them genuinely versatile for any time of day.
These also work wonderfully as part of a dessert spread alongside other seasonal treats, or tucked into lunchboxes for a special surprise. Kids particularly love how easy they are to grab and eat, making them perfect for gatherings.
Storage & Reheating
Store your apple bars in an airtight container at room temperature for up to five days. They actually taste better on day two or three, as the flavors meld and deepen. The bars will remain moist thanks to the apple filling, which continues to release moisture even after baking.
For longer storage, freeze the cooled bars in an airtight freezer container for up to three months. To reheat, simply warm them in a 300-degree oven for about ten minutes until they’re warmed through. Alternatively, you can microwave individual bars for thirty seconds for a quick treat.
Interestingly, these bars actually freeze beautifully both before and after baking. Some bakers prefer to assemble and freeze the unbaked bars, then bake them directly from frozen (adding just five to ten minutes to the baking time). This is a fantastic option if you want freshly baked bars without the full prep time.
If you’re making these for a bake sale or potluck, they transport beautifully since they’re sturdy enough to handle and stay moist throughout the day. Pack them in layers with parchment paper between each bar to prevent sticking.
This apple bars recipe has become a staple in my kitchen, especially when apples are in season. The combination of tender cake, spiced apples, and simple preparation makes it a winner every single time. Whether you’re baking for your family, a special occasion, or just because, these bars will earn you serious compliments. Make a batch today, and you’ll understand why this recipe is so beloved.
Ingredients
- 1/2 cup (115g) unsalted butter, softened to room temperature
- 1 cup (200g) granulated white sugar
- 1/2 cup (110g) packed brown sugar
- 2 large eggs, room temperature
- 1 teaspoon vanilla extract
- 1 3/4 cups (220g) all-purpose flour
- 1 teaspoon baking powder
- 1/2 teaspoon baking soda
- 1/2 teaspoon salt
- 1/2 cup (120ml) buttermilk, room temperature
- 4 medium apples (about 2 pounds), peeled, cored, and thinly sliced
- 3 tablespoons granulated sugar for apples
- 2 teaspoons ground cinnamon
- 1/4 teaspoon ground nutmeg
- 1 tablespoon lemon juice
Instructions
- Preheat your oven to 350 degrees Fahrenheit. Line a 9×13-inch baking pan with parchment paper, allowing the edges to hang over the sides for easy removal.
- In a large bowl, cream together the softened butter, granulated sugar, and brown sugar using an electric mixer on medium speed for about 3 minutes, until the mixture is light, fluffy, and pale in color.
- Add the eggs one at a time, beating well after each addition to fully incorporate. Stir in the vanilla extract and mix until combined.
- In a separate medium bowl, whisk together the flour, baking powder, baking soda, and salt. This prevents lumps and ensures even distribution of the leavening agents.
- Alternately add the dry ingredient mixture and buttermilk to the butter mixture, beginning and ending with the dry ingredients. Mix on low speed just until combined after each addition—don’t overmix, as this can toughen the batter.
- Spread half of the batter evenly into the prepared pan, using an offset spatula or the back of a spoon to create a smooth layer.
- In a medium bowl, toss the sliced apples with the 3 tablespoons of sugar, cinnamon, nutmeg, and lemon juice until the apples are evenly coated with the spice mixture.
- Spread the spiced apple mixture in a single layer over the batter in the pan, distributing the apples as evenly as possible.
- Carefully spread the remaining batter over the apples, working gently to avoid pressing down too hard. The batter doesn’t need to cover the apples completely—it will spread and merge during baking. Use a spatula dipped in water if the batter is sticking.
- Bake for 40 to 45 minutes, until a toothpick inserted into the cake portion comes out clean or with just a few moist crumbs. The edges should be lightly golden brown, and the top should spring back when gently touched.
- Remove the pan from the oven and allow the bars to cool completely in the pan for at least 2 hours before cutting. This cooling time is important for the bars to set properly and become easier to cut into clean pieces.
- Once completely cooled, use the parchment paper edges to lift the entire bar out of the pan onto a cutting board. Using a sharp serrated knife, cut into 16 equal bars (4 rows by 4 columns).
- Serve the bars at room temperature or slightly warmed. Store in an airtight container at room temperature for up to 5 days, or freeze for up to 3 months.
Pro Tips
Room temperature ingredients make a real difference in this recipe. When your eggs, buttermilk, and butter are all at the same temperature, they emulsify more readily, creating a smoother batter with better texture.
The thickness of your apple slices matters more than you might think. Slices that are too thick won’t soften properly during baking, while slices that are too thin can turn mushy. Aim for about 1/8-inch thickness using a mandoline slicer or sharp knife.
If you prefer a tangier flavor, use all buttermilk or swap it for Greek yogurt thinned with a little milk. However, if you only have regular milk on hand, you can make a buttermilk substitute by adding 1 tablespoon of lemon juice or white vinegar to 1/2 cup of milk and letting it sit for 5 minutes before using.
For a streusel-topped version, mix together 1/2 cup oats, 1/3 cup brown sugar, 1/4 cup flour, 1/4 cup melted butter, and 1/2 teaspoon cinnamon. Sprinkle this mixture over the top batter before baking for added texture and sweetness.
Don’t skip the cooling time. Cutting into warm bars will result in a crumbly mess, while fully cooled bars cut into clean, beautiful pieces. If you’re in a hurry, refrigerate the pan for 30 minutes to speed up the cooling process.
To make these bars even more special, drizzle a simple powdered sugar glaze over the cooled bars. Mix 1 cup powdered sugar with 2-3 tablespoons milk and 1/2 teaspoon vanilla extract until you reach the desired consistency, then drizzle over the top.
These bars freeze exceptionally well both baked and unbaked. If freezing unbaked bars, assemble them completely, wrap the entire pan tightly with plastic wrap and foil, and freeze for up to 1 month. Bake directly from frozen, adding 5-10 minutes to the baking time.
For a healthier version, try swapping half the all-purpose flour for whole wheat pastry flour. This creates a slightly nuttier flavor and adds fiber without compromising the tender crumb texture.