
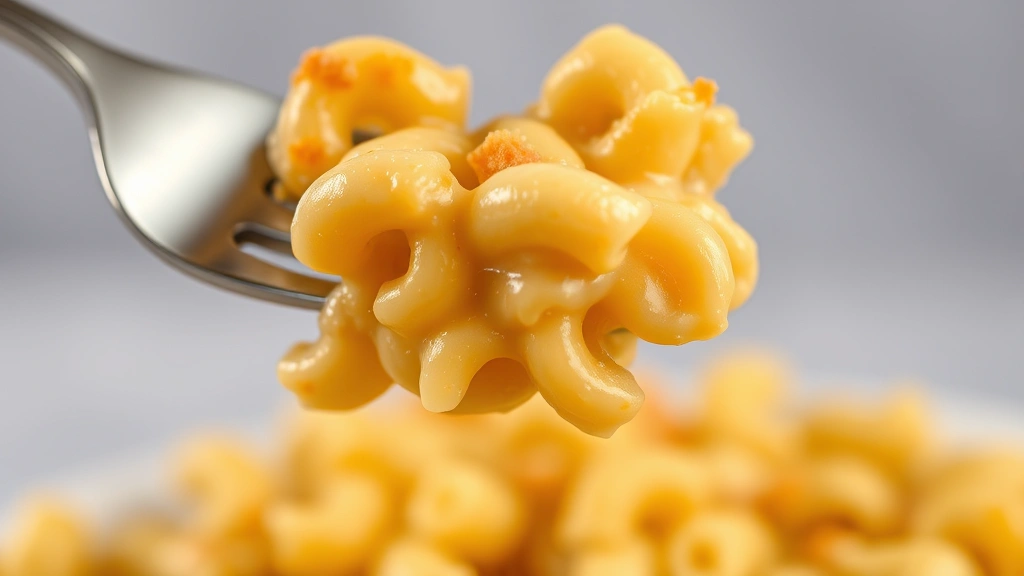
The best mac and cheese recipe is the one that brings comfort to your table with creamy, dreamy pasta and a cheese sauce so good you’ll want to lick the spoon. This homemade version beats any box mix because you control every ingredient, every flavor, and every ounce of cheesy goodness. Trust me, once you make this, you’ll never go back.
I grew up eating mac and cheese from a box, and there’s nothing wrong with that. But when I discovered how simple it is to make from scratch, everything changed. The first time I served my homemade version to my family, my kids actually asked for seconds—something that had never happened before. Now, this recipe is requested at every family gathering, potluck, and weeknight dinner.
Jump To Section
Why This Recipe Works
The secret to the best homemade mac and cheese lies in building a proper cheese sauce base. We start with a roux—butter and flour cooked together—which creates a thick, velvety foundation. This isn’t just any sauce; it’s the foundation for restaurant-quality creaminess that clings to every noodle.
The cheese selection matters more than you’d think. Using a combination of sharp cheddar and gruyere creates depth and complexity that a single cheese can’t achieve. Sharp cheddar brings bold, tangy flavor while gruyere adds a subtle nuttiness. Additionally, a touch of cream cheese ensures silky smoothness that keeps the sauce from becoming grainy or breaking.
One trick that separates good mac and cheese from great mac and cheese is tempering the cheese. You never add cold cheese directly to hot cream—instead, you slowly whisk in cheese off the heat. This prevents the proteins from seizing up and creating a lumpy, separated sauce. It sounds fancy, but it’s honestly just a gentle technique that takes thirty seconds.
Ingredient Tips & Substitutions
Fresh, good-quality cheese makes an enormous difference here. Don’t use pre-shredded cheese with the anti-caking agents—they prevent melting and create a grainy texture. Always shred your own cheese from a block. Yes, it takes two extra minutes, and yes, it’s absolutely worth it.
For the pasta, use elbow macaroni or small pasta shapes that catch sauce beautifully. Meanwhile, if you’re feeling adventurous, small shells or cavatappi work wonderfully too. The key is choosing pasta with ridges or curves so the creamy sauce clings instead of sliding off.
If you don’t have gruyere on hand, substitute with smoked gouda for depth, or use additional sharp cheddar for a bolder flavor. For a lighter version, swap half the heavy cream for whole milk. However, keep at least some cream—it’s what makes this dish truly luxurious. You could also try making creamy pasta dishes with ricotta for a different texture entirely.
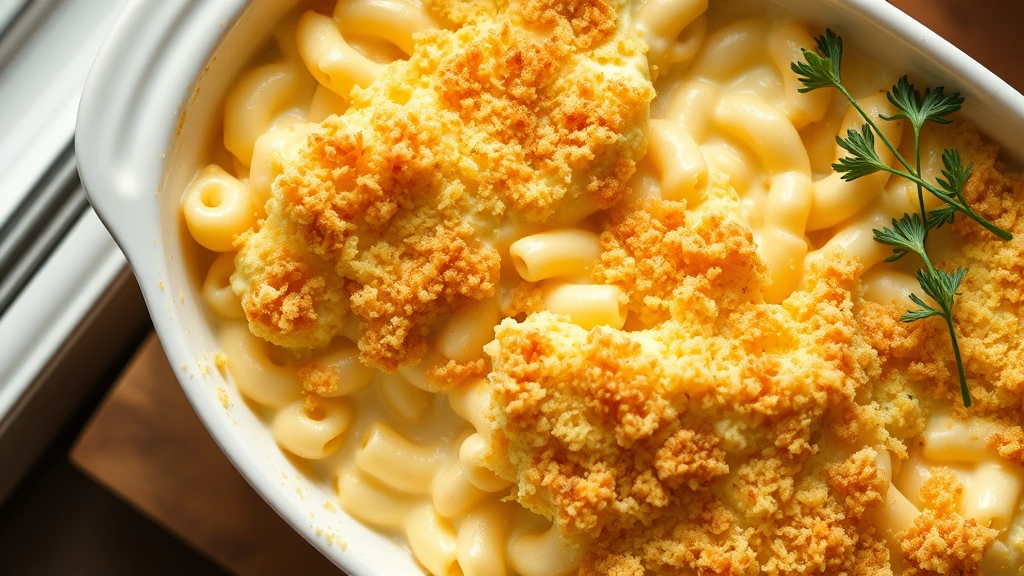
The breadcrumb topping is optional but highly recommended. It adds a golden, crispy texture that contrasts beautifully with the creamy interior. For a panko topping, simply toss panko with melted butter and a pinch of salt, then sprinkle over the top before baking.
How to Make It Perfectly
Start by cooking your pasta until just al dente—about one minute under the package instructions. It will continue cooking in the oven, so don’t cook it fully or you’ll end up with mushy mac. Drain it well and set aside in a large bowl.
While the pasta cooks, begin your sauce. Melt butter in a saucepan over medium heat, then whisk in flour to create a paste. Cook this roux for about one minute, stirring constantly. For instance, you should see it bubble gently but not brown. This brief cooking removes the raw flour taste without developing color.
Gradually pour in your milk and cream while whisking constantly. The key word here is gradually—if you dump it all in at once, you’ll get lumps. Whisk for about five minutes until the mixture thickens enough to coat the back of a spoon. The sauce should be noticeably thicker than when you started but still pourable.
Now comes the magic moment: removing from heat and adding your cheese. Turn off the burner, then add your shredded cheese handful by handful, stirring gently after each addition. The residual heat will melt everything into a silky, luxurious sauce. This is where patience pays off—take your time and enjoy the transformation.
Season with salt, pepper, and a pinch of nutmeg. Yes, nutmeg. I know it sounds odd, but just a whisper of it elevates the entire dish without making it taste spiced. Add your cooked pasta to the sauce and stir until every noodle is coated. If you’re adding a breadcrumb topping, transfer to a baking dish now.
Serving Suggestions
This creamy mac and cheese is wonderful on its own as a main dish, but it also makes a fantastic side. Pair it with a bright, fresh salad like a tasty Mediterranean salad to balance the richness. A simple green salad with lemon vinaigrette works beautifully too.
For special occasions, serve alongside roasted vegetables or grilled chicken. The creamy sauce complements lighter proteins perfectly. For a complete comfort meal, add a fresh salad on the side for brightness and freshness.
You can also customize individual bowls with add-ins like crispy bacon, fresh herbs, or sautéed mushrooms. Some people love it with a drizzle of truffle oil or a sprinkle of fresh thyme. The beauty of homemade is that you can make it exactly how you love it.
Storage & Reheating
Leftover mac and cheese keeps beautifully in an airtight container in the refrigerator for up to four days. When you’re ready to eat it, reheat gently on the stovetop with a splash of milk to restore creaminess. The microwave works too, but stir every thirty seconds to prevent the edges from overcooking.
You can also freeze this dish for up to three months. Cool it completely first, then transfer to a freezer-safe container. When reheating from frozen, thaw overnight in the refrigerator first, then reheat as you normally would. The texture stays creamy and delicious.
For make-ahead meals, assemble everything in a baking dish, cover tightly, and refrigerate up to twenty-four hours before baking. Just add five to ten minutes to the baking time since you’re starting from cold. This makes it perfect for busy weeknights or potluck planning.
If you’re looking for other pasta inspiration, check out this perfect pesto pasta recipe for a lighter option. For more cheesy pasta goodness, explore the best Velveeta mac and cheese recipe or try this delicious Velveeta version for variety.
This recipe has been tested in kitchens across America and consistently delivers restaurant-quality results. The combination of technique, ingredient quality, and simple additions creates something truly special. Whether you’re cooking for your family or impressing guests, this best mac and cheese recipe delivers every single time. Make it this week and discover why it’s become a beloved classic in so many homes.
Ingredients
- 1 pound elbow macaroni pasta
- 4 tablespoons unsalted butter
- 3 tablespoons all-purpose flour
- 2 cups whole milk
- 1 cup heavy cream
- 2 cups sharp cheddar cheese, shredded
- 1 cup gruyere cheese, shredded
- 4 ounces cream cheese, softened
- 1 teaspoon salt
- ½ teaspoon black pepper
- ¼ teaspoon ground nutmeg
- ½ cup panko breadcrumbs (optional)
- 2 tablespoons melted butter (for topping, optional)
- Pinch of sea salt (for topping, optional)

Instructions
- Preheat your oven to 350°F if making the baked version, or have a large serving dish ready for stovetop. Bring a large pot of salted water to a rolling boil.
- Add the elbow macaroni to boiling water and cook until just al dente, about one minute under the package time. Drain well in a colander and transfer to a large mixing bowl.
- While pasta cooks, melt butter in a medium saucepan over medium heat. Once melted and foaming, add the flour and whisk constantly for about one minute until it becomes a smooth paste.
- Gradually pour in the milk and cream while whisking continuously to prevent lumps from forming. Keep whisking for five to seven minutes until the sauce thickens enough to coat the back of a spoon.
- Remove the saucepan from heat completely. This is important—you’re about to add the cheese, and you want to do it off heat to prevent curdling.
- Add the shredded cheddar and gruyere cheese to the hot sauce in two or three additions, stirring gently after each handful until melted and incorporated. The residual heat will melt everything into silky smoothness.
- Stir in the softened cream cheese until completely combined and the sauce is smooth and creamy. Add salt, pepper, and nutmeg, stirring well to distribute the spices evenly.
- Pour the warm cheese sauce over the cooked pasta in your bowl and stir gently but thoroughly until every noodle is coated with the creamy sauce.
- If baking: Transfer to a buttered baking dish. Toss panko breadcrumbs with melted butter and sea salt, then sprinkle evenly over the top. Bake for fifteen to twenty minutes until golden brown and bubbly around the edges.
- If stovetop: Transfer to a serving dish and serve immediately. For baked texture, you can also transfer to a baking dish and bake at 350°F for fifteen to twenty minutes until lightly browned on top.
- Let cool for two to three minutes before serving. This allows the sauce to set slightly and makes serving easier without losing the creaminess.
Pro Tips
The most common mistake people make is overcooking the pasta initially. Since it will cook a bit more in the oven or from the residual heat of the sauce, cook it just short of al dente. You want it to have a slight firmness when you bite into it.
Temperature control is crucial for this sauce. If your milk mixture gets too hot before you add the cheese, the cheese proteins can seize up and create a grainy texture. That’s why we remove from heat first—the residual warmth is plenty to melt the cheese beautifully.
For a lighter version without sacrificing creaminess, substitute half the heavy cream with whole milk. However, keep at least one cup of cream because it’s what gives this dish its luxurious mouthfeel. For a richer version, use all heavy cream instead of the milk, though this makes it quite decadent.
If you prefer a stovetop version without baking, you can absolutely skip the baking step and serve directly from the pot or a serving dish. The breadcrumb topping is optional but adds a wonderful textural contrast. For extra crunch, toss the panko with grated Parmesan cheese before topping.
Make-ahead tip: Assemble the entire dish up to twenty-four hours in advance, cover with foil, and refrigerate. When ready to bake, add five to ten extra minutes since it’s going in cold. This makes weeknight dinner planning so much easier.
Storage is simple—keep leftovers in an airtight container for up to four days. Reheat gently on the stovetop over medium-low heat with a splash of milk to restore the creamy texture. The microwave works too, but stir every thirty seconds to prevent the edges from drying out.
For freezing, cool the dish completely and transfer to a freezer-safe container. It keeps beautifully for up to three months. Thaw overnight in the refrigerator before reheating. The cheese sauce stays creamy and delicious even after freezing.