
The best slime recipe is one that’s simple, safe, and absolutely mesmerizing to make. If you’ve been scrolling through endless slime tutorials wondering which one actually works, you’ve found it—this is the foolproof formula that kids (and let’s be honest, adults too) have been raving about.
Making slime at home is more than just a rainy day activity. It’s a gateway into understanding polymer chemistry, a stress-relieving sensory experience, and pure creative fun all rolled into one gloriously stretchy package. The best part? You probably have most of the ingredients already sitting in your pantry or bathroom cabinet.
Jump To Section
Why This Recipe Works
This particular slime recipe has earned its reputation for a reason. The ratio of ingredients is scientifically balanced to create that perfect consistency—not too runny, not too stiff—that makes slime so satisfying to play with. You’ll get immediate results without the frustration of failed batches.
Unlike complicated recipes that require hard-to-find ingredients or precise temperature control, this approach uses everyday household items. The chemical reaction happens quickly, usually within a minute or two of mixing. This means kids stay engaged and excited throughout the entire process, making it ideal for parties, playdates, or solo creative sessions.
The beauty of this method is its reliability. Whether you’re making slime for the first time or you’ve done it a hundred times, you’ll get consistent, stretchy results every single time. No mystery ingredients, no guesswork—just quality slime.
Ingredient Tips & Substitutions
Understanding your ingredients is key to mastering the best slime recipe. Each component plays a specific role in creating that magical texture everyone loves. The glue provides the base structure, while the activator creates the polymer chains that give slime its distinctive stretch and resistance.
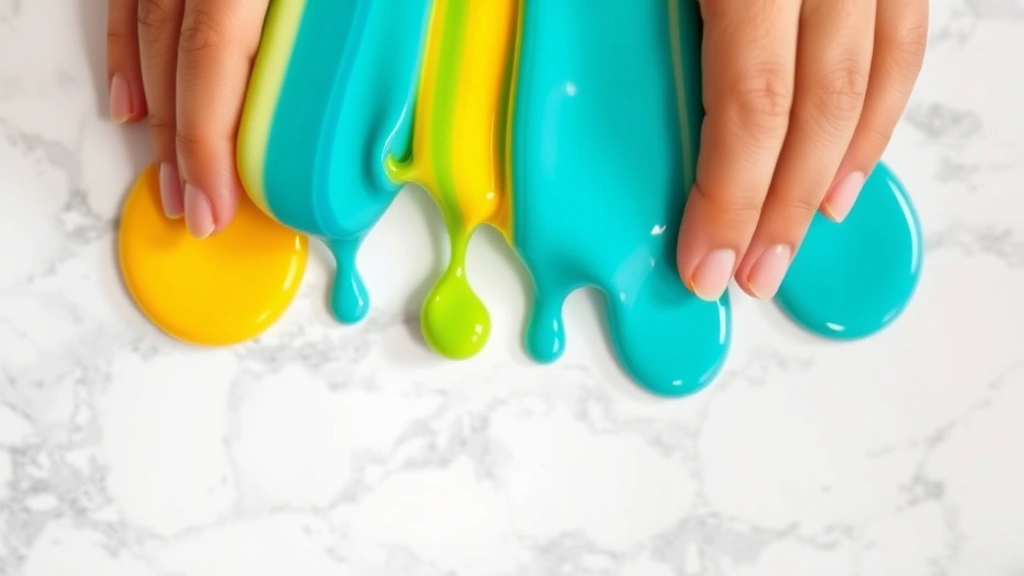
White school glue works beautifully, though clear glue creates a more translucent, glass-like effect if you prefer that aesthetic. Some kids love adding food coloring for vibrant hues, while others prefer keeping it classic white. Glitter, foam beads, and confetti all make fantastic add-ins that create unique sensory experiences.
For the activator, you have options depending on what you have at home. Contact lens solution with boric acid works wonderfully, as does borax powder mixed with water. Additionally, liquid starch can serve as an alternative activator if you’re looking for something different. Each option produces slightly different textures, so experimenting is half the fun.
The liquid starch method creates a firmer slime that holds its shape better, making it perfect for younger children who might get frustrated with overly stretchy varieties. Meanwhile, the borax method produces a stretchier, more satisfying slime for older kids who want maximum play value.
Step-by-Step Instructions for Success
Making slime doesn’t require a chemistry degree, but following the steps carefully does matter. Precision here isn’t about being rigid—it’s about understanding how these ingredients interact with each other to create something magical.
Start by measuring out your glue into a mixing bowl. Use a clear bowl if possible so you can watch the transformation happen. Pour in your chosen colorant and any mix-ins you want, stirring thoroughly until the color is completely distributed. This might take a minute or two, but patience here pays off with an evenly colored final product.
Next comes the moment everyone waits for—adding the activator. Pour it in slowly while stirring continuously. You’ll notice the mixture immediately beginning to thicken and pull away from the sides of the bowl. This is the polymer chain reaction happening right before your eyes. Keep stirring even after it seems fully mixed, as continued stirring develops the slime’s texture and elasticity.
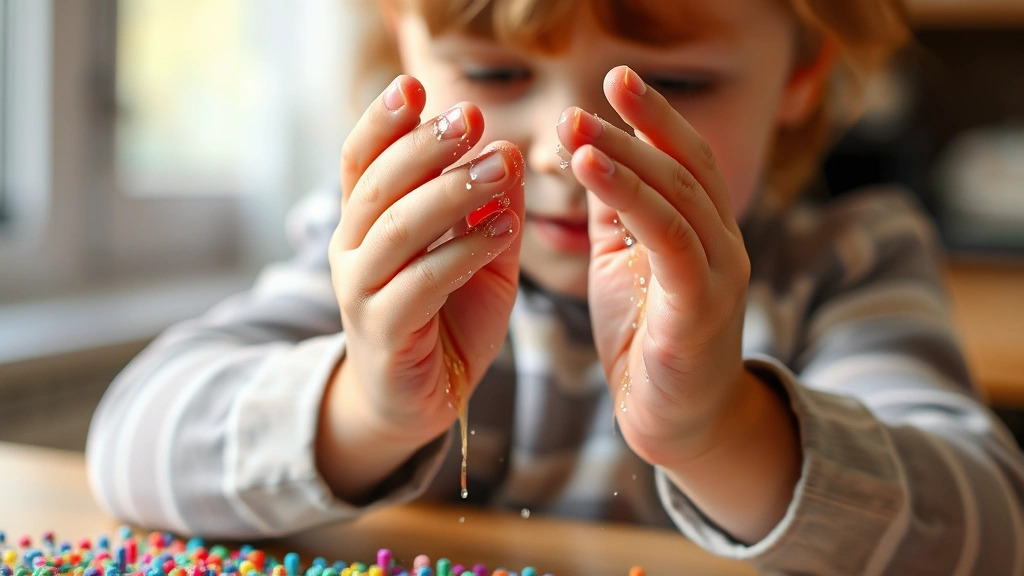
Once the slime becomes difficult to stir, it’s time to get your hands involved. Knead it with your fingers for another minute or two until it reaches your desired consistency. If it seems too sticky, add a tiny bit more activator. If it’s too stiff, work in a small amount of lotion or a few drops of the glue to soften it. This hands-on part is where kids really connect with the science happening.
Storage & Care Instructions
Proper storage extends your slime’s lifespan significantly. An airtight container keeps slime fresh and playable for weeks, sometimes months depending on the exact recipe. Glass jars with secure lids work wonderfully, as do plastic containers with snap-on covers.
Store slime away from direct sunlight and extreme temperatures. A cool, dry place like a closet shelf or pantry keeps it in optimal condition. However, don’t refrigerate slime—the cold can alter its texture and make it less enjoyable to play with. If slime does dry out over time, a few drops of lotion worked in with your fingers can often restore it to playable condition.
Between play sessions, encourage kids to wash their hands thoroughly. While this slime recipe is non-toxic and safe, it’s still a good practice for hygiene. Additionally, keep slime away from carpets and fabrics, as removal can be challenging. A designated play surface like a table or tile floor makes cleanup infinitely easier.
Creative Variations to Explore
Once you’ve mastered the basic recipe, the possibilities for customization become endless. Fluffy slime incorporates shaving cream for a cloud-like texture that’s incredibly satisfying to squish. Glitter slime adds sparkle and visual interest, making it perfect for kids who love shimmer and shine.
Clear slime allows you to embed small objects—beads, sequins, or tiny figurines—creating an almost magical appearance. Metallic slime uses special pigments to create a shimmering, otherworldly effect. For sensory seekers, adding foam beads creates a crunchy texture that provides wonderful tactile feedback during play.
Experiment with different colors and combinations to create themed slimes. Galaxy slime with multiple colors swirled together looks absolutely stunning. Glow-in-the-dark slime adds an element of mystery and wonder, especially fun for evening playtime.
Safety & Best Practices
While this recipe is designed to be safe and kid-friendly, supervision remains important, especially for younger children. Keep slime away from eyes and open cuts. Although it’s non-toxic, ingesting slime isn’t recommended, so monitor very young kids who still explore the world by mouth.
Always use fresh ingredients and clean supplies. Wash hands thoroughly after play sessions. If anyone develops an allergic reaction or skin irritation, rinse immediately with water and discontinue use. Most kids can play with slime without any issues whatsoever, but individual sensitivities vary.
When you’re ready to dispose of slime, throw it in the trash rather than down the drain. While it won’t harm plumbing systems, it’s better to err on the side of caution. Some slime can be composted depending on the exact ingredients used, so check your local composting guidelines if you prefer that route.
This best slime recipe has delighted countless kids and sparked joy in homes everywhere. The combination of instant gratification, scientific learning, and pure sensory fun makes it a winner every single time. Whether you’re making it for entertainment, education, or just because it’s fun, you’re about to create something truly special. Grab your ingredients, gather your helpers, and prepare for some serious slime-making magic!
Ingredients
- 4 ounces white school glue (or clear glue for transparent slime)
- ½ teaspoon baking soda
- 1-2 tablespoons contact lens solution (must contain boric acid as an active ingredient)
- Food coloring (optional, 1-3 drops depending on desired intensity)
- Glitter, foam beads, or confetti (optional add-ins)
- Lotion (optional, for texture adjustment)
- Mixing bowl (clear preferred)
- Mixing spoon or spatula
- Measuring spoons and cups
Instructions
- Pour 4 ounces of white school glue into your mixing bowl, making sure to measure accurately for best results.
- Add your chosen food coloring (if using) and stir thoroughly until the color is completely distributed throughout the glue.
- Add any optional mix-ins like glitter or foam beads and stir until evenly dispersed throughout the colored glue.
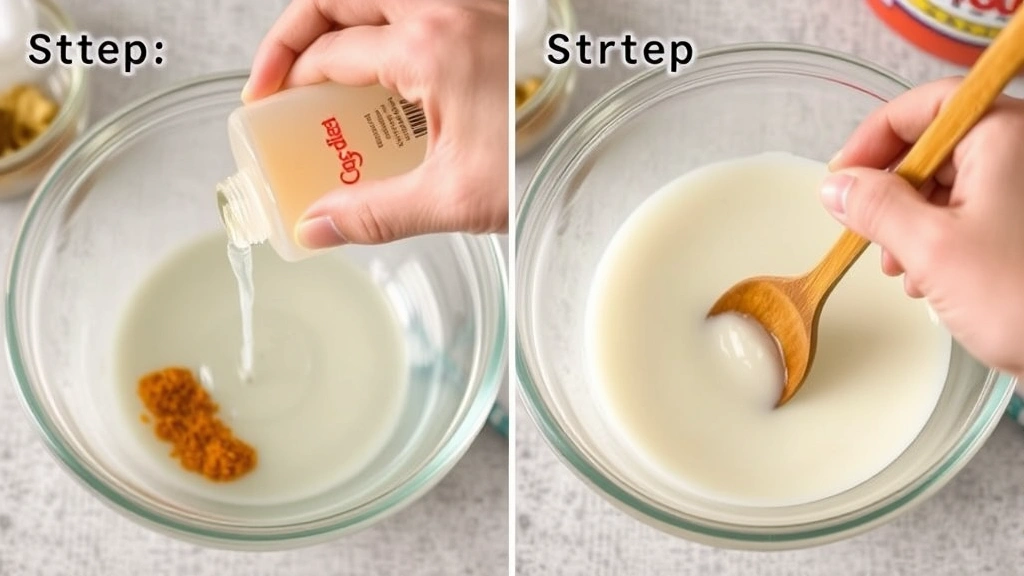
- In a separate small container, mix ½ teaspoon of baking soda with 1 tablespoon of contact lens solution and stir well to combine.
- Pour the contact lens solution mixture into the glue bowl while stirring continuously with your spoon.
- Continue stirring vigorously as the mixture begins to thicken and pull away from the sides of the bowl—this happens almost immediately.
- Once the slime becomes too thick to stir easily, transfer it to your hands and knead it for 1-2 minutes until it reaches your desired consistency.
- If the slime feels too sticky, add a few more drops of contact lens solution and knead again. If it’s too stiff, work in a small amount of lotion or glue.
- Your slime is now ready to play with! Store in an airtight container between play sessions.
- Wash hands thoroughly after playing with slime.
Pro Tips
This recipe creates slime with the perfect balance of stretch and hold. The baking soda helps stabilize the mixture, preventing it from becoming too sticky or too runny. Most kids find this texture incredibly satisfying to play with for extended periods.
Contact lens solution is the secret ingredient here, as it contains boric acid which activates the polymer chains in the glue. However, not all contact lens solutions work—you need one that specifically lists boric acid as an active ingredient. Check the bottle before purchasing to ensure success.
Food coloring provides vibrant hues, though you can absolutely skip it for classic white slime. Additionally, you might consider using gel food coloring instead of liquid, as it produces even more vivid colors. Acrylic paint also works well if you have it on hand, though it requires thorough mixing to avoid streaks.
The texture of your finished slime depends on several factors. More contact lens solution creates firmer slime, while less creates a stretchier version. Experiment to find your preferred consistency. Meanwhile, adding lotion creates a softer, more moldable slime that’s easier for small hands to manipulate.
If you’re making slime for a group, this recipe scales beautifully. Simply double or triple the ingredients while maintaining the same ratios. Making it in batches ensures everyone gets fresh slime and learns the process themselves. For storage, airtight containers keep slime fresh for 2-4 weeks, sometimes longer depending on humidity levels in your home.
Troubleshooting tip: If your slime turns out too sticky, you likely used too much glue or not enough activator. Add contact lens solution one drop at a time and knead thoroughly. If it’s too stiff and brittle, you probably used too much activator. Work in a small amount of glue or lotion to restore the perfect consistency.