

A bread and butter pickle recipe is the ultimate gateway into homemade pickling—crispy, tangy, and perfectly sweet all at once. These classic pickles have been a beloved condiment for generations, gracing picnic tables and burger plates with their signature golden-yellow hue and irresistible crunch. What makes them so special is their perfect balance of flavors: the brightness of vinegar, the subtle sweetness of sugar, and those warm spice notes that make you reach for just one more slice.
I grew up watching my grandmother make these every summer, and honestly, I thought the process was way more complicated than it actually is. The truth? Making homemade bread and butter pickles is remarkably simple, requiring just basic kitchen equipment and ingredients you probably already have on hand. Once you taste a freshly made batch, you’ll never want the store-bought version again—the difference is truly night and day.
Jump To Section
What I love most about this recipe is how versatile it is. These pickles aren’t just for snacking straight from the jar (though that’s absolutely valid). They’re incredible on grilled burgers, tucked into paninis, or even chopped up and mixed into tuna salad. They add a bright, punchy element to almost any meal, and they make fantastic homemade gifts that people actually love receiving.
Why This Recipe Works
The secret to exceptional bread and butter pickles lies in the pickling brine ratio. I use a 1:1 ratio of vinegar to sugar, which creates that signature sweet-tangy flavor without being cloyingly sugary. The key is using white vinegar for clarity and brightness—it won’t overpower the delicate cucumber flavor like some other vinegars might.
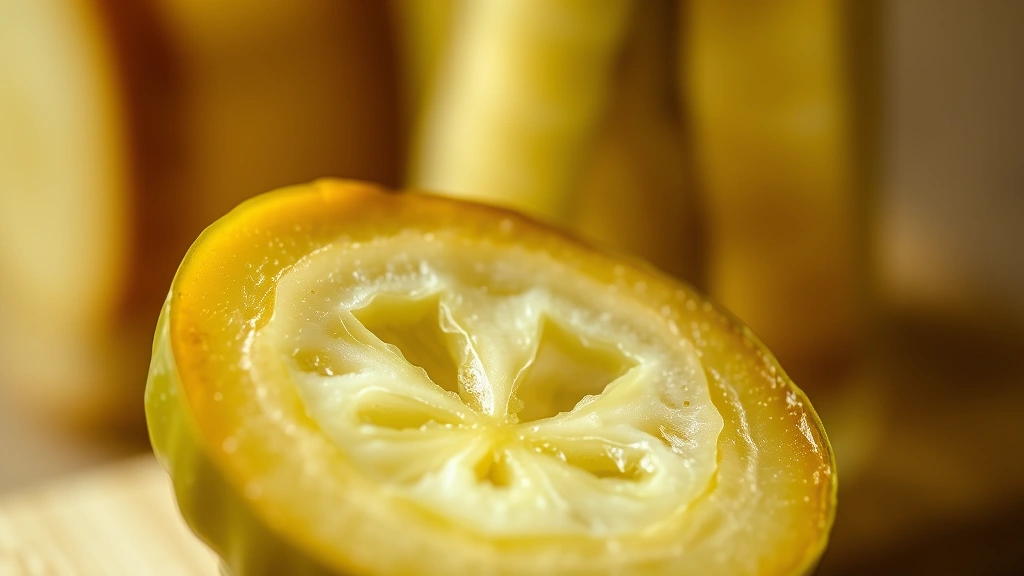
Additionally, the timing matters tremendously. I slice the cucumbers thin (about ¼ inch) so they can absorb all those gorgeous flavors quickly. Thicker slices take longer to pickle and sometimes end up soft in the middle while the outside gets too briny. The thin-slice approach ensures even, consistent pickling throughout the batch.
Meanwhile, don’t skip the ice bath step. Soaking the sliced cucumbers in ice water for a couple of hours before pickling helps maintain their crisp texture. This simple trick is what separates a truly excellent pickle from a mushy disappointment. The cold water firms up the cucumber cells, creating that satisfying crunch when you bite down.
Ingredient Tips & Substitutions
Fresh cucumbers are absolutely essential—you’ll want to use pickling varieties rather than regular slicing cucumbers. Pickling cucumbers (sometimes labeled Kirby cucumbers) have thinner skins, fewer seeds, and a naturally firmer texture that holds up beautifully to the brining process. If you can only find regular cucumbers, they’ll still work, but expect a slightly softer final product.
The onions I use are sweet yellow onions, sliced thin to match the cucumber slices. However, you can absolutely experiment here. Red onions create a gorgeous pink-hued pickle and offer a bit more bite. White onions work too if you prefer something milder. The onions soften slightly during pickling while maintaining their sweetness—they’re honestly the unsung hero of this recipe.
For the spices, I stick with the classic combination: mustard seeds, turmeric, and celery seeds. These are non-negotiable for authentic bread and butter pickles. However, here’s where you can make this recipe your own: add a pinch of red pepper flakes for heat, throw in some fresh dill if you love that flavor, or experiment with coriander seeds for extra warmth. The base recipe is forgiving—it welcomes your creative touches.
One ingredient worth mentioning is salt. I use pickling salt (also called canning salt) rather than table salt because it doesn’t contain anti-caking agents that can make the brine cloudy. If you only have table salt, use slightly less since it’s more densely packed than pickling salt. The salt draws moisture out of the cucumbers initially and helps preserve them—it’s doing important work in this recipe.
The Pickling Process Made Simple
Start by preparing your cucumbers the day before if possible. Wash them thoroughly, trim off the blossom end (which contains enzymes that can make pickles soft), and slice them into ¼-inch rounds. Layer them in a bowl with the sliced onions and salt, then refrigerate in an ice bath. This step is absolutely worth the planning ahead—your pickles will be noticeably crunchier.
The next day, prepare your pickling brine by combining vinegar, sugar, and water in a saucepan. Bring it to a boil, then add your spices and let them bloom in the hot liquid for a few minutes. This releases their essential oils and infuses the brine with deep, complex flavor. The house smells absolutely incredible at this point—you’ll understand why people get excited about homemade pickles.
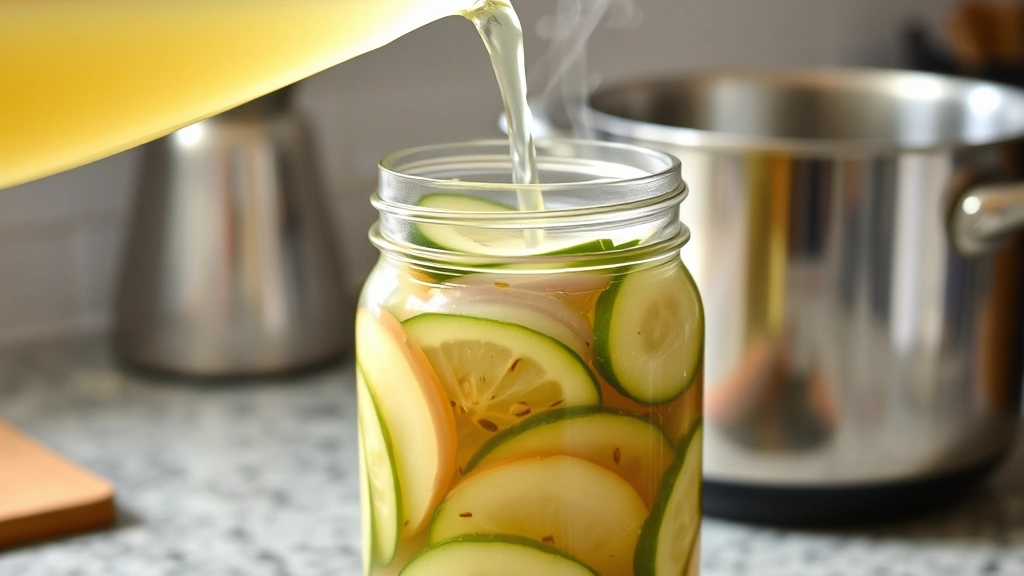
Drain your prepared cucumbers and onions well, then pack them into clean jars. Pour the hot brine over them, filling jars to about ½ inch from the top. If you’re doing a water bath canning process for long-term storage, seal immediately and process. For refrigerator pickles (which is my preferred method), just pop the lids on and refrigerate. They’re ready to eat in about 24 hours, but they continue improving for a few days as flavors meld.
Serving Suggestions
The most obvious way to enjoy these is straight from the jar as a snack or condiment—they’re incredibly satisfying when you need something crunchy and tangy. But let me share some of my favorite ways to use them. They’re phenomenal on hot dogs, hamburgers, and any sandwich that needs a brightness boost.
Try chopping them up and mixing into cream cheese for an instant appetizer spread. They add incredible flavor to a relish tray, and they’re beautiful enough to serve at gatherings. I also love adding them to salads—their tartness cuts through rich dressings beautifully. For something unexpected, try them alongside charcuterie boards or cheese platters.
If you’re feeling adventurous, use the leftover brine (called pickle juice) in cocktails, salad dressings, or even as a marinade for chicken. Nothing goes to waste with homemade pickles—that flavorful liquid is pure gold in the kitchen.
Storage & Make-Ahead Tips
Refrigerator pickles will keep for about 2-3 months when stored in clean, sealed jars in your fridge. The flavor actually intensifies over time, so don’t feel rushed to eat them immediately. If you prefer shelf-stable pickles, you can water bath can them—just follow proper canning procedures to ensure safety and longevity.
For gift-giving, fill small jars with pickles and brine, tie a pretty ribbon around the lid, and include a handwritten label with the date and any special notes. These make thoughtful, delicious gifts that show you’ve put genuine effort into something homemade. People always appreciate receiving something you’ve made yourself, especially something this delicious.
You can also make extra batches and store them in the refrigerator for up to three months. This is my strategy during cucumber season—I make several batches at once so I have pickles on hand throughout the cooler months. It’s such a satisfying way to preserve summer flavors into fall and winter.
Want to explore more pickle variations? Check out this fantastic pickle soup recipe for a unique way to use your homemade pickles, or try pairing them with spicy cucumber salad for a refreshing summer meal. You might also love exploring Mexican cucumber salad for a different take on pickling. Each recipe brings its own special character to the table.
This bread and butter pickle recipe is your foundation for pickling success. Once you master this classic version, you’ll feel confident experimenting with variations—hot pickles, herb-infused versions, or even spicy dill pickles. The pickling process is your canvas, and these simple ingredients are your paint. Happy pickling!
Ingredients
- 4 pounds pickling cucumbers, sliced ¼ inch thick
- 2 large yellow onions, sliced thin
- 3 tablespoons pickling salt
- 2 cups white vinegar
- 2 cups sugar
- 1 cup water
- 1 tablespoon mustard seeds
- 1 teaspoon turmeric
- 1 teaspoon celery seeds
- ½ teaspoon black peppercorns
- 2 bay leaves
- 4 cloves garlic, sliced (optional)
Instructions
- Wash cucumbers thoroughly and trim the blossom end. Slice cucumbers into ¼-inch rounds and place in a large bowl with sliced onions.
- Sprinkle pickling salt evenly over cucumbers and onions, then toss gently to combine. Cover the bowl with plastic wrap.
- Fill the bowl with ice or place it in the refrigerator for 2-4 hours (or overnight). This ice bath firms up the cucumber cells and creates that signature crunch.
- In a large saucepan, combine vinegar, sugar, and water. Bring to a boil over medium-high heat, stirring occasionally until sugar dissolves completely.
- Add mustard seeds, turmeric, celery seeds, peppercorns, bay leaves, and garlic (if using) to the boiling brine. Reduce heat and simmer for 2-3 minutes to bloom the spices.
- Drain the cucumbers and onions thoroughly in a colander, discarding the accumulated liquid. Pat dry with paper towels if desired.
- Pack the drained cucumbers and onions into clean jars, distributing them evenly. Leave about ½ inch of headspace at the top.
- Carefully pour the hot pickling brine over the cucumbers, ensuring they’re completely covered. Fill jars to ½ inch from the rim.
- For refrigerator pickles: Place lids on jars and refrigerate immediately. For shelf-stable pickles: Wipe jar rims clean, seal with lids and bands, and process in a water bath canner for 10 minutes.
- Allow pickles to cool to room temperature before moving or opening (if water bath canned). Refrigerator pickles are ready to enjoy after 24 hours, but flavor improves over several days.
Pro Tips
The ice bath step is absolutely crucial for crispy pickles. Don’t skip it, even though it adds time to the process. The cold temperature firms up the cucumber cells and prevents them from becoming mushy during pickling. This simple step is what separates excellent homemade pickles from disappointing ones.
For thinner slices that pickle faster, consider using a mandoline slicer. Just be careful with your fingers—those blades are incredibly sharp. Alternatively, a sharp knife and a steady hand work perfectly fine. The goal is consistency; uniform thickness ensures even pickling throughout.
If you prefer sweeter pickles, increase the sugar to 2½ cups. For tangier pickles, reduce the sugar to 1½ cups and add an extra ½ cup of vinegar. This recipe is flexible enough to accommodate your personal taste preferences without sacrificing texture or quality.
Storage is simple: refrigerator pickles keep for 2-3 months in sealed jars in your fridge. The flavor actually deepens over time, so don’t rush to eat them all at once. If you prefer shelf-stable pickles for long-term storage, follow proper water bath canning procedures. Always check your jars for proper sealing before storing at room temperature.
The leftover brine is liquid gold. Use it in salad dressings, cocktails, marinades, or even as a brining liquid for chicken. This zero-waste approach maximizes value from your pickling project. Many people save the brine and reuse it once, though fresh brine creates the best-flavored pickles.
Pickling cucumbers are essential for best results. These smaller varieties have thinner skins, fewer seeds, and firmer flesh than regular slicing cucumbers. If you grow your own cucumbers, pick them when they’re 4-6 inches long for ideal pickling texture. Store-bought pickling cucumbers are available year-round at most grocery stores.
Make-ahead tip: You can prepare the cucumber-onion mixture the day before and refrigerate it in the ice bath. This actually improves the final texture. Just prepare your brine fresh on pickling day, heat it, and pour it over the drained vegetables. This approach breaks the recipe into manageable steps if you’re short on time.