
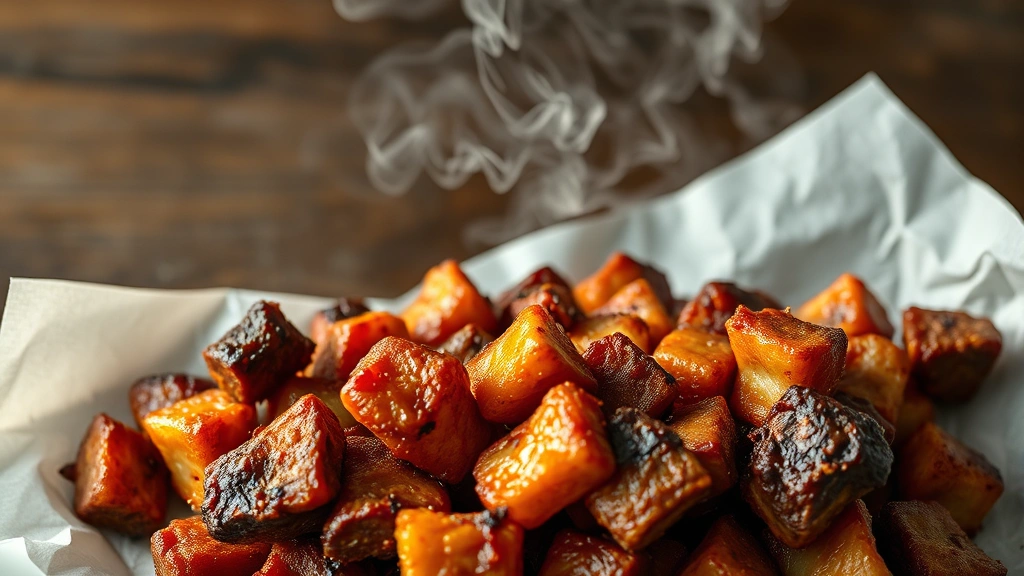
A burnt ends recipe is the ultimate celebration of barbecue’s most addictive, caramelized treasures. These sticky, smoky, utterly irresistible bites are cut from the point of a beef brisket and transformed through low-and-slow smoking into jammy, bark-covered nuggets of pure barbecue bliss.
I still remember the first time I tasted authentic burnt ends at a Kansas City barbecue joint. The moment that crispy-edged, tender-centered morsel hit my tongue, I was completely hooked. The combination of smoky beef, sweet glaze, and caramelized edges felt like a flavor explosion—and honestly, it changed how I thought about smoking meat forever.
Jump To Section
Burnt ends have become the crown jewel of any serious pitmaster’s repertoire. What makes them so special? They’re the ultimate lesson in patience and precision. You’ll start with a beautiful beef brisket point, smoke it low and slow, then cube it up and finish it with a sticky barbecue glaze that caramelizes into glossy, charred perfection. The result? Meat that’s tender enough to melt on your tongue while delivering intense smoky flavor in every single bite.
Why This Recipe Works
The magic of a burnt ends recipe lies in using the brisket point instead of the flat. The point has more marbling and fat, which means it stays incredibly juicy throughout the smoking process. This fatty content is your secret weapon for achieving that tender, pull-apart texture that makes burnt ends so crave-worthy.
The two-stage cooking method is absolutely essential. First, you smoke the whole point unwrapped until it develops a beautiful bark and reaches the right tenderness. Then, you cube it, toss it with your glaze, and finish it in a foil packet. This final stage is where the magic happens—the glaze caramelizes, the edges crisp up, and you get those signature burnt, sticky edges that give the dish its name.
Temperature control matters tremendously here. Smoking at 225-250°F gives the smoke time to penetrate the meat while allowing the fat to render slowly. Additionally, wrapping the brisket point in foil during the glaze phase traps steam and heat, helping the meat become incredibly tender while the glaze sets beautifully.
Ingredient Tips & Substitutions
Your choice of wood makes a real difference in the final flavor profile. Hickory delivers a strong, classic barbecue taste, while oak provides a milder smoke. For something special, try mixing oak with a bit of cherry wood for subtle sweetness. However, avoid softwoods like pine or cedar, which can impart unpleasant flavors.
The barbecue sauce is where you can really make this recipe your own. Store-bought options work perfectly fine if you’re short on time—just choose one you genuinely love. For homemade versions, brown sugar creates that deep caramel sweetness, while a splash of apple cider vinegar adds brightness. You might also consider pairing burnt ends with your favorite smashburger sauce recipe for a unique twist.
When it comes to the beef rub, you really can’t go wrong with the classics. A simple blend of salt, pepper, paprika, garlic powder, and brown sugar works beautifully. Meanwhile, if you prefer something with more complexity, add cumin, chili powder, and cayenne for depth. The rub should be generous—don’t be shy about coating every surface of that brisket point.
Serving Suggestions
Burnt ends are genuinely versatile, which is part of their charm. Serve them on their own as an appetizer or main course, piled high on butcher paper for that authentic barbecue experience. They’re perfect for feeding a crowd at backyard gatherings, tailgates, or casual weeknight dinners.
For a more complete meal, pair burnt ends with traditional barbecue sides. Creamy coleslaw provides a cool, refreshing contrast to the rich, smoky meat. A simple baked bean dish or cornbread complements the flavors beautifully. For something different, try serving them alongside your favorite slow cooker mac and cheese recipe for an unforgettable comfort food combination.
Don’t overlook burnt ends as a sandwich topping either. Pile them on a soft brioche bun with a drizzle of sauce, and you’ve got a sandwich that’ll rival any barbecue joint in town. Additionally, they make an impressive addition to loaded nachos, grain bowls, or even tacos for something completely unexpected.
Smoking Techniques & Pro Tips
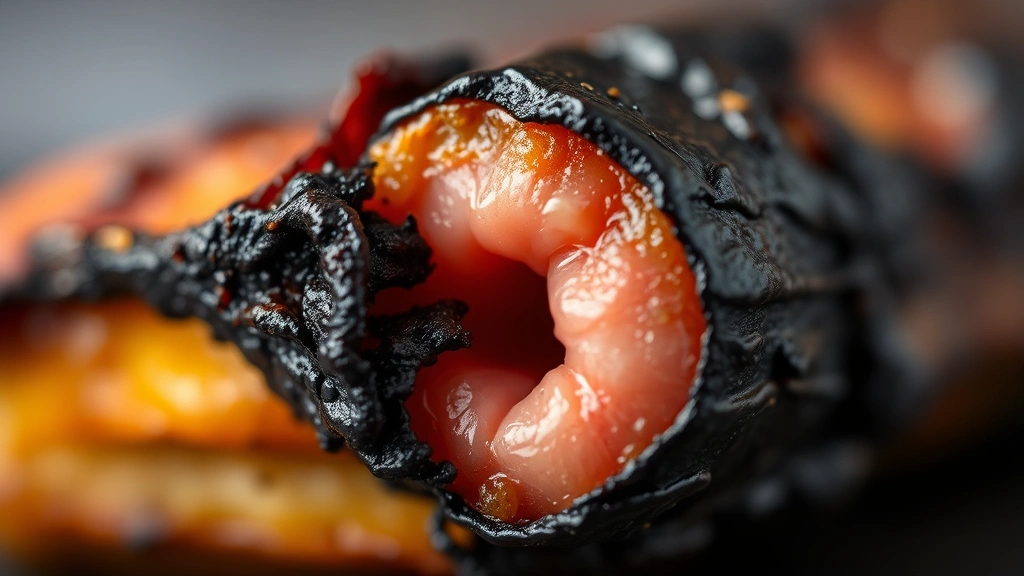
Getting the bark right is crucial for authentic burnt ends. The bark develops when the dry rub and smoke create a flavorful crust on the meat’s exterior. To encourage this, keep your smoker at a consistent temperature and resist the urge to open the lid too often. Every time you peek, you’re letting heat and smoke escape.
The “spritz” technique is a game-changer here. Every 45 minutes or so, spray the brisket with a mixture of apple juice and a bit of apple cider vinegar. This keeps the surface moist, helps the bark develop evenly, and adds subtle flavor. It’s a small step that delivers big results.
When you reach the glaze phase, don’t rush it. The cubed meat needs time for that sticky sauce to caramelize and create those signature crispy-edged, caramelized edges. About 45 minutes to an hour wrapped in foil at the same smoking temperature is typically perfect. For instance, you’ll know they’re ready when the sauce has reduced and the meat has a gorgeous sheen.
Storage & Reheating
Burnt ends actually keep remarkably well, which makes them fantastic for meal prep or leftovers. Store them in an airtight container in the refrigerator for up to four days. The flavors even deepen slightly as they sit, making day-two burnt ends absolutely delicious.
Reheating is simple and straightforward. Low and slow is your friend here—just like the original cooking method. Warm them gently in a 300°F oven for about 15-20 minutes, covered with foil to prevent drying out. Alternatively, you can reheat them in a slow cooker on low for 1-2 hours. However, avoid microwaving if possible, as it can make the meat tough and the sauce separate.
For longer storage, burnt ends freeze beautifully for up to three months. Let them cool completely, then transfer to a freezer-safe container or bag. When you’re ready to enjoy them, thaw overnight in the refrigerator and reheat using the oven method. This makes burnt ends perfect for planning ahead or enjoying whenever the craving strikes.
This burnt ends recipe has become my go-to whenever I want to impress people with serious barbecue credentials. The combination of technique, patience, and perfectly chosen ingredients creates something truly special. Whether you’re a seasoned pitmaster or a barbecue enthusiast just starting out, this guide will help you create burnt ends that rival the best in the business. For more inspiration on complementary dishes, check out recipes like best Lipton onion soup meatloaf recipe, best old fashioned beef and noodles, vegetable beef soup recipe, and best Mexican soup recipe for complete meal planning. Once you nail this technique, you’ll be making burnt ends regularly—trust me on that one.
For deeper inspiration and techniques, check out Serious Eats barbecue guides, Bon Appétit’s smoking methods, and New York Times cooking techniques for additional barbecue wisdom and inspiration.
Ingredients
- 1 beef brisket point (5-7 pounds)
- 3 tablespoons kosher salt
- 2 tablespoons freshly ground black pepper
- 2 tablespoons paprika
- 1 tablespoon garlic powder
- 1 tablespoon onion powder
- 2 tablespoons brown sugar
- 1 teaspoon cayenne pepper
- 2 cups apple juice
- 2 tablespoons apple cider vinegar
- 2 cups barbecue sauce (store-bought or homemade)
- 3 tablespoons brown sugar (for glaze)
- 2 tablespoons butter
- 1 teaspoon Worcestershire sauce
- Wood chips for smoking (hickory, oak, or cherry)

Instructions
- Prepare your smoker by bringing it to 225-250°F. Fill the water pan and add your choice of wood chips to create steady smoke throughout cooking.
- Pat the brisket point completely dry with paper towels. This helps the rub adhere properly and encourages bark development.
- In a small bowl, combine kosher salt, black pepper, paprika, garlic powder, onion powder, brown sugar, and cayenne pepper to create your dry rub.
- Apply the dry rub generously to all sides of the brisket point, working it into the meat and making sure every surface is well-coated.
- Place the rubbed brisket point directly on the smoker grates, fat-side up. Insert a meat thermometer into the thickest part without touching bone.
- Smoke the brisket for approximately 4-5 hours until the internal temperature reaches 190-200°F and the bark is dark and crusty.
- Every 45 minutes during smoking, spritz the brisket with a mixture of apple juice and apple cider vinegar to keep the surface moist and encourage even bark development.
- Once the brisket reaches the desired temperature and tenderness, remove it from the smoker and let it rest for 10-15 minutes.
- Using a sharp knife, cut the rested brisket into roughly 1-inch cubes, including all the flavorful bark and fat.
- In a saucepan, combine barbecue sauce, brown sugar, butter, and Worcestershire sauce over medium heat, stirring until the butter melts and the glaze is smooth.
- In a large bowl, toss the brisket cubes with the warm glaze until every piece is well-coated.
- Line a disposable aluminum pan with foil and transfer the glazed brisket cubes into it, spreading them in an even layer.
- Place the foil-lined pan back on the smoker at 225-250°F for 45 minutes to 1 hour, allowing the glaze to caramelize and the edges to become sticky and charred.
- Remove from the smoker when the glaze has reduced and the meat has a gorgeous, glossy appearance with caramelized edges.
- Transfer the burnt ends to a serving platter or piece of butcher paper and serve immediately while still warm.
Pro Tips
The brisket point is absolutely essential for this recipe. Unlike the flat, which is leaner, the point has beautiful marbling that keeps the meat incredibly moist throughout the long smoking process. This fat content is what transforms the burnt ends into those jammy, tender morsels everyone craves.
Temperature consistency matters more than you might think. Invest in a reliable smoker thermometer if you don’t already have one. Meanwhile, opening the smoker door frequently drops the temperature and extends cooking time, so try to minimize peeking. The spritz technique is your way of keeping tabs on progress without losing too much heat.
Don’t skip the resting period after the initial smoke. This allows the juices to redistribute throughout the meat, ensuring maximum tenderness when you cube everything up. Additionally, a well-rested brisket is much easier to cut into clean cubes without crumbling.
For the glaze phase, you can absolutely customize the sauce to match your preferences. If you prefer something spicier, add hot sauce or extra cayenne. For sweeter burnt ends, increase the brown sugar. However, remember that the glaze will concentrate as it caramelizes, so taste before adjusting.
The final wrapping step is crucial. Foil traps heat and steam, which helps the glaze reduce while keeping the meat tender. For instance, without this step, the edges might dry out before the glaze fully caramelizes. You’ll achieve the perfect balance of sticky, charred exterior with a tender, juicy interior.
Cleanup is easier if you line your pan with foil before adding the glazed meat. This simple step saves significant time afterward and makes serving directly from the pan more convenient. Additionally, any leftover glaze can be refrigerated and used for other barbecued meats or as a dipping sauce.