
This chex mix recipe oven method is hands-down the easiest way to make this beloved party snack at home. I’m talking perfectly crispy, evenly toasted, and absolutely addictive—no stovetop stirring required. Once you master this simple technique, you’ll never buy pre-made chex mix again.
There’s something magical about homemade chex mix that the store-bought versions just can’t replicate. The aroma alone as it toasts in your oven will have everyone asking what you’re making. Plus, you control every single ingredient, which means you can skip the artificial flavors and excessive salt if you want to.
Jump To Section
I’ve been making this recipe for years, and it’s become my go-to snack for parties, game nights, and even just because. My kids have literally begged me to make it for their school functions. The best part? It’s ridiculously simple, and you probably have most of the ingredients in your pantry right now.
Why This Recipe Works
The oven method is superior to stovetop versions because heat distributes evenly throughout the mixture. You’re not standing over a hot stove constantly stirring to prevent burning—the oven does the heavy lifting for you. This means every piece gets toasted to golden, crispy perfection without any burnt edges.
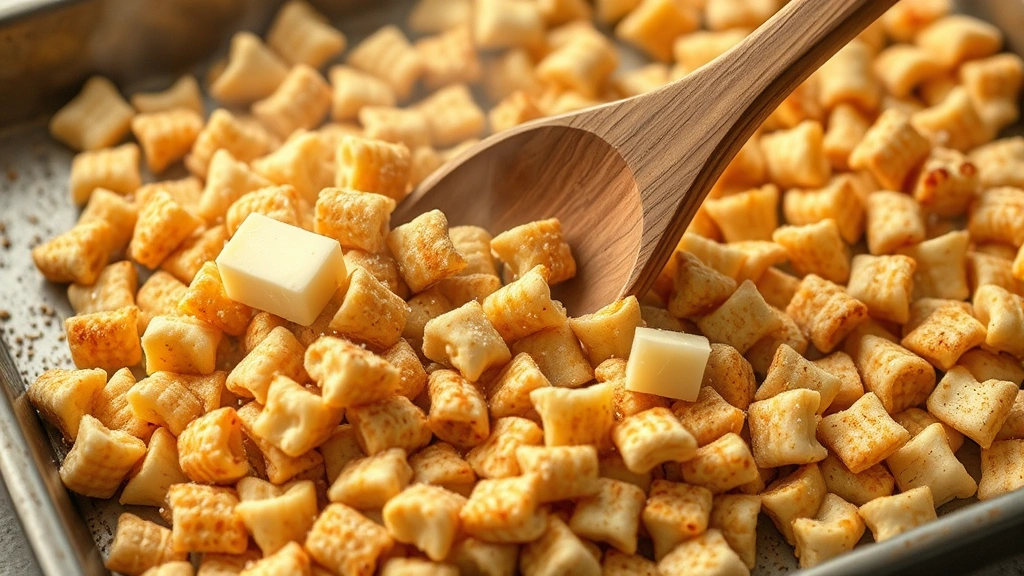
The butter and Worcestershire sauce combination creates an incredibly savory coating that clings to every cereal piece. Additionally, the low-and-slow baking approach allows the flavors to meld beautifully. Meanwhile, the nuts and mix-ins get a chance to toast and develop their own deeper flavors.
Spreading the mixture on a large baking sheet in a single layer is the secret weapon here. This prevents overcrowding and ensures air can circulate all around each piece. The result? Crispy, not chewy—exactly what you want in a party snack.
Ingredient Tips & Substitutions
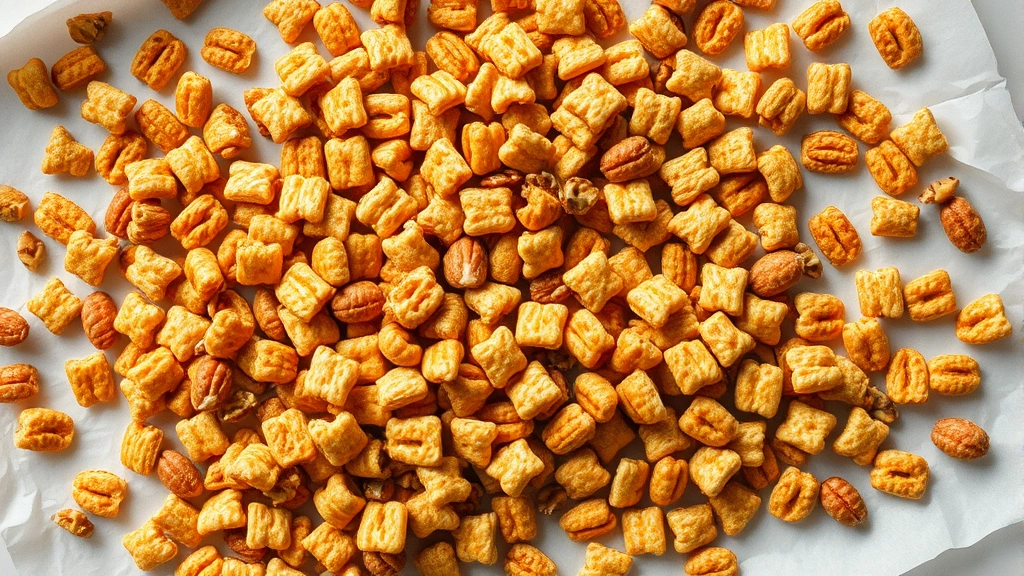
Start with three cups of cereal—the classic combination is equal parts Rice Chex, Wheat Chex, and Corn Chex. However, you can absolutely customize this based on what you love. Some folks prefer all Rice Chex for extra crunch, while others mix in Cinnamon Toast Crunch for a sweet twist.
The nuts are where you can get creative. Cashews, almonds, and pecans all work beautifully. For instance, I sometimes use a combination of roasted peanuts and cashews for a more gourmet feel. Just make sure they’re unsalted so you can control the salt level yourself.
Worcestershire sauce is non-negotiable in my opinion—it’s the ingredient that makes this snack taste restaurant-quality. If you’re vegetarian, there are plant-based versions available that work wonderfully. The melted butter carries all these flavors and helps everything toast evenly in the oven.
Don’t skip the seasoning salt and garlic powder combination. These simple ingredients create that addictive savory flavor profile everyone loves. For extra heat, a pinch of cayenne pepper adds sophistication without overwhelming the snack.
Serving Suggestions
This chex mix recipe oven version is perfect for literally any occasion. Serve it at parties in a large decorative bowl, or portion it into small bags for a homemade gift. It pairs beautifully alongside appetizers and light bites.
I love setting out bowls during game day—it’s way better than chips and provides that satisfying crunch without the grease. Additionally, it’s impressive to serve at holiday gatherings because guests always assume you spent hours preparing it. The homemade factor makes such a difference in how special it feels.
Consider pairing it with cold beverages or serving alongside cheese and crackers for a more substantial snack board. It also makes an excellent addition to salad toppings if you want extra crunch and flavor.
Storage & Reheating
The beautiful thing about homemade chex mix is how well it keeps. Once completely cooled, store it in an airtight container at room temperature for up to two weeks. The longer it sits, the more the flavors develop and intensify—which honestly makes day-three even better than day-one.
If your chex mix ever loses its crispness (which happens in humid climates), simply spread it on a baking sheet and warm it in a 250°F oven for about five minutes. This refreshes the crunch without burning anything. Let it cool completely before storing again.
For gift-giving, use pretty mason jars or decorative tins lined with parchment paper. Include a little label with the ingredients if you’re giving it to someone with allergies. Homemade snacks make such thoughtful presents, and people genuinely appreciate the effort.
Pro Tips for Perfect Results
Always use fresh ingredients, especially the cereals and nuts. Stale cereal will never achieve that satisfying crunch, so check your pantry first. Similarly, nuts that have been sitting around for months won’t toast as beautifully—quality ingredients make a real difference here.
Measure your butter carefully. Too little and the mixture won’t coat evenly; too much and it becomes greasy. The three tablespoons in this recipe is the sweet spot for perfect coverage without excess oil. Likewise, the Worcestershire sauce should be measured precisely for optimal flavor.
Watch your oven during the last few minutes of baking. Every oven runs slightly differently, and you want to catch it right when it’s golden but before any browning happens. Set a timer for the full baking time, then check a minute or two early if you have a particularly hot oven.
Stir the mixture halfway through baking—this ensures even toasting and prevents any pieces from getting too dark on one side. Use a large spoon or spatula and be thorough. This simple step makes a huge difference in achieving consistent results throughout the entire batch.
Let the finished chex mix cool completely on the baking sheet before transferring to a storage container. This allows the coating to set and helps maintain crispness. If you move it while still warm, steam can make it chewy. Patience at this stage really pays off.
Looking for more party-friendly snacks? Check out this slow cooker pasta recipe or this spaghetti casserole recipe for heartier options. Both are crowd-pleasers that work beautifully for entertaining.
For more advanced snack inspiration, Serious Eats has excellent snack guides, and New York Times Cooking offers creative variations. Additionally, Bon Appétit frequently features party snack ideas that pair perfectly with homemade chex mix.
This chex mix recipe oven method has genuinely changed how I approach party planning. It’s simple, reliable, and produces results that everyone adores. Once you try making it this way, you’ll understand why it’s been a party staple for generations.
Ingredients
- 3 cups Rice Chex cereal
- 3 cups Wheat Chex cereal
- 3 cups Corn Chex cereal
- 2 cups roasted unsalted peanuts
- 2 cups raw cashews
- 3 tablespoons unsalted butter, melted
- 2 tablespoons Worcestershire sauce
- 1 tablespoon seasoning salt
- 1 tablespoon garlic powder
- 1/2 teaspoon onion powder
- 1/4 teaspoon cayenne pepper (optional)
- 1/4 teaspoon black pepper
Instructions
- Preheat your oven to 250°F. Line two large baking sheets with parchment paper for easy cleanup and even heat distribution.
- In a large mixing bowl, combine all three types of Chex cereal, roasted peanuts, and cashews. Toss gently to mix everything together.
- In a small bowl, whisk together the melted butter and Worcestershire sauce until well combined. This mixture will be your flavorful coating.
- Drizzle the butter-Worcestershire mixture over the cereal mixture, stirring constantly with a large spoon or spatula. Make sure every piece gets coated evenly—this step is crucial for consistent flavor throughout.
- In another small bowl, mix together the seasoning salt, garlic powder, onion powder, cayenne pepper (if using), and black pepper.
- Sprinkle the seasoning mixture over the coated cereal and nuts, stirring continuously until everything is thoroughly combined and evenly seasoned.
- Divide the mixture between your two prepared baking sheets, spreading it in a single layer. Avoid crowding—pieces need space for air to circulate around them.
- Place both baking sheets in the preheated 250°F oven. Bake for 45 minutes, stirring the mixture every 15 minutes to ensure even toasting and prevent burning.
- After 45 minutes, check the color—you’re looking for a light golden tone. If it needs more time, bake for an additional 10-15 minutes, stirring every 5 minutes.
- Once the chex mix reaches a beautiful golden color, remove it from the oven. Spread the hot mixture on clean paper towels or parchment paper to cool completely.
- Allow the chex mix to cool for at least 30 minutes before transferring to airtight containers. Cooling completely helps it achieve maximum crispness.
- Store in airtight containers at room temperature for up to two weeks. If it loses crispness, refresh it in a 250°F oven for 5 minutes.

Pro Tips
This homemade chex mix recipe oven version stays crispy for days when stored properly. The key is using completely airtight containers and allowing it to cool fully before storage. Moisture is the enemy of crunch, so avoid storing it in humid environments.
For a sweeter version, reduce the Worcestershire sauce to one tablespoon and add one-quarter cup of melted white chocolate after the snack cools. Drizzle it over and let it set before storing. Meanwhile, for a spicier kick, increase the cayenne to one-half teaspoon or add a pinch of smoked paprika.
If you prefer vegetarian chex mix, simply replace the Worcestershire sauce with soy sauce or tamari, which provides that same umami depth. The flavor profile changes slightly but remains absolutely delicious. Additionally, you can experiment with different nuts—walnuts, pecans, or almonds all work beautifully.
Some people add dried cranberries or raisins after the chex mix cools, but I recommend keeping them separate initially since they can soften. However, mixing them in just before serving gives you the best of both worlds—crispy base with chewy accents.
The oven temperature of 250°F is intentional—higher temperatures can cause burning before the inside toasts properly. This slower method ensures even cooking throughout. If you’re at high altitude, you may need to add 5-10 minutes to the baking time.
For batch cooking, this recipe doubles easily. Simply use two large bowls for mixing and plan on using all three oven racks if needed. Rotate the baking sheets halfway through cooking to ensure even results across all of them.
Make-ahead tip: You can prepare the dry ingredient mixture the night before, then add the butter and seasonings in the morning before baking. This is perfect for parties when you want fresh chex mix without last-minute stress.