
This chex mix recipe sweet is honestly the easiest snack you’ll ever make, and I promise your family will be asking for it constantly. With just five simple ingredients and about 15 minutes of your time, you’ll have a homemade treat that tastes infinitely better than anything from a box. It’s the kind of recipe that feels almost too simple to be true, but that’s exactly why it’s become my go-to for parties, game days, and those moments when you need something crunchy and satisfying.
I remember the first time my grandmother made sweet chex mix for our family gathering—the whole house smelled incredible, and within minutes, the bowl was completely empty. Since then, I’ve made it hundreds of times, tweaking it slightly each time until I landed on this perfect version. What makes this recipe special is the balance between sweetness and the satisfying crunch of the cereal. It’s not overly sugary or cloyingly sweet; it’s just right.
Jump To Section
Why This Recipe Works
The magic of a great sweet chex mix recipe lies in the coating technique. By melting butter with brown sugar and vanilla, you create a caramel-like mixture that clings perfectly to every piece of cereal. The key is keeping your oven temperature low and steady so the mixture toasts evenly without burning.
Additionally, the beauty of this snack is how customizable it is. You can add nuts, dried fruit, or chocolate chips depending on your preferences. However, the foundation of this recipe—the buttery, sweet coating—remains the star of the show. It’s crispy, it’s addictive, and honestly, it’s impossible to eat just one handful.
Meanwhile, the storage is incredibly convenient. Once cooled completely, this snack keeps in an airtight container for up to a week, making it perfect for meal prep or gift-giving. For instance, I always double this recipe during the holiday season to have on hand for unexpected guests.
Ingredient Tips & Substitutions
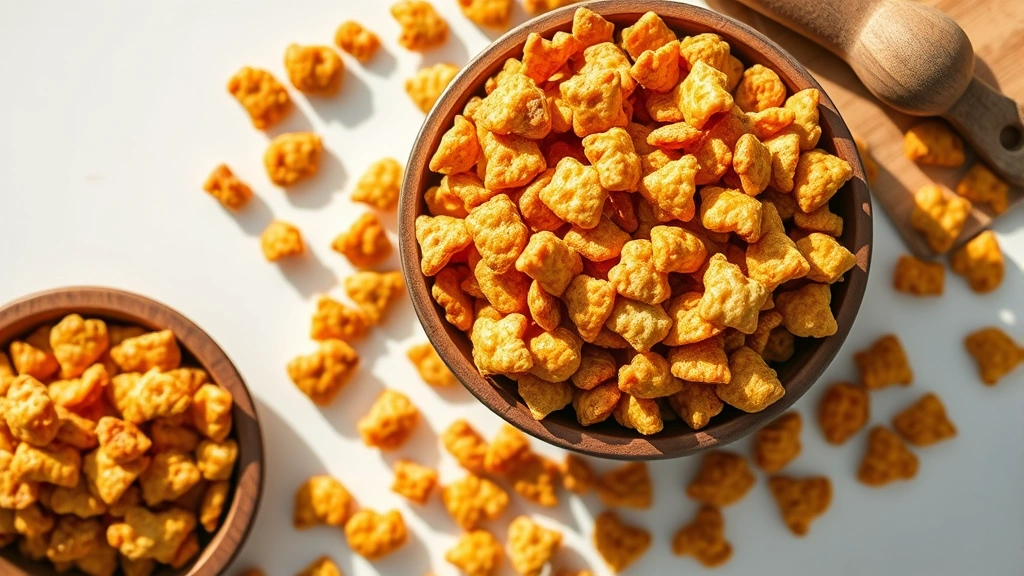
For this recipe, you’ll want to use traditional square Chex cereal—either the classic corn variety or rice Chex work beautifully. The size and shape matter because they hold the coating perfectly and stay crispy longer than flakes would. If you’re looking for a healthier alternative, you can substitute with whole grain Chex or even granola clusters.
Brown sugar is essential here because it adds depth and a slight molasses flavor that white sugar simply can’t replicate. If you only have white sugar on hand, you can use it in a pinch, but the result won’t have quite the same rich complexity. For the butter, use real butter—margarine will give you a waxy texture that’s less than ideal.
The vanilla extract should be pure vanilla, not imitation, if possible. The difference in flavor is noticeable and worth the extra dollar or two. You can also experiment with almond extract or maple extract for a different flavor profile. Additionally, a pinch of sea salt sprinkled on top before the final bake adds wonderful contrast to the sweetness.
Step-by-Step Baking Instructions
Start by preheating your oven to 250 degrees Fahrenheit and lining a large baking sheet with parchment paper. This low temperature is crucial because it allows the coating to caramelize slowly without burning the cereal. Pour your 6 cups of Chex cereal into a large bowl and set aside.
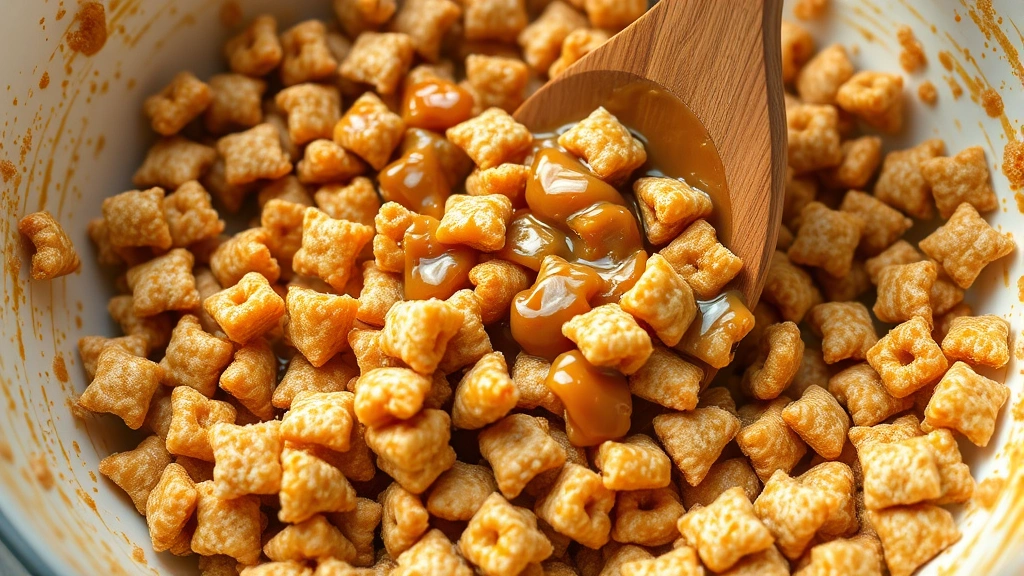
In a small saucepan, melt 4 tablespoons of butter over low heat. Once melted, add 1/2 cup of packed brown sugar and stir constantly until the mixture is smooth and combined. This should take about 2-3 minutes. Remove from heat and stir in 1 teaspoon of vanilla extract until fully incorporated.
Pour the warm brown sugar mixture over the cereal and stir gently but thoroughly, making sure every piece gets coated. This is easier than you’d think if you work slowly and methodically. Spread the mixture evenly on your prepared baking sheet in a single layer.
Bake for 15 minutes, stirring halfway through to ensure even toasting. The mixture should be fragrant and the coating should look slightly bubbly. Remove from the oven and spread on a fresh piece of parchment paper to cool completely—this usually takes about 20-30 minutes. Don’t skip this cooling step; it’s when the coating sets and becomes wonderfully crispy.
Serving & Storage Ideas
Once completely cooled, break any large clusters apart and transfer to an airtight container. This snack is perfect served at room temperature with coffee or as an after-dinner treat. You can also package it in cute jars or bags for gift-giving—it’s always a hit with friends and family.
For serving at parties, transfer to a pretty bowl and let guests help themselves. It pairs wonderfully alongside savory options, creating a nice sweet-and-salty snack board. If you’re taking it to a potluck or event, pack it in the container it’ll stay fresh in rather than transferring it beforehand.
However, I should mention that humidity is this snack’s only real enemy. If your kitchen is particularly humid, add a silica packet to your storage container to keep it crispy. The snack will stay fresh and crunchy for up to 7 days when stored properly in an airtight container at room temperature.
Variations & Creative Twists
If you want to elevate this basic recipe, try adding 1/2 cup of chopped pecans or almonds to the cereal before coating. Dried cranberries or raisins stirred in after cooling add a chewy element that’s absolutely delicious. For a chocolate version, drizzle melted chocolate over the cooled snack and let it set before serving.
Another fun variation involves adding a tablespoon of cinnamon to the brown sugar mixture for a cinnamon-sugar version that tastes like fall in every bite. You could also try substituting the vanilla with pumpkin pie spice for a seasonal twist. The possibilities are truly endless, and part of the joy of this recipe is experimenting with flavors you love.
If you’re into more indulgent versions, toss the cooled snack with white chocolate chips or add mini marshmallows for a s’mores-inspired treat. For a savory-sweet balance, sprinkle a tiny bit of sea salt on top while the coating is still slightly warm so it sticks.
Looking for more snack inspiration? Check out the best Caesar salad recipe for a savory option. For comfort food side dishes, this delicious Velveeta mac and cheese is always a crowd-pleaser. If you’re planning a full menu, the best crockpot mac and cheese is perfect for feeding a crowd. For holiday meals, this Thanksgiving salad recipe pairs beautifully with sweet snacks. You might also enjoy the best Velveeta cheese mac and cheese for another crowd-favorite side.
For more inspiration on sweet snack recipes, Bon Appétit’s snack collection offers wonderful ideas. Serious Eats has excellent snacking guides if you want to dive deeper into texture and flavor science. The New York Times Cooking section also features creative variations on classic snacks.
This sweet chex mix recipe has become my signature snack, and I genuinely think it could become yours too. It’s simple enough for kids to help make, impressive enough to serve to guests, and delicious enough to keep everyone coming back for more. The best part? You probably already have everything you need in your pantry right now. So grab a bowl, gather your ingredients, and get ready to make something that’ll disappear as fast as you can make it!
Ingredients
- 6 cups Chex cereal (corn or rice)
- 4 tablespoons unsalted butter
- 1/2 cup packed brown sugar
- 1 teaspoon vanilla extract
- 1/4 teaspoon sea salt
Instructions
- Preheat your oven to 250 degrees Fahrenheit and line a large baking sheet with parchment paper. Set aside.
- Pour 6 cups of Chex cereal into a large mixing bowl, making sure to break apart any large clusters.
- In a small saucepan, melt 4 tablespoons of butter over low heat, stirring occasionally.
- Once the butter is melted, add 1/2 cup of packed brown sugar and stir constantly until completely combined and smooth, about 2-3 minutes.
- Remove the saucepan from heat and stir in 1 teaspoon of vanilla extract until fully incorporated.
- Pour the warm brown sugar mixture over the cereal in the bowl and stir gently but thoroughly, ensuring every piece is coated with the mixture.
- Spread the coated cereal in a single layer on the prepared baking sheet, pressing gently to create an even layer.
- Bake for 15 minutes, stirring the mixture halfway through to ensure even toasting and prevent burning.
- Remove from the oven when the mixture is fragrant and the coating appears slightly bubbly.
- Immediately spread the hot mixture onto a fresh piece of parchment paper to cool completely, about 20-30 minutes. Do not skip this step.
- Once completely cooled, break apart any large clusters and transfer to an airtight container.
- Sprinkle 1/4 teaspoon of sea salt over the cooled snack and stir gently to distribute evenly.

Pro Tips
The cooling step is absolutely non-negotiable if you want crispy chex mix. Spreading it on fresh parchment paper allows air to circulate underneath, which helps set the coating properly. If you leave it on the hot baking sheet while cooling, the residual heat continues cooking the coating and can make it overly hard or chewy.
For a nuttier version, add 1/2 cup of chopped pecans, walnuts, or almonds to the cereal before coating. Toast the nuts lightly in a separate skillet first for enhanced flavor. Alternatively, you can stir in the nuts after cooling to keep them crunchier.
If you prefer a less sweet version, reduce the brown sugar to 1/3 cup and add an extra pinch of salt. You can also substitute half the brown sugar with white sugar for a lighter flavor profile. The ratio is flexible based on your personal taste preferences.
Storage is simple—keep your cooled chex mix in an airtight container at room temperature for up to 7 days. However, in humid climates, add a silica gel packet or a few saltine crackers to absorb excess moisture and keep the snack crispy. These crackers will absorb moisture instead of your chex mix and can be discarded after a few days.
For gift-giving, package the cooled snack in mason jars, decorative bags, or festive containers. Include a simple tag with the ingredients list for anyone with allergies. This homemade snack makes a wonderful gift because it’s personal, delicious, and shows thoughtfulness.
If your mixture seems too clumpy after cooling, don’t worry—just break it apart gently with your hands. Some clumping is actually desirable because those little clusters are extra crispy and delicious. Additionally, if you accidentally burn the coating slightly, you can still salvage it by picking out the darkest pieces and enjoying the rest.